


|
|
|
|
|
|
| Paul Guttenberg | profile | all galleries >> Photoshop Samples >> Photo Shop Text Shading Process | tree view | thumbnails | slideshow |


While exploring image galleries at pbase.com I became drawn to the variety of methods people use to "sign" their work. Some use frames or boarders adding their signature line within the boarder area. Others add their signature within the image area. It is the latter that has captured my imagination. It may sound simple at first, however if you consider the infinite contrast and color combinations within any image you begin to realize creating a line of text that is both visible and pleasing on any image is a complex task. I demonstrate my solution, which resulted from my own experimentation, here in this gallery. It is certainly not the only or best method but I wanted to share it. I use Adobe PhotoShop Elements 2.0 running on Windows XP.
Happy Shooting,
-Paul
| previous page | pages 1 2 ALL | next page |


Each shaded line of text in this image has, directly underneath it, a duplicate line using only the primary solid text color of the shaded version. I provide this image as an example of the challenge associated with using non-shaded standard text verses employing semitransparent shadowing. Please view the "original" sized version for best results.

The first step for me was to settle on a color theme for my PBase site text. One approach is to use the existing color theme from your CSS template. I used HTML color definitions i.e. FFCC01, however PhotoShop has several ways to choose a color. I recommend thinking about your theme ahead of time or experiment with a few variations before committing. This process can be executed relatively quickly, but if you are creating a large number of banners as I did, changing later can be a labor intensive operation. Another note I would like to make at this point is about saving your work. I strongly recommend saving your PhotoShop files at several stages in PSD format along the way to producing your jpeg for web viewing. This will save you an incredible amount of time later on, trust me! Inevitably you will find a small mistake or wish to make a color adjustment; having saved your work preserving all PhotoShop layers is essential to making reasonably quick fix�s later
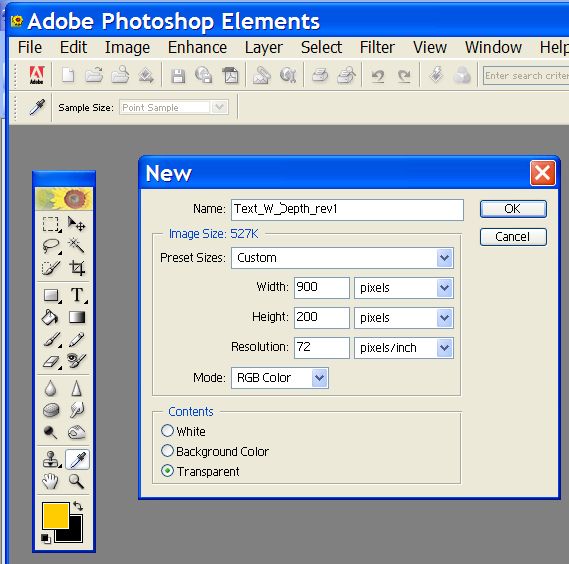
Open a new image file considering its end use, in this case web viewing. For web viewing 72 dpi (dots per inch)is the standard. Your screen unlike paper or film is not capable of reproducing a high number of dots per inch, even HD monitors are not capable of coming close to print or film dpi�s. No need to go into greater detail on that here. The most important issue with dpi is that your text project is the same dpi as the images you plan to place it on. This will keep everything the same relative scale. Place a text line created in a 72dpi layer on a image saved at 300 dpi and what I am saying here will become immediately apparent. For this process I will assume you have optimized your images for web viewing and that all the files you use for this effort are saved at 72 dpi.

Enter the line of text you desire. I use Vivaldi font in this example. Select the size and other attributes you desire now. Text while it exists in a layer can be changed at any time with an important exception. When a text layer is �simplified� the text attributes will no longer be editable, i.e. size, font, bold, etc� The process of adding semi-transparent shading will require simplifying the text layer. (There are a few more steps before we simplify the text layer) This is important to understand to avoid rework later.

Select the layer containing your text. Next using the �magic wand� tool select your text. You should now see the �marching ants� surrounding every letter in you text layer. Now here is where the magic starts. From the SELECT menu pick FEATHER. The feather selection dialog box will appear. I have experimented with different values and found for web viewing a feather radius of 1 pixel gives the best results. Feathering applies to the selected area, and in this case is how the shading will be applied outward from the boundary of the selected area; in this case your text.
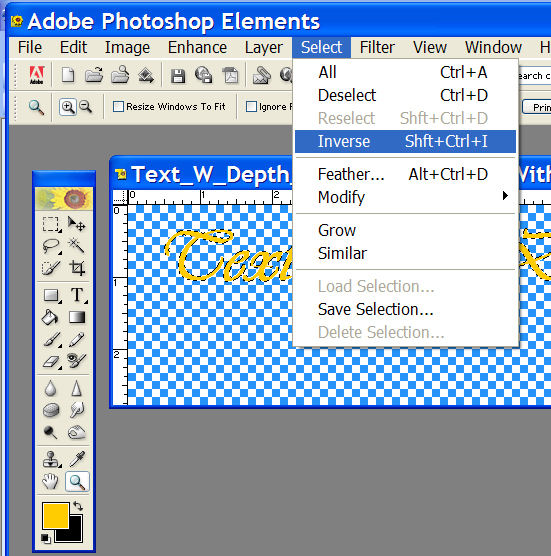
Now it is necessary to inverse the selection and feathering applied in the last step. Because the text was originally selected the feathering is happening inside the boundary of the selected text. To achieve the effect of shadow depth in a line of text the feathering shadow color must be applied outside the selected text boundary. This is accomplished by picking INVERSE from the SELECT menu.

Now select a new color for the shadow. Generally this will contrast from the primary text color; however you can achieve beautifully subtle effects with similar colors of varying saturation or luminosity. Have some fun experimenting!

As I mentioned earlier the text layer will be �simplified� as part of this process. This occurs automatically, and will occur when you first attempt to apply a color to the now selected area. When this happens PhotoShop displays an informational dialog box; to apply the feathering in the text layer you must select OK to proceed. Use the �paint bucket� tool to apply the color chosen. The color will be applied to all letters until a space is reached.

As you work with the �paint bucket� tool you will notice several issues.

NOTE: This is another good place to save your work.

This is an example of finished shaded text above the original flat text. The difference is significant however it can not fully appreciated until seen on an image, as in the next example.


Good luck with your shaded text project. Please feel free to leave me comments and I would like to see links to your results if you care to share them. You can find examples of my use of this process throughout my galleries. Thanks. -Paul

| previous page | pages 1 2 ALL | next page |