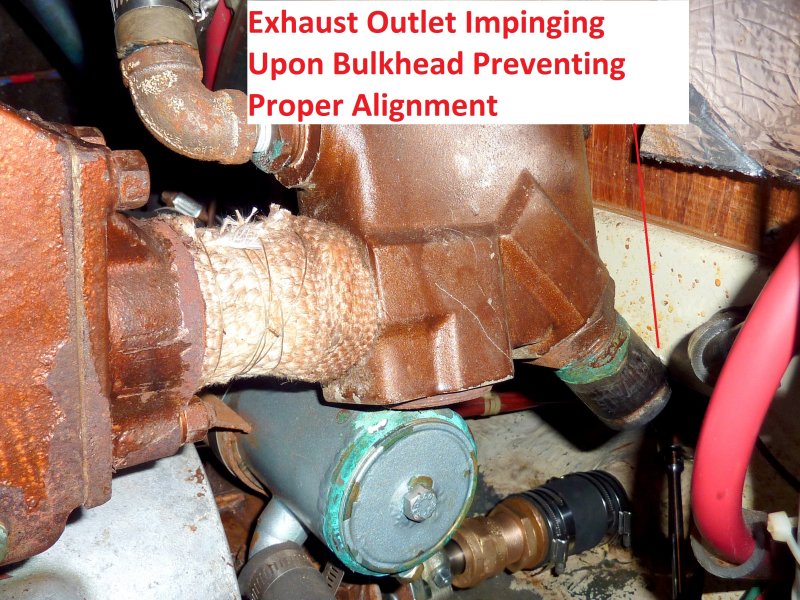
Yes, believe it or not I discovered yet another problem. Once all the new mounts were in place I began to do a rough alignment of the motor to the shaft, cutlass & shaft log.
For some reason the I could get close but she just kept popping back out of alignment no matter how I moved the engine. After 20 minutes of mucking with her I realized why the engine was so low to begin with. A previous owner had replaced the exhaust elbow, a whole other set of problems, and made the nipple between the manifold and the exhaust elbow to darn long.
To correct for this mishap they Mickey Moused it by simply lowering the engine so the exhaust outlet cleared the bulkhead. This fixed the exhaust issue but caused many more as you'll see below.
01-JAN-2011
Ouch !!!!!
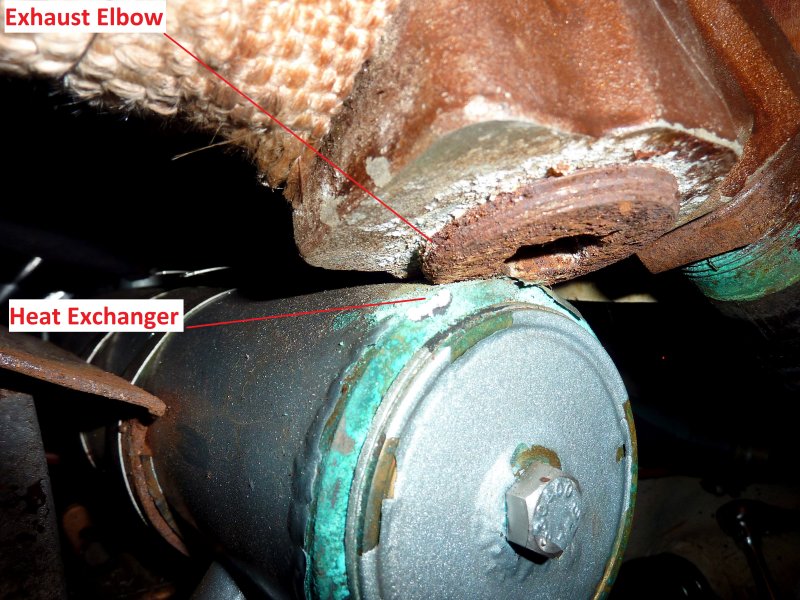
As I said this entire project has been a comedy of errors. Either the previous owner who did all this work was a really bad DIY guy or he hired the worst mechanics on the planet. There was no reason for this exhaust elbow to be tilted off center other than the fact that the installer refused to use pipe dope to mate the NPT fittings together.
It probably bound up and refused to turn anymore so they just left it tilted off center. Due to this laziness, or lack of understanding, it caused the exhaust elbow to chafe, vibrate, dent and make a career ending thin spot in the heat exchanger. Cha-ching $$$$ more unnecessary expense for the boat owner $$$$. Had someone done this job right to begin with he would likely not have needed a new shaft cutlass, motor mounts, heat exchanger etc. etc. etc...
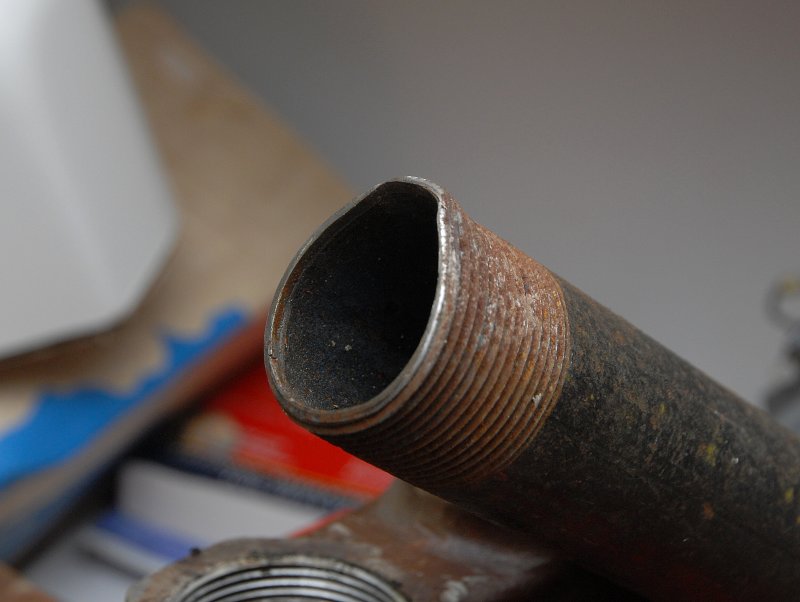
This manifold will fit and will clear the bulkhead & heat exchanger when installed correctly, it was not.
01-JAN-2011
More Frustrations
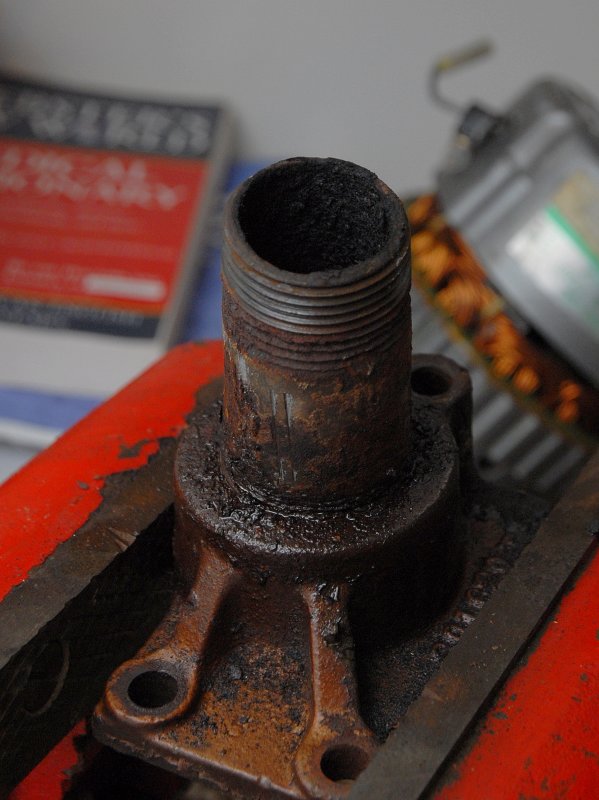
As mentioned the exhaust elbow was a disaster of an installation. Who ever did this install knew nothing about thread sealants or pipe dope. It took nearly four hours of heat, PB Blaster, a massive bench vise and a 3.5 foot 1 1/4" black iron pipe as added leverage to an 18" Rigid pipe wrench to break these fittings apart.
Due to the improper installation of these threaded fittings they had been leaking since early on and thus rusted together as strong as I have seen in a long time. PB Blaster is great but when you are dealing with sealing threads, such as NPT, that are meant to keep fluids out, they also tend to keep most of the PB Blaster out too.
This exhaust flange fitting is a $90.00 part from Universal so I clearly wanted to save it for the owner.
02-JAN-2011
It Was Realy Stuck!
So after many hours and a very long pipe on the end of a very robust pipe wrench the nipple finally gave up its hold. The force needed to remove it from the exhaust flange crushed and made it oval.
01-JAN-2011
A Lot of force Was Required
This is what my 3.5 foot black iron pipe looked like after I broke the stuck fittings free. I have not done the calculation on how much force I applied but all my 200+ pounds were going into that leverage pipe and the fitting was over 4.5 feet away away from the end of the pipe.
02-JAN-2011
Apart & Cleaned Up
The owner was already into this job for a new shaft, coupling, cutlass bearing, three motor mounts, Ultra-X packing, stuffing box hose, four AWAB clamps, a heat exchanger and various nuts bolts and hardware. I really did not want to have him absorb the cost of a new exhaust elbow and flange on top of all this for just for a few stuck fittings.
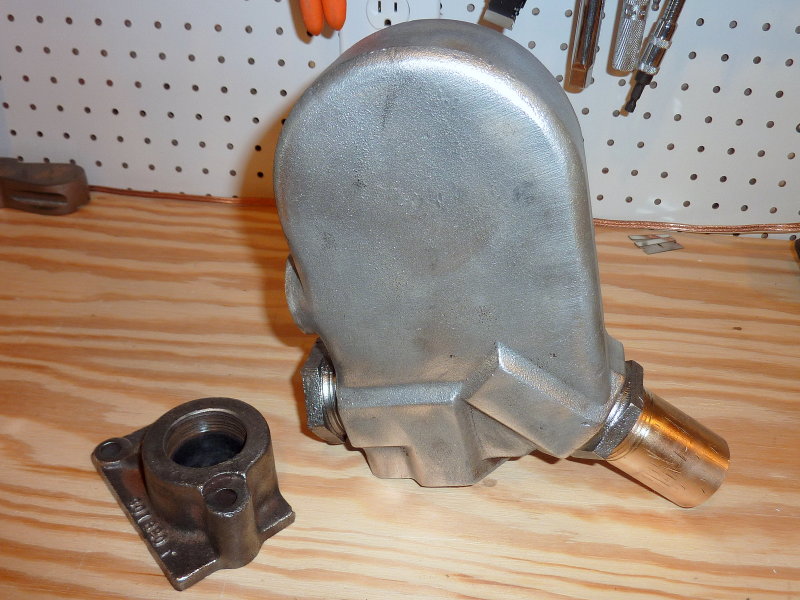
This would have been about $300.00 worth of additional parts but I was able to clean, paint and re-use them.
02-JAN-2011
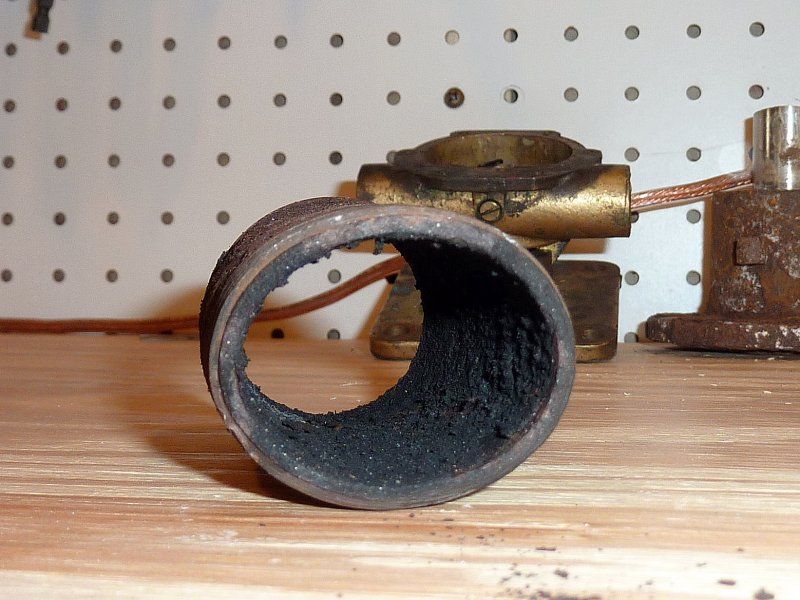
Rebuilt Exhaust Elbow
I was able to take nearly 2" out of length out of the nipple between the exhaust flange and the exhaust elbow. This will allow the elbow to no longer hit the bulkhead and to also clear the new heat exchanger. I used a street elbow for water injection which allowed the assembly to be shortened.
This exhaust elbow is not a Universal Engines genuine part hence the reducing bushing from 1 1/2" to 1 1/4". Gotta love the snowballing effect.
The motor mounts were the easy part of this job. It is all the little things you find along the way that make the job take longer and really get frustrating. for example getting the exhaust elbow off the engine required the engine to be completely lifted off the mounts and moved forward. We used a 4:1 Harken block & tackle to a beam across the companionway for this. This little extra step added almost an hour to the job alone.
So a simple shaft & cutlass replacement led to; three new motor mounts all failed, removal & reconfiguration of the exhaust elbow, a new heat exchanger, failed hose clamps, engine antifreeze flush & fill and more. This is a much more typical job than it would seem and this sort of snowballing effect happens quite often with boats. See, it's not always easy...
MAY-2006
Help Support This Site
Like what you saw or read in this article? Was it helpful? Could the information save you some money? Would you like to see more articles like this?
If so feel free to donate, support the site, and keep it growing. Please DO NOT feel obligated at all. If you like it and want to make a donation, please do. Your donations help keep the content coming and also help keep it FREE.
Click the DONATE button below if you would like to make a donation via PayPal.