


|
|
|
|
|
|
| Miljenko Devcic | profile | all galleries >> tech >> Lens reviews and tests >> My Bigma experience >> How to remove Sigma 50-500 vignetting with Photoshop CS | tree view | thumbnails | slideshow |
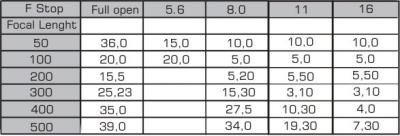 Devignetting table.jpg |
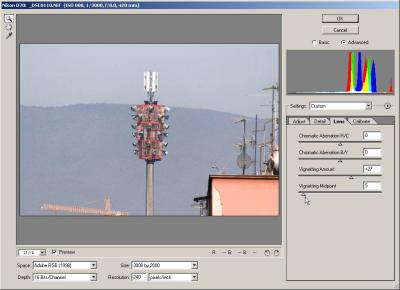 RAWplugin_panel.jpg |
| comment | share |