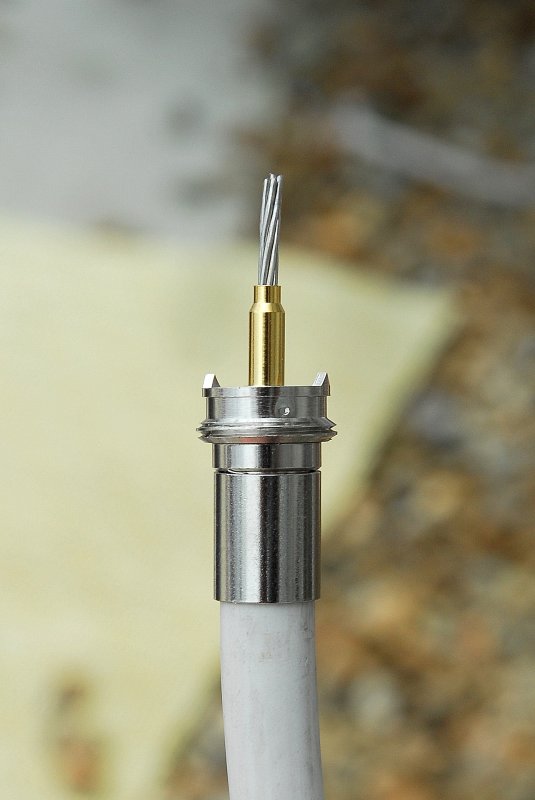
In this photo I slid the crimp band into place over the shielding. As you can see (click the image and look close) there is an errant piece of shielding wire that needs to be removed. Make sure you get a good fit with no shield strands hanging out the top.
09-MAY-2009
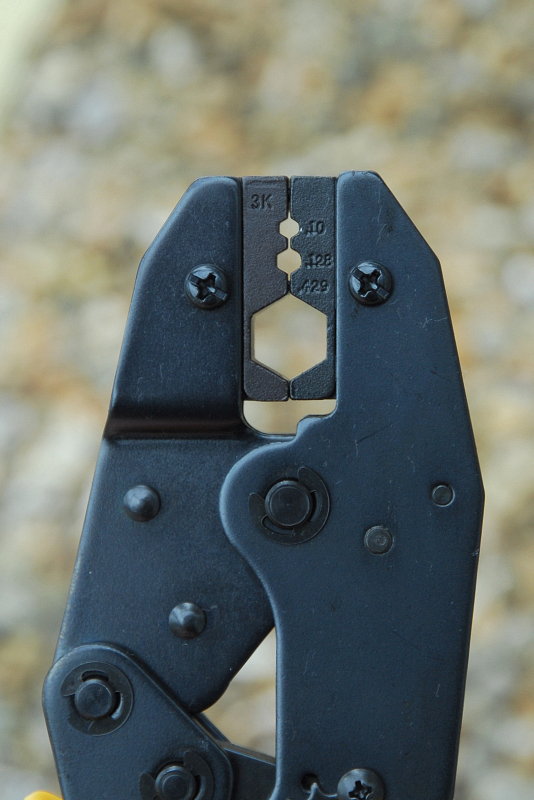
Crimper
This tool is the Hanlong HT-336K crimper. It does .100", .128" & .429". The critical die for RG-8 or RG-213 is the .429. This tool is intended for use on RG-8, RG-11, RG-174, RG-179 & RG-213.
I paid about $30.00 for this tool from HR Distributors in Portland, ME. They are located on 101 Hanover Street and they can be reached at 207-773-2552. They will ship where ever you want.
09-MAY-2009
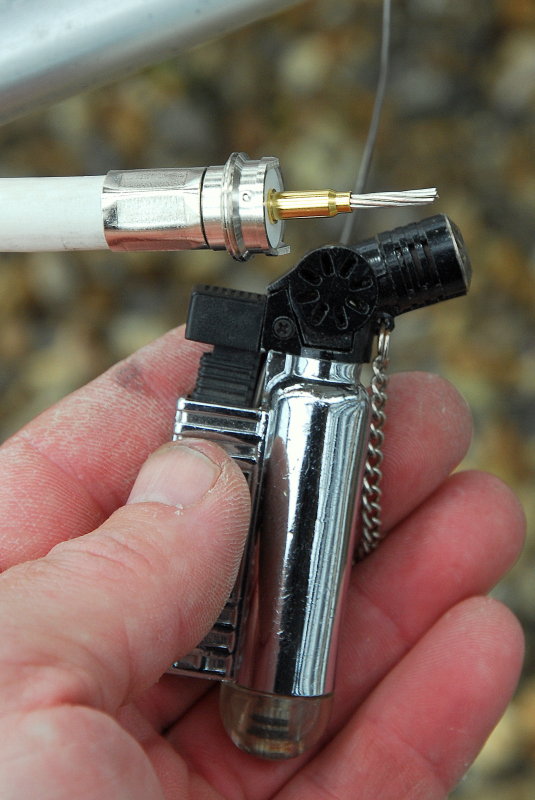
Crimp Made, Ready To Solder
In this picture the crimp has been executed. You want to make sure to crimp in the middle of the crimp band. Doing this leaves smooth strain relief and no hard edges to impinge on the jacket.
For the soldering I use a mini-butane torch. A true Ham radio guy might cringe but when working out side, at a mast rack, in a boat yard, or 40' in the air in a bosuns chair, a soldering iron just won't always cut it, especially with 15 knot winds.
I have done more bosuns chair soldering than I would ever like to. It is darn near impossible in the wind and being 40-60' in the air swinging around wildly, as Sea Ray's blast through "no wake" zone, makes it even harder....
09-MAY-2009
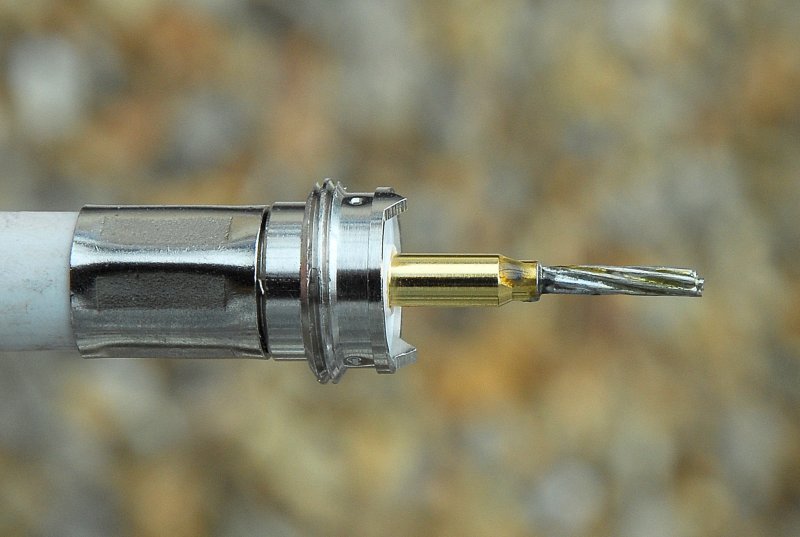
Soldered
Heat the wire and tip just enough to allow the solder to flow. Do not use an acid flux solder always use a high quality rosin core solder. Wipe off any residue after you're done then trim the wire end with a wire snip.
09-MAY-2009
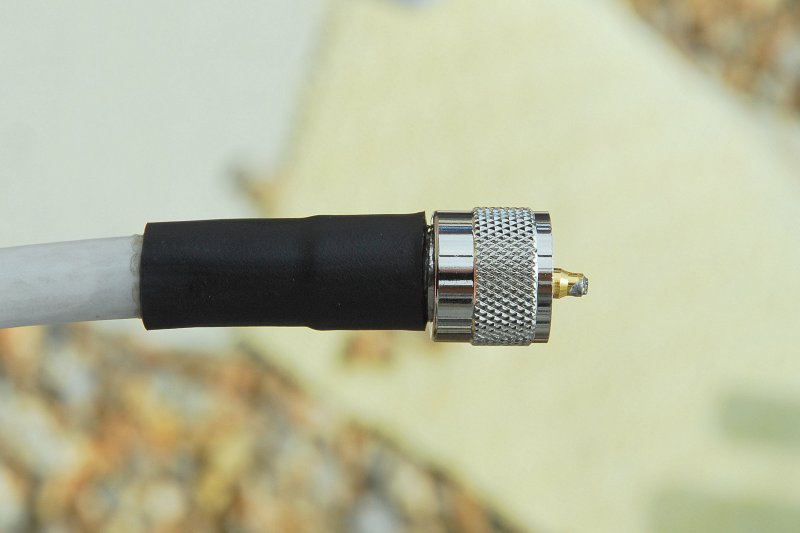
Screw On The Nut
Slide the nut up the wire and thread it onto the PL-259 then follow that with the adhesive lined heat shrink. I leave about a 1/16" gap so I can easily twist the nut but also effectively seal the crimp band with adhesive and heat shrink.
09-MAY-2009
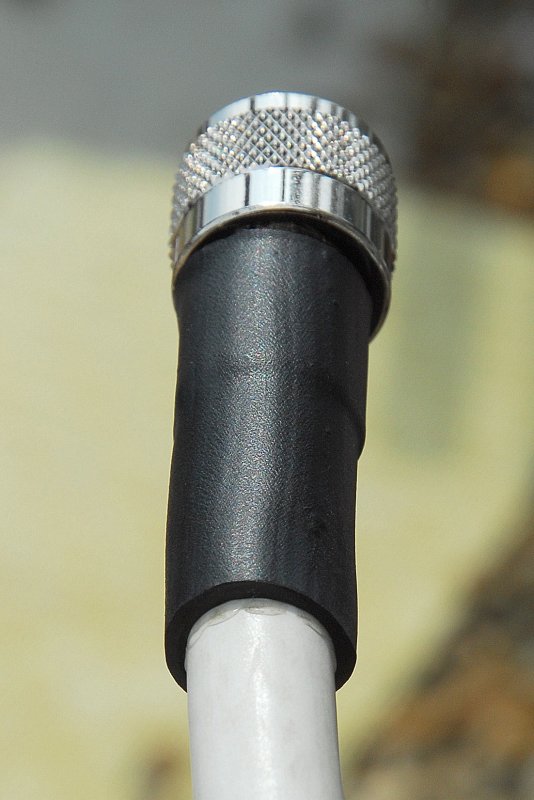
Heat Shrink
You'll want to use a heat gun for the melting as it does a much better job than a flame. You want to heat it evenly until adhesive oozes out the ends. Blow up the photo and you can see the adhesive.
Once you connect this to the antenna use a self amalgamating tape to seal the entire connector.
There are many methods to install a PL-259. Get on the net, research them and use what you feel comfortable with, you will get many opinions on this. Over the years I have tried most all of the methods and finally settled on this method for many of my PL-259 terminations in the marine environment.
When swinging from a bosun's chair 40-60 + feet up in the air with a 10 knot breeze I can assure you that getting a good solder joint for the braid is nearly impossible, no matter how good you are at soldering. The tip is easy but the shield, not so much, this a crimp solder connector works very well.
Unless you are very skilled at this, which most won't be, you may ruin a few connectors trying the solder/solder method and may still wind up with a cold solder joint and a failed connection.
The crimp solder method has held up very well for me in the marine environment.
Even with this method I advise buying a couple extra PL-259's and practicing first.
Good luck!
MAY-2006
Help Support This Site
Like what you saw or read in this article? Was it helpful? Could the information save you some money? Would you like to see more articles like this?
If so feel free to donate, support the site, and keep it growing. Please DO NOT feel obligated at all. If you like it and want to make a donation, please do. Your donations help keep the content coming and also help keep it FREE.
Click the DONATE button below if you would like to make a donation via PayPal.