Next, slide on the compression nut, compressing clamp and watertight seal in this order.
*******CLICK BELOW FOR PAGE TWO*******
11-MAY-2013
Strip The Wire
Now strip back about 1/4" +/- of wire being very careful not to damage any strands.
11-MAY-2013
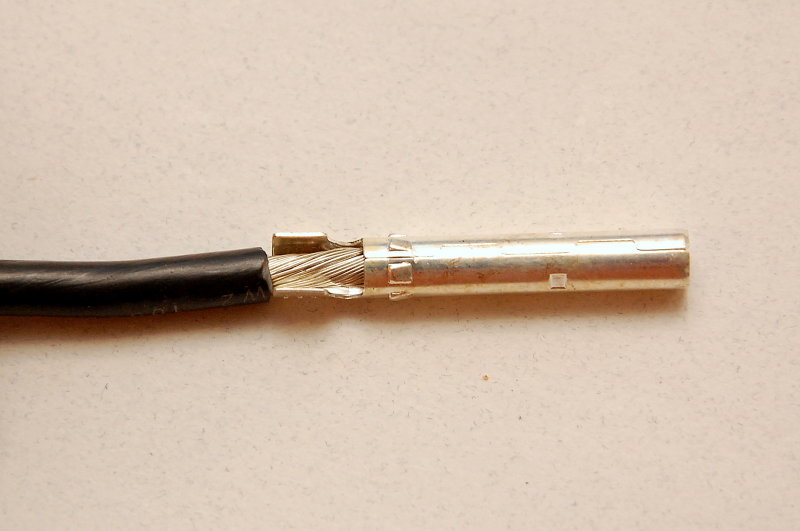
Check Your Strip Depth
Insert the stripped wire into the crimp terminal and check your strip depth.
I prefer to have the stripped wire extend into the barrel of the terminal a bit so it does not "fan out" when crimped and create issues when inserting it into the plug.
11-MAY-2013
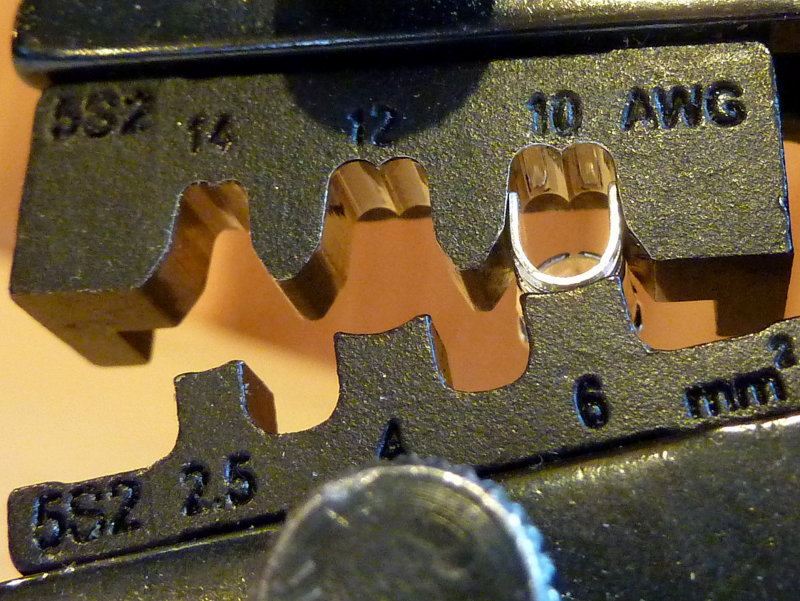
Insert Terminal Into Crimp Tool Dies
Now you're ready to place the terminal into the crimp tool dies. The open end of the terminal faces up towards the "butt cheeks" so it can be rolled over and formed to execute the crimp.
It helps to compress the crimp frame a couple of clicks. This will hold the terminal as shown and you can then insert the wire and finally squeeze the handle to complete the crimp.
11-MAY-2013
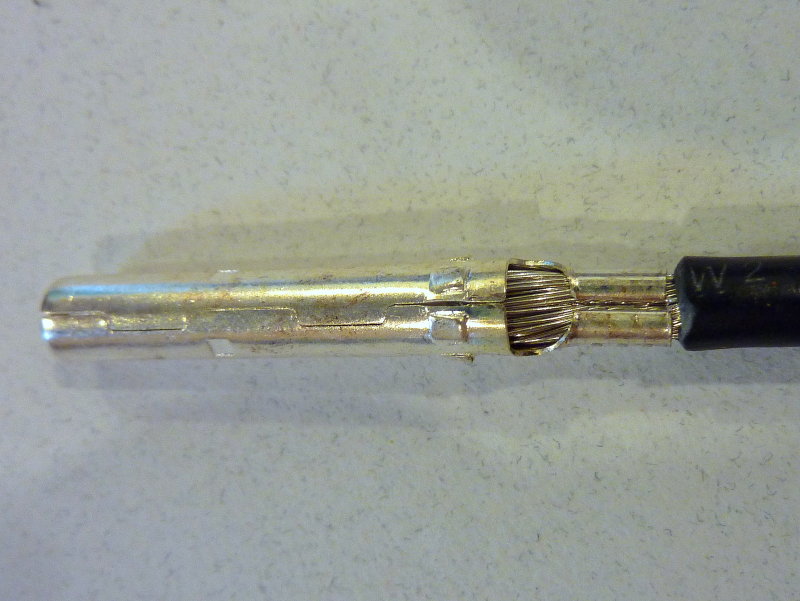
Crimped Terminal
Even non pro-level MC4 crimp tools can make a nice strong crimp. This picture illustrates why I like to see the stripped wire extend into the barrel slightly. If it does not extended into the barrel of the terminal it can "fan out" and make inserting it into the plug difficult.
11-MAY-2013
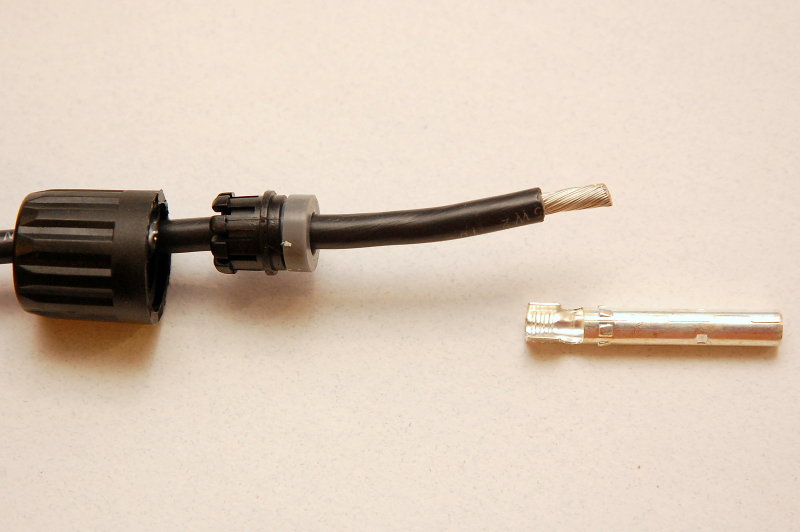
Insert Terminal Into Plug
Once you've crimped the wire to the terminal you can then insert the terminal into the MC4 plug body.
11-MAY-2013
Press Until It Clicks
Keep pressing the crimped terminal into the plug body until you feel it "click" into place. With some MC4 terminals this is less obvious than with others.
Don't worry about mixing up the terminals and plug bodies because male & female pins will not fit into the wrong plug bodies.
Bear in mind that solar panels ship with the female plug shown here, marked +, on the positive output lead from the solar panel. This means the positive wire on your boat will get the corresponding male plug not another female plug..
11-MAY-2013
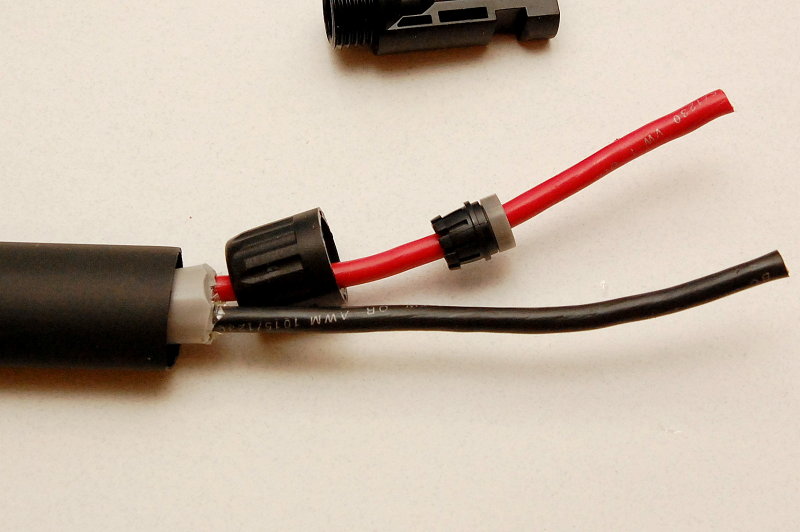
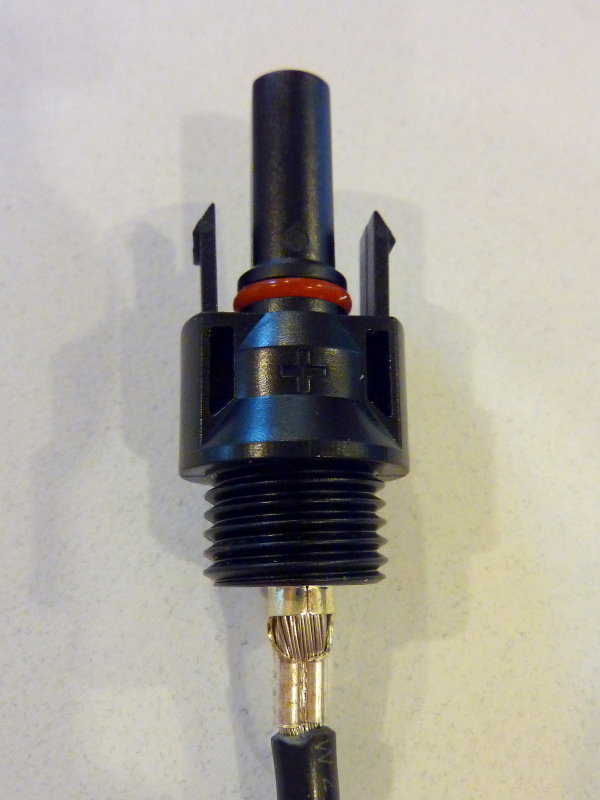
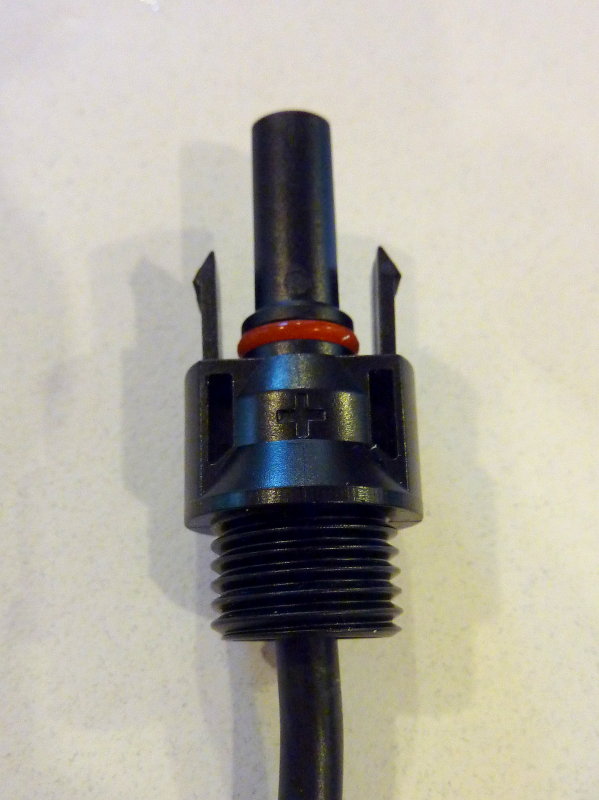
Slide Sealing Gland Into The Plug Body
Once the terminal has been clicked into place slide the sealing gland and compression gland up the wire and into the plug. The gray colored sealing gland (not all brands use gray) should be "in" the terminal as shown here.
11-MAY-2013
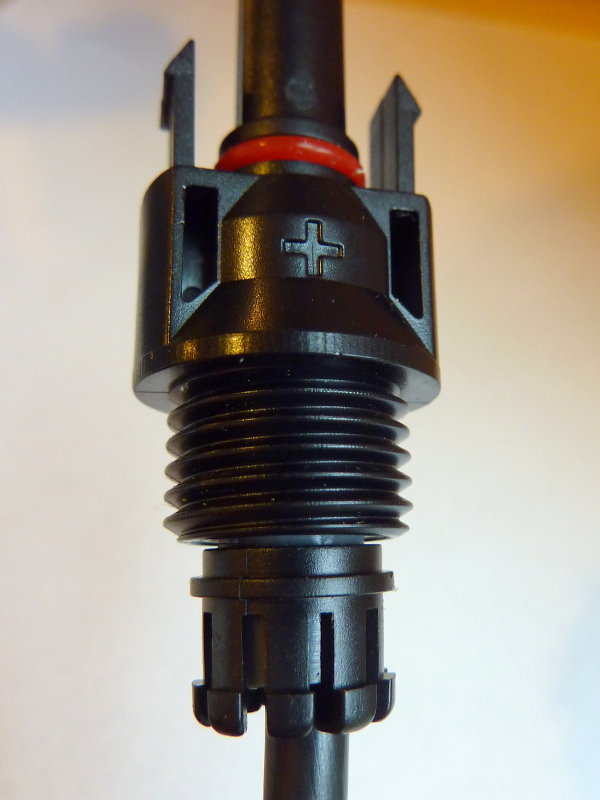
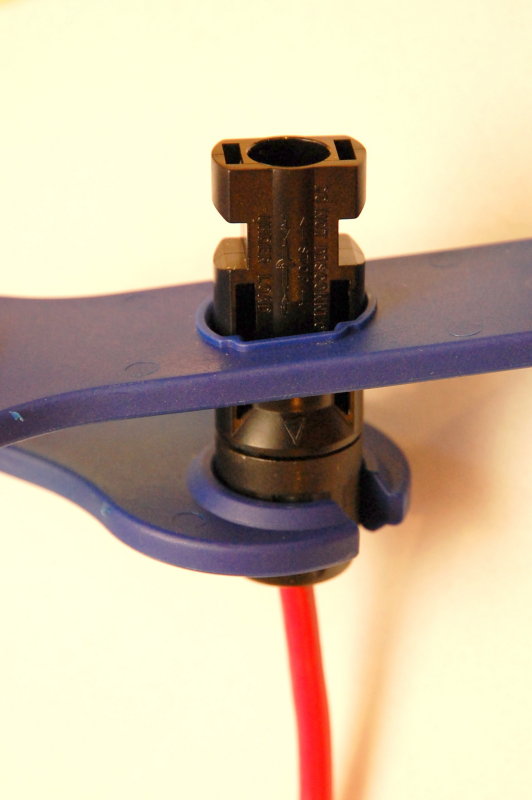
Thread On Compressing Nut & Tighten
Thread the nut on finger tight then snug it up, as shown, using the MC4 tool.
11-MAY-2013
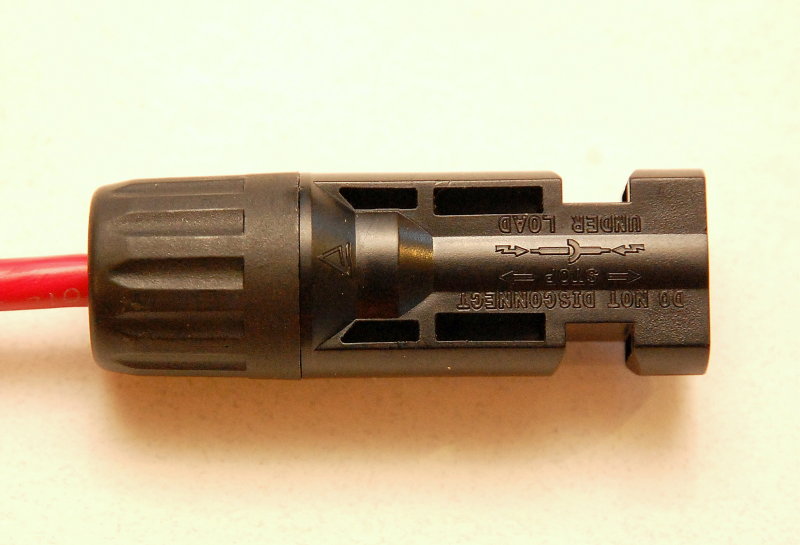
Finished MC4 Plug
Here's a finished MC4 connector.
Good luck with your project!
MAY-2006
Help Support This Site
Like what you saw or read in this article? Was it helpful? Could the information save you some money? Would you like to see more articles like this?
If so feel free to donate, support the site, and keep it growing. Please DO NOT feel obligated at all. If you like it and want to make a donation, please do. Your donations help keep the content coming and also help keep it FREE.
Click the DONATE button below if you would like to make a donation via PayPal.