Changing an impeller is not a daunting task and it's one that every boater should consider adding to their arsenal of DIY maintenance. Changing and impeller, on many engines, usually takes less than 20 minutes even if you are fairly slow. The most complicated aspect of it is access to the pump.
Impellers are a wear item unfortunately they do not always abide by a "time" or "hours of use" schedule. A simple mishap like forgetting to open the engines raw water intake can kill an impeller in short order. They don't like to be run dry and they don't like heat. If let go for to long they can "throw" a blade or loose a chunk that can lodge in the hose or the heat exchanger. If this happens you have a much larger job on your hands of finding the piece to prevent further damage or overheating issues.
I change my impeller every year regardless of condition. Some feel this is overkill and you'll need to decide for your self what you maintenance schedule is. I look at it this way, impellers are cheap insurance! I pay $16.00 for the impeller used in my Westerbeke diesel engine and it takes about 8-10 minutes to change it. It took me twenty minutes even while photographing it and the access for my large camera was very tough!
An over heated engine or a thrown blade can cost many, many times more in both time and money than the few minutes and the "low" boat bucks required of this simple maintenance. Heck, changing an impeller costs less than changing my engine oil and filter.. If you do it every spring, or every time you run it dry for more than a 30-45 second period, or under restricted flow due to a blockage in the strainer or intake system you should have a trouble free impeller and never throw a blade or lose flow due to a worn impeller again.
23-JUL-2008
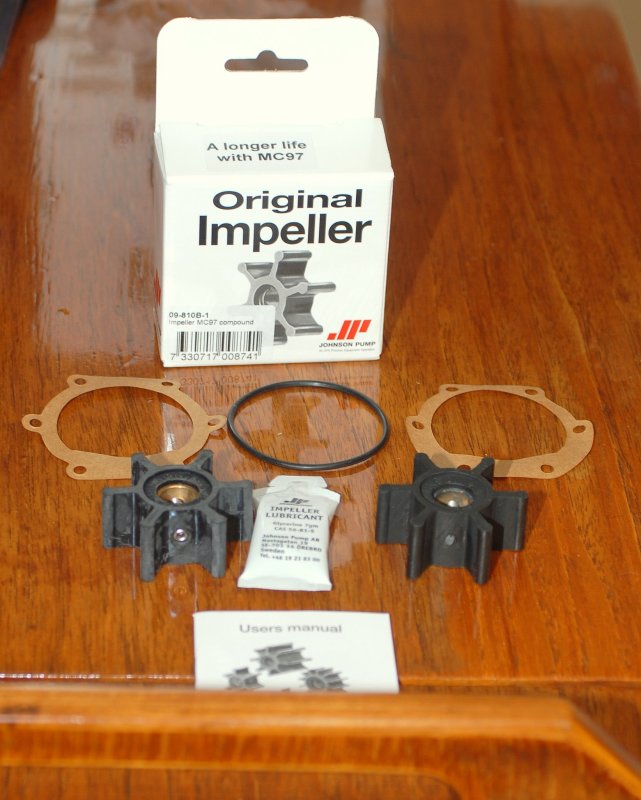
New Impeller Kit
This is the impeller kit I use in my engine. It comes complete with gaskkets, instructions and impeller lube which is nothing more than glycerin.
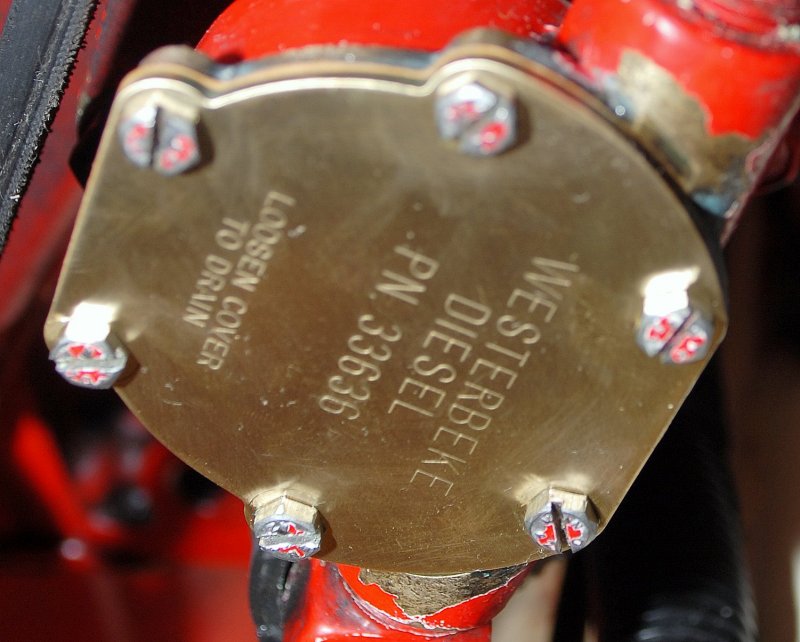
If you notice, the box does not say Westerbeke on it. Westerbeke uses a Johnson pump on this particular engine and Hamilton Marine stocks the exact replacement kit for it. They may for your engine too.
The impeller on the left is the brand new one and the one on the right was removed last fall after winterizing the engine. I keep the old ones, that are in good condition, as extra, extra spares. Sure, I could buy this impeller through Westerbeke but it costs almost $38.00 vs. $16.00 at Hamilton Marine and they are identical right down to the embossed part number on the impeller itself.
I always recommend keeping at least one fully new replacement impeller on board at all times and a minimum of two gaskets as sometimes you'll need to check the impeller but it may not need to be replaced.
23-JUL-2008
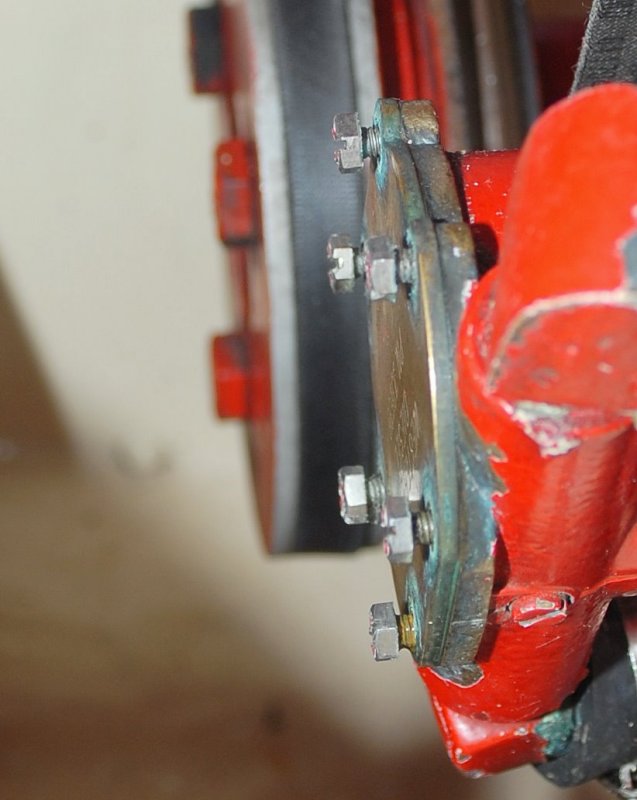
Removing The Screws
As I said this job is very, very easy. If you can change oil or an air filter or clean a blender after making frozen "chick drinks" you can change an impeller.
Step 1: loosen the screws and remove them. If they are frozen or rusted use some PB Blaster but be VERY, VERY careful not to just spray it on! PB Blaster will eat pump seals, engine seals and engine gaskets for breakfast. If you need to use a penetrating oil I'd advise spraying it into the spray can cap and then dab it on the screws with a q-tip.
Tip: Buy yourself some spare face plate screws as one will always drop into the bilge, to never be seen again, and it will do it at the least opportune time. Murphy is always waiting for you...!
23-JUL-2008
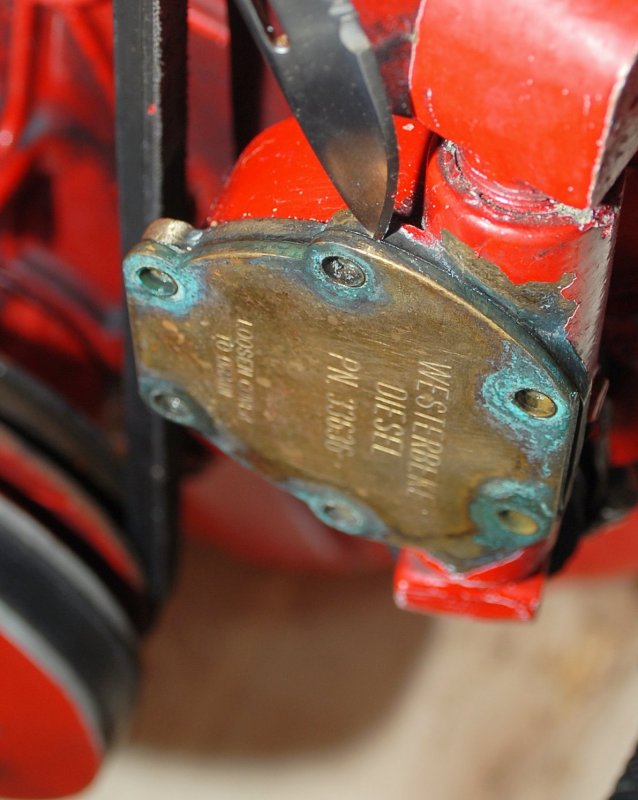
Pry The Plate Off
Step 2: Pry the plate off. I use my Leatehrman knife blade for this and it works fine. There are many ways to get the plate off but what ever method you choose make certain it does not harm the gasket mating surfaces.
Be sure to CLOSE the engine intake seacock before prying off the plate or changing the impeller for obvious reasons. Some water will drain out of the hoses, after you pop the plate off, so a turkey baster, rags and or a sponge may be good to have on hand to dry everything up afterwards.
23-JUL-2008
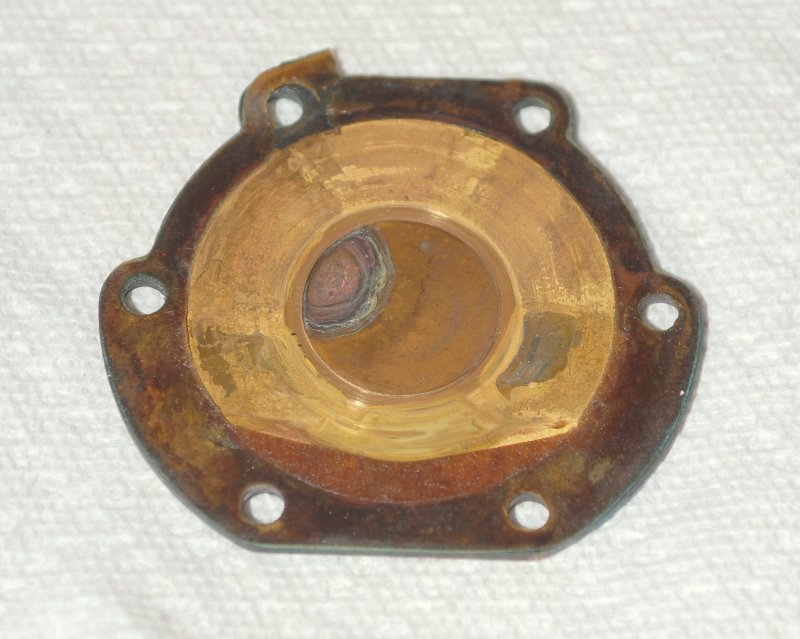
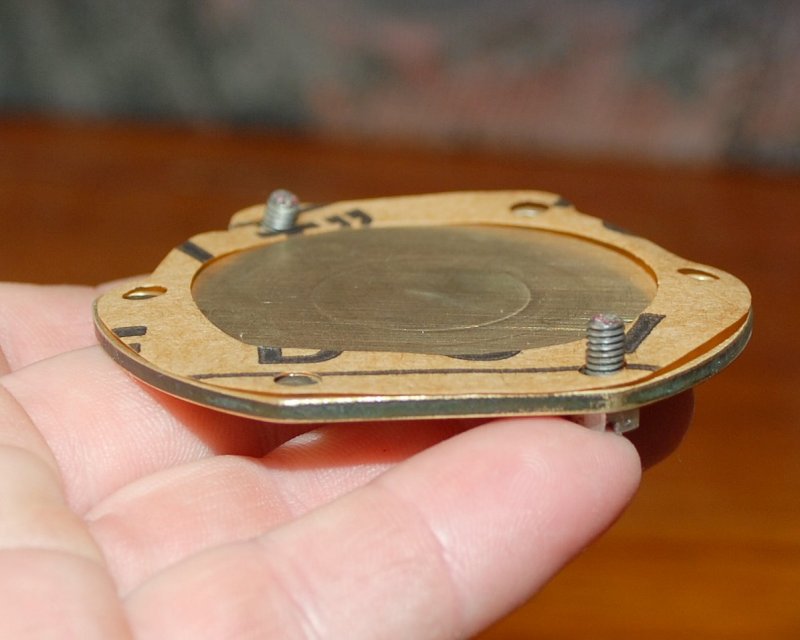
Check For Wear
The face plate of a water pump can be considered another wear item. If it is scored and worn you should replace it or flip it. I keep a spare brand new cover plate on board just in case. Even at Westerbeke's exorbitant prices it was only $13.00 and again is cheap insurance. Some pumps, such as certain Oberdorfer models, have face plates with no "stamped" part numbers on them. If your face plate is worn, and the opposite side has no paint or stampings, you can simply flip it around and re-use it. My Westerbeke face plate is well embossed and can not be flipped.
Note that my paper gasket came off, except for one small chunk, in one piece.. That is not by design but rather dumb luck... Sometimes you get lucky!
23-JUL-2008
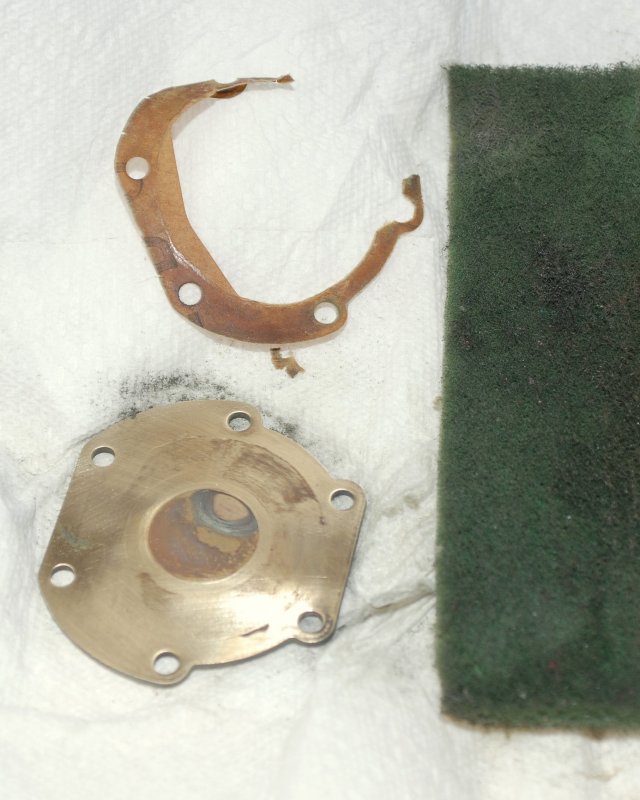
Clean The Cover Plate
Before re-using the cover plate you should clean it and make the gasket surface smooth again. To do this I simply use Scotch-Brite pads. Be sure to remove all traces of the previous gasket from both the pump body face and the cover plates mating face. Being diligent in your cleaning duties will minimize the potential for a gasket leak..
23-JUL-2008
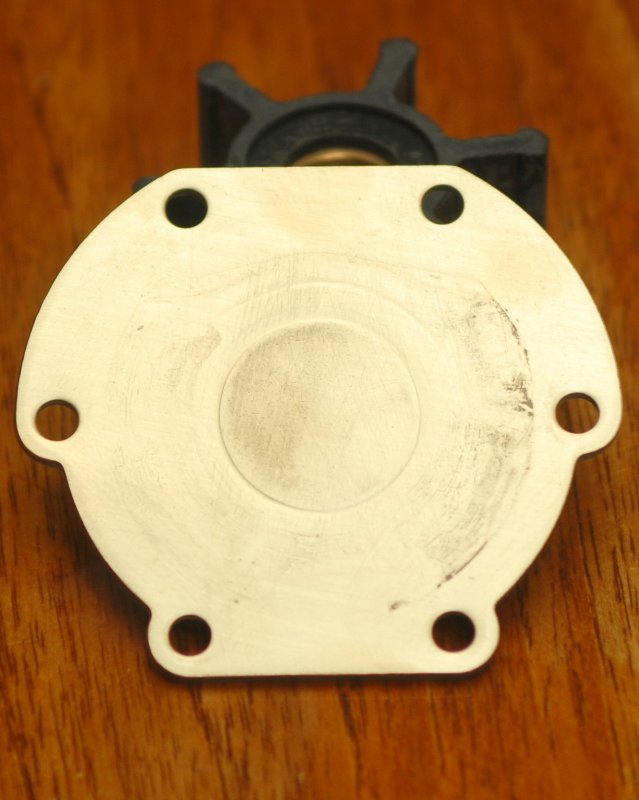
Ready To Re-Install
After I cleaned this plate I decided that I'd install my new one instead, and keep this as a back up. The pictured plate has fairly minimal wear and could certainly be re-used with success but for the $13.00 I decided to go new.
23-JUL-2008
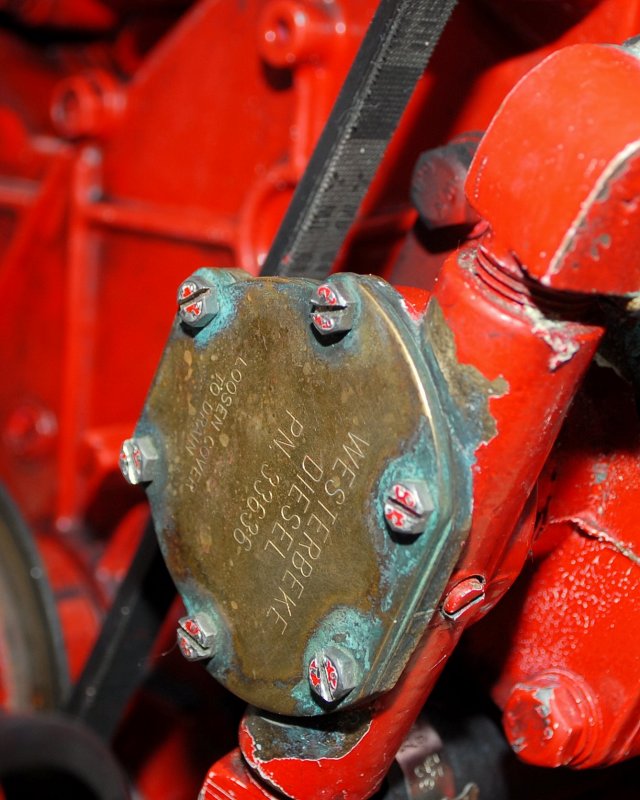
The Old Impeller
If you been reading, and paying attention, you'll know that I replaced this impeller only a couple of months ago in April and now, as I write this, it's only late July.
So why is this impeller already cracked and ruined? That's an easy answer. We were motoring back in zero wind on a spring tide day. Spring tides have a nice feature that involves reaching far up onto the shoreline and pulling every last bit of seaweed and deposited junk back off the beach and into the bay. About a mile from our mooring I noticed the exhaust note change like less water was being spit out. I kept a close watch on my water temp and it only went up about 8-10 degrees above normal before we got to the mooring. The next day I went to the boat, cleaned the strainer and reamed out the intake hose between the strainer and seacock. It was certainly restricting flow but it was not running totally dry, just less. Clearly it was enough to heat the impeller and damage it. As always, in a situation like this, where it had limited flow, I make a habit of checking the impeller.
I was very surprised that only a few minutes of restricted flow caused this type of damage. Normally I would have stopped the boat and cleaned the strainer but the temp was not even at 190, it normally runs at 180, and we had a hungry baby on board so I pushed on.
The bottom line is this. If you run your impeller dry, or with restricted flow, at least check on it. If it's in good condition all it will cost you is an $.88 cent gasket. If it's bad, as mine was, replace it. I would guess I probably had another 5-10 hours before this one started throwing chunks!
Globe impellers are reportedly able to run dry for short periods of time however I have had two Globe impellers spin the hub and stop pumping completely. While I think the concept is great I'm a little gun shy, having had two fail me. These Globe impellers may be another option but do know of my failures and that they are almost triple the cost of the stock Johnson impeller.
23-JUL-2008
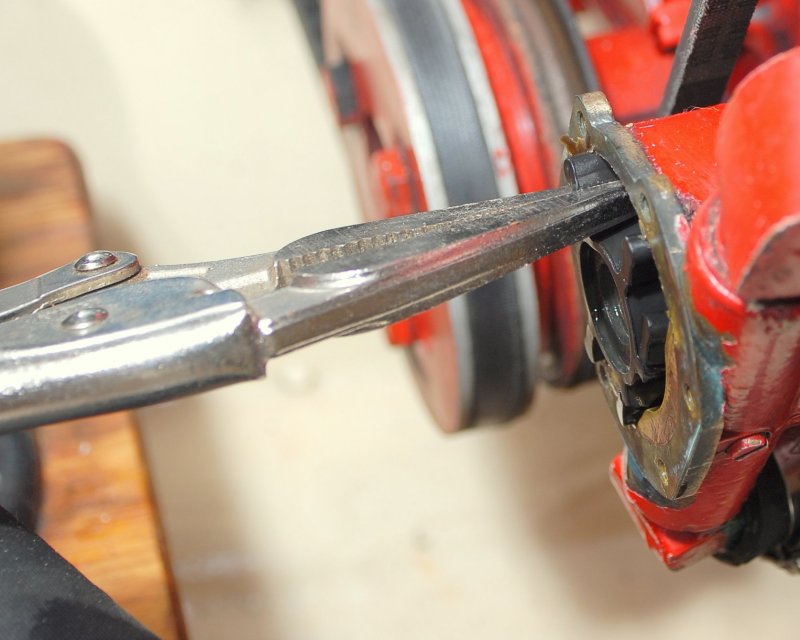
Remove The Impeller
While the concept of water pumps is the same across brands the method of how the impeller sits on, or is attached to the shaft may be different. This pump has a slotted shaft and the impeller has a screw that sits in the slot. To remove it I simply use my needle nose Vise Grip pliers. It just pops right out and could not be any simpler.
Some pumps use set screws or c-clips. Impellers with c-clip retaining rings will require a set of c-clip pliers. It's always good to know what your pump looks like before taking it apart so you can have the right tools on hand. Most engine manufacturers and pump makers have on-line parts manuals that will show an exploded view and will allow a sneak peek into the inside of your pump before you open it up..
23-JUL-2008
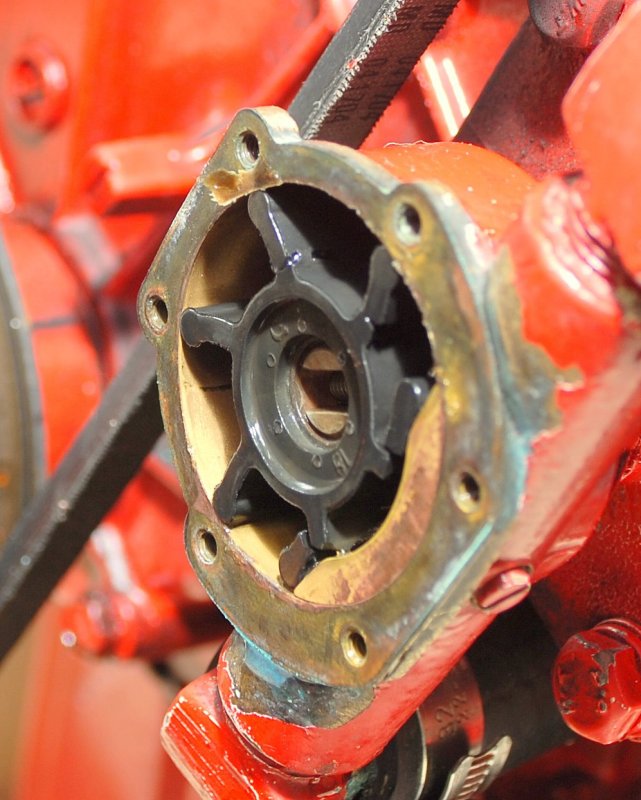
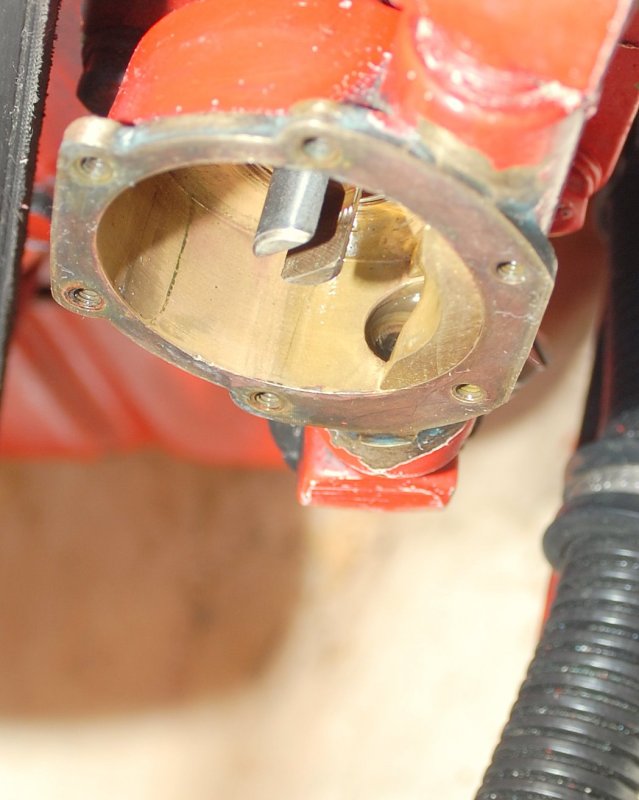
Check The Pump Body
Don't forget to check the pump body for both wear and debris. Run your finger around the inside to feel for groves or rough spots and give it a good visual inspection.
Once you have done this apply some impeller lube to your finger and lube up the inside surfaces of the pump body including the back wall as it is part of the impellers sealing surface and the impeller spins on it as it does the front cover. Both the rear of the pump and the cover plate should be lubed before final assembly or insertion of the impeller.
23-JUL-2008
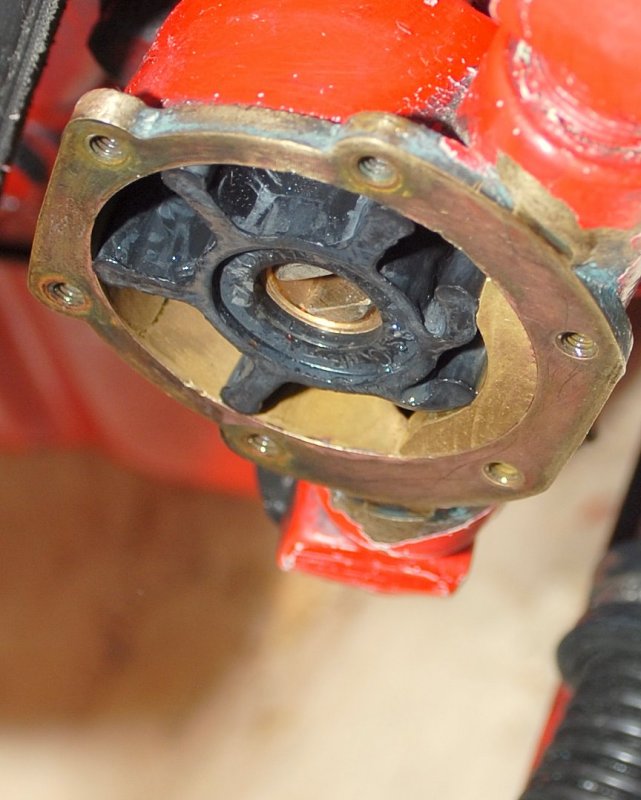
New Impeller
To install the impeller lube the entire exterior with the supplied lube (usually glycerin). Avoid the use of petroleum based lubes as they may shorten the life of the impellers compound. After lubing compress it with your fingers aligning the vanes in the direction they were oriented when the old one came out.
I often hear of folks talking of using zip ties to pre-compress the impeller for insertion but I honestly don't understand why one would need to do so. I've replaced impellers on very large Detroit diesels, Cummins, Caterpillars and even one lung teeny tiny Yanmar's and all of those impellers went back in fine without a zip tie pre-compressing it. You really do not need to over think the re-insertion just do it.
If your impeller had vanes pointing in different directions when you took it out, as the photo of the old one shows, DON'T WORRY. This is rather normal and is due to the little bit of "back spin" a diesel can get as it shuts down. Sometimes during the last revolution the engine may actually spin back a notch or two causing the impeller blades to be out of spin direction unison. Even of you put it in completely backwards of the pumps rotation it would correct itself with no long lasting trouble. I don't advise this but the reality is that it won't actually hurt much.
23-JUL-2008
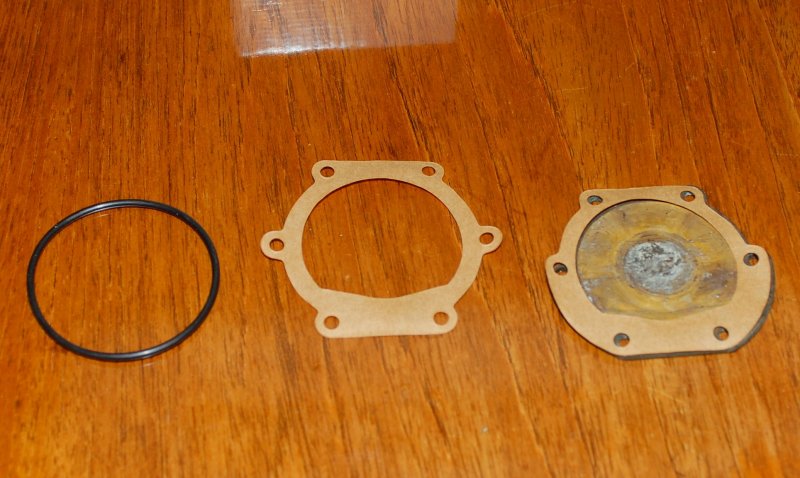
Chose The Right Gasket
If you buy an OEM impeller directly from Yanmar, Westerbeke or Universal, to name a few, they usually come with the right gasket. If your impeller came with more than one gasket chose the right one by matching it to your cover plate or o-ring groove.
23-JUL-2008
Prep The Gasket
I like to insert two machine screws and lay the gasket over them before installation of the plate. This keeps the gasket aligned and makes it a simple one step procedure. With the two screws finger tight I then insert the remaining screws and torque them to proper spec which you will find in your owners manual. If your handy with a wrench you can do this by feel if not you may actually want to use a torque wrench.
You can install the gasket any way that gets the gasket in the right place without ripping it as that is all that really matters.. With paper gaskets they usually go in dry but with o-rings they should be lubed with the glycerin supplied. Default to the manufacturers instruction on the gasket lube or dry situation though..
23-JUL-2008
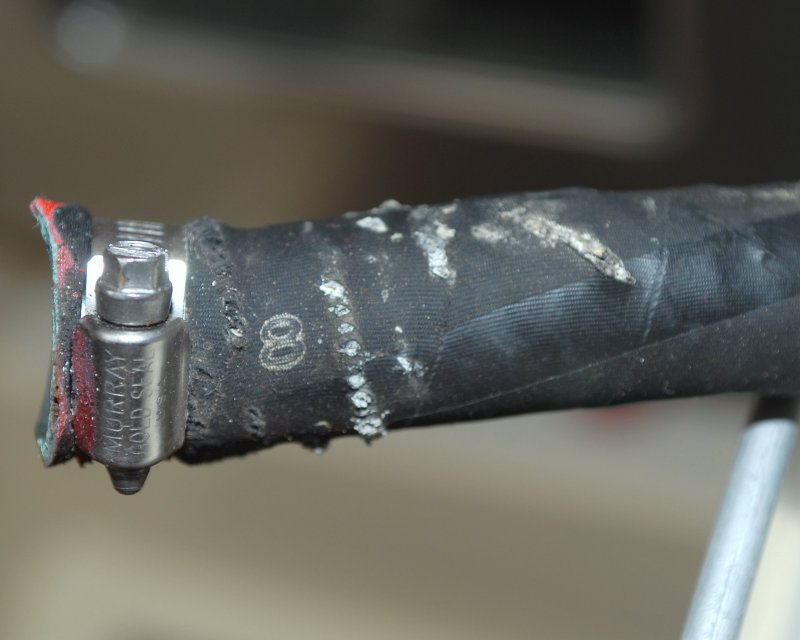
Check Your Hoses
Do yourself a favor and always physically and visually inspect your hoses each time you're in the engine compartment.
This is a wire reinforced hose that was very close to failure. Of course it was the most difficult hose to replace and the only way I could tell it was bad was by feel. The internal reinforcing wire is severely corroded and rotting through the jacket as evidenced by the white residue and bulges.
23-JUL-2008
All Done
As I said at the beginning EASY !!!!!
MAY-2006
Help Support This Site
Like what you saw or read in this article? Was it helpful? Could the information save you some money? Would you like to see more articles like this?
If so feel free to donate, support the site, and keep it growing. Please DO NOT feel obligated at all. If you like it and want to make a donation, please do. Your donations help keep the content coming and also help keep it FREE.
Click the DONATE button below if you would like to make a donation via PayPal.