


|
|
|
|
|
|
| Claudio Gatti | profile | all galleries >> Minolta FAx (Forum & Ax FAQ) >> Broadband FAx | tree view | thumbnails | slideshow |
Niamh (Niamh, Great Britain)
John down under (John Harvey, Australia)
Klaudio (Claudio Gatti, Canada)
These people have contributed whole answers or large parts of answers:
Niamh (Niamh, Great Britain)
John Down Under (John Harvey, Australia)
Klaudio (Claudio Gatti, Canada)
Howard1 (Howard Sandler, Canada)
We'd also like to acknowledge the entire Minolta Talk Forum at www.dpreview.com for providing information, inspiration and just a great place to hang out. This project was born in the friendly and helpful spirit that makes our little forum so special.
Special Kudos to Slug at pbase for all his support that made this page possible and for offering one of the best photo sharing sites in the world.
And many thanks to Phil Askey, the man behind dpreview, which makes it possible for the Konica Minolta Talk Forum to exist in its current form.
Submissions from other contributors are always welcome. Please contact the editors (Claudio or John). We also encourage discussion in the Konica Minolta Talk Forum at www.dpreview.com, but please do not use the comments area at the bottom of this page for discussion of topics.
Here are the general terms.
These have already been covered extensively by others. Not need to re-invent the wheel. See Brian Biggers FAQ.
Richard B has a nice collection of tips for the S404 on his page (See "S400 FAQ and Tip" at the bottom of the page).
This Ax Frequently Asked Questions page has been created and is maintained by a group of volunteers (see Contributors) of the Minolta Talk Forum at www.dpreview.com.
The official home of the Minolta Ax FAQ is the MTF Challenge page on pbase.
We have not yet set up a process for you to update the FAx yourself (and maybe we never will ;-)), but we welcome your submissions. Please use only text format, make it in the form of Question and Answer like you see here and keep it rather short (we have a hard limit of 256K for the HTML document size). For now, just send an email with the addition to Claudio or John down under.
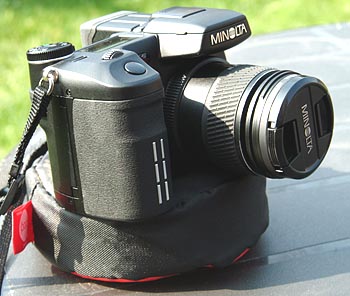
The Minolta DiMAGE A1 and the Konica-Minolta DiMAGE A2 are very well-featured high end 'SLR-like' prosumer digicams,
although they are not SLRs. However, they have a number of features that provide for a great photographic
experience for beginners and experienced users alike. They have been designed so that many of the useful
features are easy to access through buttons on the camera. Some of the outstanding features include:

There are many things you can do. Here are some suggestions.
You are now ready to compose and shoot.
Read the manual.
Read the FAQ on this page.
Familiarise yourself with the basic kinds of controls available; see the manual and various FAQ.
Set the settings in the menus; see these FAQ and the manual. Also see the buttons FAQ.
Check the firmware version and update if possible and desired; see the firmware FAQ
In terms of price/performance definitely not ;-). Seriously, an Ax can be an excellent occasional point and shoot. All that's needed is to use P mode with a specific ISO setting (64 - A2 only - or 100), boost color, saturation and sharpness to taste, and save all these values in a custom setting. Then at the flick of a switch you have a point and shoot ready to be handed over to an inexperienced photographer for an easy snapshot. In reality if this is all you plan to do, then there are much cheaper alternatives that will probably make you happier. While the Ax is a joy to use for the amateur photographer, it is quite a complex camera and it can be frustrating if you are not interested in using and learning all the capabilities.
There's no straightforward answer to this one because everybody has different requirements and only you know what is of most importance for your photography. This is not an exhaustive list, but here are a few things you might want to consider:
Final advice: I strongly advise you not to make a purchase without a) going into a store and handling all
the prospectives yourself and b) examining samples (preferably printed) which are
widely available on the internet. Good luck!
Minolta Ax default settings are very neutral, just like on many of the DSLR out there. Our guess is this is a conscious decision by Minolta made considering the target market for the Ax cameras. This type of image is the perfect starting point for effective post-processing and leaves a lot of latitude for different types of final results. For users who do not like post-processing there are several in-camera options that allow them to produce sharp and saturated images straight out of the camera. But for the most demanding users there is no substitute for post-processing. Shooting in RAW will give you the best possible quality, but even when shooting in JPEG post-processing can really bring out the full quality of the Ax images. As for most of the other questions the first and more important point is to expose your image at its best. Then the typical basic post-processing consists of:
These steps are really just to give you a starting point, but they are normally all it takes to make a neutral image stand out. With some practice some default values can even be derived and saved in an action for automatic processing of massive quantities of shots in a short time. Nothing will beat the careful fine tuning on a specific shot, but that can be reserved for those "special shots".
It is well known that Minolta default settings are generally very neutral. The images tend to have very little processing applied to them in the camera, both in terms of color, sharpness and contrast, very much like in a DSLR. People that are used to snapshot digicams are generally shocked by the difference, since in most of the point and shoot models the images are heavily processed inside the camera to boost saturation, sharpness and contrast. Minolta Ax can also easily do that, but it's just not their default settings. You could start by using "Vivid" color mode or increasing color saturation by +1 or +2. Also set sharpness to hard and contrast +2 . You'll see that your images will look pretty snappy out of the camera. The result will not be as good as you can get in post-processing starting from neutral (see the basic workflow FAQ), but you have the choice. The Ax allows you to save all these settings in one custom user mode, and then recall it at the flick of a dial.
In reality the Ax pictures are just about normal, if not lower, compared to any other camera in the same category. They are indeed more noisy than a larger size sensor DSLR (or low megapixel cameras), but the difference is really visible only at higher ISO levels. If you are seeing very noisy images you should first make sure that:
Now that if all these conditions are met and you still see noise in your images the next step is to assess how you are looking at your images. If you are looking on the screen with 100% image size, then you are likely to still see some noise, but that is really only caused by the magnification factor. Try printing an image and see if you can still see noise. If you do then your camera is unusually noisy and it would be a good idea to send it back to Minolta for ISO re-calibration. It is a little known fact that the Ax cameras have quite a few more ISO levels than what is user-selectable.
In general the best advice to keep noise under controls is to use your histogram to make sure you are not underexposing, but you are "exposing to the right" as much as possible. Another advice would be to consider shooting in RAW mode, since same of the converters out there (i.e. the RAW converter of Photoshop CS) have noise reduction functionality implemented in the conversion function itself.
For your higher ISO shots, it is recommended that you use a noise cleaner. There are literally tens of noise cleaners out there but 2 that tend to stand out for features and price are Neat Image and Noise Ninja. One of the authors also uses a set of free Photoshop actions by David Marsit with great success. The last one in particular can be a valid alternative if you do your post-processing on a platform where the noise cleaners are not available (eg Mac, although Grain Surgery is supported for the Mac).
Now some A2 units seems to have a "diagonal pattern" of noise in certain conditions. At the moment it is known that the beta version of the new Camera RAW converter for Photoshop CS has been enhanced to remove that type of noise. This obviously does not help much with JPEG.
The Ax cameras can tend to underexpose slightly in some situations. That is not a big deal in most situations. You can either use a small amount of +ive exposure compensation in the camera or fix the brightness during post-processing on your computer. For more tips on exposure, see the FAQ on the different metering modes and the FAQ on working with histograms.
This is controversial and there are different line of thoughts. The point is that the Ax has 3 levels of sharpening: soft, normal and hard. The English manual states that "normal" does not apply any sharpening while soft actually softens the image. The Japanese manual is actually worded differently, and does not seem to imply a softening. Anyway, several users have done tests, and we could point you to tests that prove one or the other theory... Confusing, isn't it? Bottom line, do your own experiments and decide for yourself. The authors use soft since they prefer to do sharpening in post-processing and have not seen any indication of additional softening done in-camera.
Auto-ISO should really be avoided most of the time. Prosumer cams with high megapixel counts and small sensors are inherently more noisy than DSLRs or lower resolution cameras. While noise removal provides a great help in producing decent photos, low ISO (64, 100, 200) are really the largely usable range on the Ax to keep noise levels from becoming too noticeable. Knowing what ISO is used is critical to produce optimal quality images, so our suggestion is that even if you plan to use your Ax in Program mode, make sure you switch to explicit ISO. To do this, turn the function dial on the left side of the camera to the ISO position, press the button at the center, and then turn one of the main control dials on the right side of the camera until you see ISO64 (A2) or ISO100 (A2, A1) on the LCD/EVF.
If your photos have a slightly green tone, you may be in Roswell, NM, or it is more likely that you have a white balance (WB) problem. First of all make sure you are not underexposing your pictures, since this will exaggerate the effect. Second you are probably using AutoWB. In general it does a decent job, but it can easily get fooled. It is always better to use a specific white balance or even better a custom white balance. The Ax series offers 6 different white balance presets + AUTO + custom, and they can be selected by turning the function dial on the left side of the camera to WB, pressing the center button and then using one of the main control dials on the right to select the desired WB.
Custom WB is also extremely easy to set since the Ax have a dedicated WB button on the left side of the camera. Once pressed the camera will show a small rectangle that should be pointed to a white surface or other neutral color surface while the WB exposure is taken. After the WB shot has been taken, it is possible to save the setting in one of 3 different custom WB settings. You can use a white object in your environment to set the custom balance, but if you want to be more precise there are choices:
ISO800 allows for proper exposure at higher shutter speeds to help freeze the action and/or avoid seeing the effects of camera shake in your pictures, perhaps in low light situations. However, it also means much more noise in pictures than there is at lower ISO speeds. Here are some tips for getting usable ISO800 pics:
Most of these ideas are considered together in this useful article by Bryan Biggers (Shooting ISO 800 on the DiMAGE 7). The lower resolution will be fine for web-based purposes, but will be limiting if you want to print large.
See the FAQ on shutter-aperture for an explanation of exposure. 1/16000 sec is a very fast shutter speed. Even 1/4000 sec is a pretty fast shutter speed. Even with a wide aperture like f2.8 that lets as much light as possible through the lens, you need very bright light for a shutter speed of 1/16000 sec to provide enough light to the camera's CCD sensor to produce a properly exposed picture. Chances are you will hardly ever be able to use a very fast shutter speed like 1/16000 sec, if at all. If you thought you could use 1/16000 sec shutter speeds to freeze sports action, you will be out of luck, unless you are shooting a game on Venus or Mercury!
Technically yes with the help of an IR pass filter like the Hoya R72. But the Ax series, like the vast majority of digicams, has a very strong IR block filter in front of the CCD. So in order to take IR shots you are forced to use very long shutter times and this limits the usefulness. Also the IR block filter tends to generate a "hot spot" in the middle of the frame that reduces the image quality even further. So if you just like to experiment with IR, then you can definitely do that, but you won't really be able to take high quality images. The original Minolta D7 is one of the few cameras (together with several Sony digicams) that have a weak IR cut filter or that can move it out of the way on request, and therefore can produce high quality IR images. Your other option would be to "hack" into the camera to remove the filter, but if you are serious about IR work a much cheaper and less risky option is to look for a second hand D7 or Sony 7x7.
Anti-shake or AS is one of the key benefits of the Ax. It works exceptionally well. In fact, it works so well that many users say they will not buy another camera without AS. AS stabilises the CCD sensor against certain types of camera movement so that the user can take much slower handheld shots than they would be able to take with most other cameras. The difference can be at least a couple of stops. In actual shutter speed terms, some Ax users have reported usable handheld shots down to as low as 1/2 second, but that is the exception. However, with the help of AS, it is not uncommon for many users to be able to take very good handheld shots at around 1/10 second with some practice. AS on the Ax is definitely not a gimmick and provides a much more affordable and practical solution when compared to stabilised lenses on SLRs. Here is an example of a night shot taken at ISO 400, 1/3 sec with aperture 2.8

The real time or live histogram is one of the most important features that sets aside
the current crop of prosumers from other digital cameras. But before we start
discussing it for the Minolta Ax, let's first see in more
detail
what the histogram is.
In a digital image each pixel in an image has a specific color. Each pixel
also has a specific luminosity/brightness. The histogram is a graph that shows
you how many pixels there are in an image for each level of brightness. The X
axis (horizontal) of the histogram represent the levels of brightness: for
simplicity you can think of it as a scale from 0 to 255, but the range depends
on how many bits per pixels are used by the camera/image processing software.
The Y axis (vertical) represents how many pixels in each level are present in
the image. Theoretically the area under the histogram graph is constant and
represents how many pixels are present in an image, but in practice the drawing
of the histogram is not always done with the same scale.
Now the histogram is one of the best tools to judge the exposure of your image.
The shape of the graph really depends on the luminosity of the scene, but in general
if the
graph is all bunched up to the left, your image is underexposed. On the other
end if the graph is all to the right and you see part of the graph
that looks
truncated, then you have most likely overexposed and blown your highlights. The
secret for a perfectly exposed image, with the most available amount of
details, is to expose your image as much as possible to the right, without
blowing the highlights. Note when you want to obtain high key or low key
images you have to apply this concept only to the portion of the histogram
that really interest you. This sounds more complicated that it really is and
the preview on the LCD/EVF will also help you judge those more extreme
situations,
All this is general knowledge for the digital photographer, and it's normally
used also by DSLR users to judge their exposure during the review of shots just
taken. A solid understanding of the histogram will also help you during
postprocessing, where you will be able to adjust your level much more easily
if you know how to interpret the little graph.
But what sets aside the prosumer cameras like
the Ax from most of the other lower end
digicam and from DLSR is that the histogram is available in real time. On
the Ax the real time histogram, and the availability of the 2 dials to control
shutter and aperture directly when in manual mode, transforms the camera into one
of the most precise light meters available. You do not have to worry about
metering mode, and which portion of the image is used for determining the
exposure because you are using the whole image. You can quickly see the effect
of the 2 exposure variables in the LCD or EVF and judging by the shape of the
histogram you can make optimal choices about the exposure. The color and
brightness of the pixels actually reflect the exposure in the default display
mode on the LCD/EVF monitors, but
in general it is too coarse to make really good judgments on the
image. The A2 has improved with the higher resolution EVF, but still the
histogram will give you the most information about exposure. If you have an Ax and
you are not using the histogram you are really
robbing yourself of one of the best tools available to improve the number of
good shots that you take in terms of exposure.
There are a couple of minor things that you should be aware: the histogram is
computed from the downsampled image that is used for the LCD and EVF. One
effect is that the brightness of small details in the image may not be visible
in the histogram. Another thing to note is that the
brightness adjustment to the EVF LCD does not affect the histogram, but the
signal amplification that is used in low light does. So if you see that the
amplification kicks in (the LCD becomes
B&W and brighter) you should know that
you can't use the histogram to judge your exposure
(until you press the shutter release button half way). This is also true for
flash setup, expecially when you enable monitor amplification all the
time.
So now that we have hopefully convinced you to use this great digital age tool, we should really tell you how to activate it on the Ax:
Here is a procedure for using the histogram to make Manual exposure mode easy. First decide whether you want to control DOF or movement (see the shutter-aperture FAQ). For DOF, set the aperture you want with the rear control dial. For movement, set the shutter speed you want with the front control dial. Then frame your subject, look at the histogram and adjust the opposite control dial until the monitor image looks ok and the histogram is where you want it, probably towards the right, but not truncated at the right. The correct exposure should now be set so that you are ready to shoot. It sounds more complicated that it really is, and it will become second nature very quickly if you start using this method with your Ax. Just remember that very small details may not show on the histogram display for the Ax as the histogram only has limited resolution.
If you prefer priority modes you can obtain the same effect by assigning exposure compensation to the unused second dials in the 4th setup menu (blue wrench menu). Set the priority mode that you prefer on the main selector, dial the driving value that you prefer, then look at the histogram and adjust the exposure compensation until the histogram conform to what we said before.
Here are a few more resources, from simpler to more advanced, on the general concept of histograms in the context of taking a picture and post-processing:
The Ax has all kinds of useful information that it can display on its monitors to help you. It is useful to know how to turn that information on and off.
In record mode, from a blank display, pressing the information button (i+) on top of the camera takes you through the following display sequence:
To display the grid to assist with composing, press and hold the function button (top left) and press the information button (i+) until the desired pattern of grey lines appears.
In AF S (single) or AF C (continuous) autofocus mode, press and hold the 4-way controller centre button for a couple of seconds to change the focus display to a cross to activate flex focus point mode. You can then move the flex focus point to anywhere in the display with the controller arrow keys and that becomes the autofocus point. The flex focus point can also be set in the menus for spot metering.
The Ax has three metering modes - multi-segment, centre-weighted and spot - that work with Ax exposure modes other than M (manual). You choose the metering mode by turning the function button on the left to select the metering symbol, pressing the centre button, rotating one of the control wheels on the right to show the metering mode selection, and pressing the function button to lock in the selection.
Multi-segment metering is best for fairly evenly lit scenes.
Centre-weighted metering is best for central subjects that are noticeably lighter or darker than their surroundings.
Spot metering is for metering against a small area that is assumed to be the same brightness as an 18% grey photographic card. Note that the Ax can be set to spot meter at the flex focus point if so desired.
Also note that the metering mode is not really meaningful when the camera is in manual exposure mode; see the FAQ on metering mode for manual exposure. As described in the histogram FAQ, the exact metering mode becomes less important when you use the histogram to determine the best exposure to use.
See the AEL button FAQ for more metering information.
This is a complex subject, but here is a quick overview of the Ax buttons/settings.
The manual is a good source of information on the various Ax buttons. Here is a quick overview.
The front and rear control dials on the right of the camera allow you to quickly change many settings.
On the top of the camera:
On the back of the camera:
On the left of the camera:
On the lens:
The auto exposure lock (AEL) button can be very useful. Pressing that button locks exposure for the framing at that time. Menu settings allow for setting the AEL mode to the existing metering mode or spot mode, and for exposure lock to occur only while the button is pressed or to toggle on and off each time the button is pressed. Some people prefer to keep the AEL set for spot toggle so that they can readily switch from another metering mode to spot metering by pressing that one button rather than having to use the function dial/button to change from another metering mode to spot metering. Note that spot metering can be set to coincide with the flex focus point.
If the flash (built-in or external) is on, pressing the AEL button also puts the camera into slow shutter sync mode as explained in the flash mode FAQ. That allows for a long exposure with the flash firing early in the exposure period.
Well, in manual exposure, metering is not really used, since you are making all the decisions on exposure (aperture and shutter). Having said that, the metering mode affects how the AutoFocus works so it is sometimes needed to switch. The only way to switch is to turn the exposure-mode dial on the top of the camera back to one of the program modes, change the metering mode and then go back to Manual. Honestly, this is not really necessary, since what you normally want to achieve is more precise focus and than is best dealt with by using the Flex Focus option: press the central button of the 4 way controller for a couple of seconds and the cursor on the LCD/EVF will turn into a cross. AF will focus on that particular spot, and you can move it around with the 4 way switch. Press the center button again for a couple of seconds, and you'll be back in the original mode. In the Flex Focus mode, you can set the camera to provide spot metering at the Flex Focus point.
Bracketing drive mode allows you to take a series of 3 shots with the 1st at the set value, the 2nd a bit less and the 3rd a bit more. For example, exposure bracketing will take the 1st shot at the selected exposure, 2nd at a lesser exposure and 3rd at a greater exposure. You can also bracket for contrast, saturation and colour. The bracket value can be set via the menus. Bracketing can be very handy when you are unsure of the exact exposure or digital effect you want. While bracketing means that the number of pictures quickly builds up, you can readily review them through looking at the review image and what the histogram shows and delete those photos that are not quite what you want.
As an alternative to bracketing, you could try shooting in RAW format and
then adjust the image settings using a RAW software converter (see the
working
with RAW FAQ for more details). Just about the only image settings which
can't be adjusted using RAW are the ISO setting used and the extent of
depth-of-field. It's a matter of personal preference whether you use RAW or
bracketing. If you are really keen to have more exposure range options, you
can even bracket with RAW.
RAW files are the best way to get top quality images, but more than anything else to deal with difficult lighting and white balance. A RAW file contains the data as captured by the CCD, that is before the Bayer interpolation is performed. This gives more latitude during the conversion process: exposure can be adjusted up and down to a point, white balance can be done on the spot and levels can be adjusted with minimal loss of information. The drawback is the storage space and some reduced in-camera performance, the main being that it's not possible to zoom a RAW image during review on the camera LCD to check if the focus is correct. As for the Minolta RAW format (MRW), there are several converters available:
We'll add more as we discover them (send an email if you know additional converters supporting Minolta raw format).
To see an informal comparison of various raw converters you can also visit
this forum thread on dpreview
.
As an alternative to using RAW for difficult lighting conditions, you can also
use bracketing. Please see the bracketing
FAQ for further information. Just about the only image settings which can't
be adjusted using a RAW converter are the ISO setting used and the extent of depth-of-field. It's a
matter of personal preference whether you use RAW or bracketing. If you are
really keen to have more exposure range options, you can even bracket with RAW.
The red light indicates when an image is being written to the CF card. The Ax are smart enough to continue writing even if you shut down the camera while it's still writing. The write cycle will be completed and then the camera will be turned off as requested. This is a nice feature, but we generally recommend to avoid shutting down the camera if the red light is on. An even bigger no-no is to take out the CF card while the red light is on; at best, you will loose your shot, and at worst your CF card will be damaged.
To review your pics, it is easiest to just stay in record mode and press the quick view button (QV/trash button at the bottom to the right of the LCD). When you press the QV button, you first see a full view of the last picture you took. To see more information about the picture, including its histogram, push the up arrow on the 4-way controller at the back of the camera. To return to just the picture, press the controller down arrow. To review the next or previous picture, press the controller right or left arrow.
To review a movie, you need to turn the mode switch to playback as QV does not work for movies.
When you are reviewing a picture, you can press the QV/trash button again to delete the picture by following the prompts.
You can magnify the picture being reviewed by up to 8X (except there is no magnification of RAW images). To magnify, make sure the additional information/histogram is not displayed (press the down arrow if needed to remove that information) and press the magnify button on the top of the camera. That gives you a 2X display. You can use the up and down arrows to zoom in or out (increase or decrease magnification). Press the controller centre button to switch between zooming and scrolling. In scroll mode, press the arrow keys to move the viewing window in that direction. Press the magnify button again to return to normal view.
To return from review mode to record mode, press the shutter release half way or press the menu button.
This is a rather useful function of the Ax. It automatically senses if you are in a low light situation, and if so it automatically switches on an additional amplification and the B&W mode. This allows first of all to see what the camera sees in very low light, and also the AF system to lock in semi-darkness. Read the histogram FAQ for the effect of this feature on the histogram. This behavior is controlled by the Monitor amplification menu in record menu screen #3. Auto, the default setting, will enable the automatic amplification while Normal will not. When using Manual mode you have 2 further options available in the next menu:
See the histogram FAQ.
This is how you can check your Firmware version number. Press Menu and go to the setup menu (blue wrench on the left). Go in, and then select screen #1. Hold down the center OK button on the 4-way switch and at the same time press the Info button (i+) at the top. This will display a little dialog with the primary version of the firmware. While that screen is visible again press the AEL button and the Info button together. The dialog will alternate between the main firmware version and the secondary version numbers.
For upgrading the firmware we recommend you check your manual or the Minolta web site. It's rather simple, but since there is a chance of damaging your camera, we prefer not to give you any specific instructions. Thanks for understanding.
Don't worry about the ticking sound when the flash is up. It is completely normal. It has been speculated that it is caused by a capacitor, but whatever it is your Ax is not going to explode in your hands any time soon.
Flash can be useful to illuminate low light subjects, provide more even light (eg to fill shadows) or even allow faster shutter releases to avoid motion blur from camera or subject movement.
The inbuilt flash is ok for many situations with direct flash illumination within the distance ranges quoted in the manual. Minolta makes a built-in flash diffuser, but some facial tissue or a ping pong ball over the flash can also be cheap and effective diffusers, as can a diffuser made from a nylon cutting board or translucent plastic that is cut out to sit around the end of the lens. Some kind of diffuser is helpful for macro work where the camera is close to the subject. See more, including a link to pictures of flash diffusers, in the flash diffusers FAQ.
An external flashgun is better than the inbuilt flash where the range, angle or power requirement is too great for the inbuilt flash. A good example is where bounce flash is to be used. Flashguns generally have a MUCH greater range than the inbuilt flash. The flashgun also moves the flash source far enough above the lens plane to eliminate red-eye or pet-eye. You can also bounce powerful enough flashgun light off a low ceiling or a wall to illuminate the subject indirectly for a more natural look or other effect. When used as a wireless flash or slave flash, the flashgun provides even more flexibility and creative control of the lighting source.
The Minolta 5600HS(D) and 3600HS(D) are popular flashguns for the Ax, as is the Sigma EF-500 DG Super (MA), ie for Minolta. There are also other options that have varying degrees of compatibility with the Ax. This section only considers the Minolta and Sigma units.
The Minolta flashguns are fully compatible with the Ax except that the autofocus assist lights do not illuminate with the Ax (the Sigma unit does not provide an autofocus assist light when used with the Ax either). The 5600 is more powerful and fully featured than the 3600, but is more expensive.
The Sigma EF-500 DG Super (MA) flashgun is about the same price as the Minolta 3600HS(D), but about as powerful as the 5600 and has most of the same features. The Sigma flashgun works well with the Ax. However, those with serial number starting with '5' or less are slightly less compatible with the Ax than are the Minolta flashguns. Sigma EF-500 DG Super (MA) flashguns with serial numbers starting with '6' or more appear to be equally as compatible with the Ax as are the Minolta units.
Sigma EF-500 DG Super (MA) units with serial numbers starting with '5' or less:
Sigma EF-500 DG Super (MA) units with serial numbers starting with '6' have overcome the multi-flash limitation.
While the Minolta and Sigma units both support wireless flash with no add-ons, only the Sigma flashgun has a native slave flash capability without any add-ons. Wireless flash means that the flashgun fires when signalled by the Ax inbuilt flash, whereas the Ax Slave flash means that the flashgun fires when it sees another flash firing, for example the Ax inbuilt flash.
The 5600 is undoubtedly a great flashgun; cost, current/future compatibility and brand are normally the deciding factors for people trying to choose between the Minolta 5600HS(D) and the Sigma EF-500 DG Super (MA).
Whichever flashgun you use, it is a good idea to get one or more diffusers to improve the evenness of subject illumination (see the flash diffusers FAQ).
The best flash mode and flash control for any given situation depend on a lot of things and can often come down to a matter of personal preference. Here are some explanations and suggestions.
Flash mode:
Flash control:
Essentially, flash compensation is needed whenever the flash output is too little or too much in any given mode and probably comes down more to personal taste and trial and error than to anything else. Some people like the greater and sometimes more even lighting control that can be obtained from using flash as the main source of light. Others feel that flash washes out colours and prefer more subdued flash, possibly in conjunction with longer exposure to capture more ambient light with its more natural colours (see rear sync and slow shutter sync modes in the flash modes and control FAQ). With the use of less flash, they may also prefer to correct picture brightness levels more during post-processing (see the basic workflow FAQ).
Some users report that ADI flash can result in underexposure, so some positive flash compensation (more flash than the standard amount) may be needed. Positive compensation may also be needed for bounce flash, depending on the subject, especially for a non-reflective subject. Likewise, negative flash compensation (less flash than the standard amount) may be needed when the subject is quite reflective. Note that flash compensation is not relevant for manual flash mode.
Before the shot is taken, the Ax can only estimate the effect that the flash will have on the image. For that reason, even though the live histogram takes account of the flash being used, it cannot provide accurate information for metering. The playback or review histogram is therefore a more useful tool as it can used to show the result of flash use after the shot is taken. Also see the histogram FAQ.
To adjust flash compensation, press the exposure compensation button on the back of the camera, turn the rear control dial to set the desired compensation amount and press the exposure compensation button again to lock in the selected value.
Flash diffusers soften the impact of flash to provide more even lighting. They also reduce the intensity of the light source as they diffuse/spread the light. For close work like for macros, the reduced light output reaching the subject can avoid saturating the subject with too much light. Shadows resulting from flash with diffuser have softer edges and are not as dark as shadows from straight flash without diffuser. The diffuser achieves its effect by causing light from a flash to illuminate the subject from a larger area than the original flash source itself (in-camera or flashgun head). Note that a flash reflector is really just another kind of diffuser.
One way of achieving diffusion without buying additional items is to use a flashgun as a bounce flash. The head of the flashgun is tilted up or rotated sideways so that the flash bounces off a low ceiling or a wall to spread the light and possibly create more natural looking lighting. This is particularly true when bouncing off the ceiling to more closely resemble the kind of overhead lighting you might expect outside from the sun to highlight facial details with some shadows, for example. Diffusers are available that even allow bounce with a small amount of direct illumination at the same time (follow the flash diffuser gallery link below for an example).
Note that when you use a diffuser, the effective range of the flash is reduced, sometimes greatly so. ADI flash control will then not work without some compensation, so P-TTL or manual flash control modes might be better options for use with diffusers (see flash mode and control FAQ). Alternatively, ADI with some positive compensation may prove to be suitable for some situations, especially if P-TTL is proving to be inconsistent.
Also be aware that some diffusers can also alter white balance, so you should take that into account when setting up and/or post-processing (see the white balance FAQ). As an example, flash bounced off a ceiling will contribute colour to a photograph based on the reflective properties of the ceiling.
To create catchlights in a subject's eyes when you are using bounce flash, another simple flash diffuser is a spoon, some white card or even a cupped hand protruding above the top of the head from behind so that it catches a small part of the flash to reflect it forward towards the subject. Without such a reflector, eyes can lack sparkle with bounce flash.
For examples of flash diffusers, check out John down under's Flash Diffusers gallery.
Connect the flash trigger cord to the PC terminal on the left side of the camera (unscrew the little round cap over the terminal and don't lose it!).� Set the camera to manual mode.� The camera will not "know" there is going to be a flash and set the exposure accordingly, so use manual mode and don't bother with the live-view histogram.� In manual mode, to avoid the live preview from going dark when you half-press the shutter, you need to:
The Ax can synch to the flash at any speed; however, if you set the shutter speed faster than about 1/800s, the exposure will be reduced because the camera is not capturing all of the flash duration.� This can be used to advantage to allow you to open the aperture up wider than would otherwise be possible, but avoid overexposure by using a very high shutter speed.� The open aperture provides a short depth of field which is often desirable in portrait work.
Under some circumstances, it can be useful to turn down exposure compensation (or underexpose the scene by 1 or 2Ev) and turn up flash compensation by 1 or 2 Ev in ADI mode. What that does is to reduce the average ambient light contribution to the illumination of the scene and increase the average flash contribution to the illumination of the scene. That can tend to fill shadows more effectively in fairly well lit areas with deep shadows, for example where there are leafy plants in good light. The result is less likely to blow highlights and more likely to lessen the depth of the shadows when compared with simply using normal exposure and flash levels. However, some people find that additional flash can wash out colours in the subject more than they like.
This really depends on your budget and what you want to do with your Ax.
Here are some suggestions:
UV filter:
There are several schools of thought about this. Some folks like to have a circular screw-on UV filter permanently on the end of their lens to protect the lens from dust, scratches, chipping, sea spray etc. Sea spray in particular can damage some glass multi-coatings if left on the glass for more than a short while. Most people would agree that it�s much easier and cheaper to replace a damaged UV filter than a damaged lens element.
With the use of filters on the GT lens, vignetting can occur (also see the vignetting FAQ). Some users report no vignetting with just a standard filter like the Hoya 49mm HMC UV(0) filter, which is 4mm thick + thread and is multicoated on one side only. Others report slight vignetting with this filter and prefer to use a thinner one like the Hoya 49mm Super HMC Pro1 UV(0) filter, which is 3mm thick + thread and is multicoated on both sides for superior optical performance. Both of these Hoya filters have a front thread to allow additional filters/lenses to be fitted at the same time. Unfortunately, when you fit other filters at the same time, vignetting is likely to occur. You may also want to consider the use of larger diameter filters on step-up rings (see the step-up ring FAQ).
Other folks don�t like the idea of having an extra layer of (possibly inferior) glass permanently on the end of their lens as they feel it may increase flare and reduce image quality. Bear in mind that if you do use a UV filter, you still need to inspect and clean it regularly (as you would your lens) as otherwise you will undoubtedly get a reduction in image quality over time (also see the cleaning FAQ).
When used with a film camera, this filter blocks some types of UV light and thus helps to cut through haze and enable �truer� colours. Whether or not it is worth having a UV filter solely for this purpose with a digital camera is open to debate, as some people assert that digital sensors are less sensitive to UV than film. If you would like further information before making a purchase, you could start with Jeremy McCreary�s very interesting site at http://www.dpfwiw.com which covers this debate more fully.
You can see standard and slim UV filters in John down under's Lenses and Filters gallery.
Polariser:
It�s possible to deliver a physics lecture on what polarisers do and how they do it. Suffice it to say here that on bright days they will reduce reflections and saturate colours, notably blues and greens. Polarisers have maximum effect when they are used at about 90 degrees to the source of the reflection. For that reason, their effect in darkening blue skies, for example, is at its maximum when the sun is to the left or right of the camera and will have almost no effect when the sun is directly behind the camera. You can alter the extent of the effect by twisting the filter slowly whilst looking through the viewfinder. If you keep twisting you will see the colours deepen and the sky darken, and then lighten again. Bear in mind that a polariser reduces the amount of light which reaches the camera by between 1 and 3 stops or even more (i.e. if you shoot in manual you will need to use a shutter speed 1 - 3 stops or more slower with the polariser than without if you keep the aperture the same). For this reason, on an overcast day the polariser can double as a neutral density filter (useful if you ever want a slower shutter speed, e.g. to help blur moving water).
Another tool you can use to help set the polariser for maximum effect, which is how most people normally want to use it, is to use the Ax live histogram. It is easiest to see the effect if the camera is in manual exposure mode so that the camera does not change the exposure as you rotate the polariser to vary the strength of its darkening effect on the sky. When your camera sees sky and you are at an angle to the sun, look at the live histogram as you rotate the polariser front element and you will see a 'blob' moving around to show how the brightness of the sky is changing. When that moving part of the graph is as far to the left as possible, the sky will have been polarised as much as possible and you will have set the polariser to maximum affect. At the same time, you will have been able to see that the sky has become as dark as possible on the LCD/EVF monitors.
There are two different types of polariser - linear and circular. Linear polarisers are usually a bit cheaper than the circular kind for the same quality of glass but are not compatible with all cameras, especially some kinds of AF SLRs. Either type will work perfectly well with the Ax, however if you plan to use the filter with other cameras as well then you might want to check compatibility with the manufacturer.
Polarisers, like many filters, come in two different system kinds: those for �square� systems, such as Cokin P, and those of the circular screw-in kind. It�s a matter of personal preference which filter system you use. If you plan to use more than one filter at a time, or to acquire other filters as well such as graduated neutral-density filters or warm-ups, or to use your filter system with more than one camera, you might find that the square system allows for easier adjustments and greater versatility. However that�s only the opinion of the author; feel free to make up your own mind.
Below left: no polariser, ISO 100, f5.6, 1/1000
sec Below right: with polariser, ISO 100, f5.6, 1/250 sec
100% crops underneath
Note the darker sky, more vivid clouds, brighter colours, greater contrast and reduced reflections in the polarised sample.
These samples were taken only about an hour before sunset and the effects would
be even greater earlier in the day.


You can see standard and slim 62mm polarisers in John down under's Lenses and Filters gallery.
For additional information about filters, see the Filters FAQ.
Most of the filters used with film cameras can also be used to similar effect with digital. Whether you choose to use them is a matter of personal preference, since equivalent effects can often also be achieved through post-processing, although not always. There is even specialist filter duplication software available, such as the offerings from Nik Inc, but the effectiveness of these are not known to the author.
Some people find it more convenient and cheaper to post-process and say that, although it can be much more time consuming, it can even give a greater degree of control. Other people simply prefer filters, for example if they don�t like to spend time in post-processing. Sometimes using filters can result in a more successful image - it�s difficult to �rescue� blown highlights in post-processing, for instance. Some effects, such as polarisation and graduated neutral-density, may seem much more difficult to achieve through post-processing than just popping a couple of filters on the end of your lens. However post processing is unlikely to cause flare or vignetting. In reality, there will be instances where filters are very useful - and other instances where post-processing is more effective, and the two are hardly mutually exclusive. Use either or both if you want.
If you wish to get to grips with filters, you need to understand a bit about the options available to you, or you might end up wasting your money. There are several related filter questions in these FAQ (e.g. on vignetting, step-up rings and UV filters and polarisers, etc) and it�s recommended that you have a read through these as well. For additional information Jeremy McCreary�s site http://www.dpfwiw.com can be a useful starting point, particularly on the technical side. To learn about some of the effects that can be achieved with filters, you could visit a couple of manufacturers� websites - these list the filters available and also include some sample �before and after� photographs. In particular have a look at http://www.leefilters.com - the Lee filter system is for professional landscape photographers and may cost much more than you need to spend, but you may find the site itself useful and interesting. There are some weird and wonderful filters available, but don�t get too carried away or all your shots will resemble those of a seventies wedding.
There are two types of filter system, �circular screw-in� (such as Hoya, B+W etc) and �square� (such as Cokin P). Some filter effects (e.g. graduated neutral-density) are easier to control with the square system filters, but square filters are potentially more likely to cause flare and less convenient to use. Screw-in filters can either screw directly in to the front of your lens, or be used with a step-up ring. Read the step-up ring question for more information. Square filters fit into a plastic filter holder (which may hold up to 4 at once) which is mounted onto the front of your lens using a screw-in adapter. Sounds fiddly and time-consuming, but it doesn�t take more than a minute or two to fit all the bits together.


(a) Cokin P adapter ring, (b) Cokin P polariser and case, (c)
Cokin P filter holder, (d) Hoya 49mm UV screw-in filter.
Some of the most commonly used filters are probably as follows, but many others are available:
The GT lens has a front thread of 49 mm, but since it's a very wide zoom, it's very sensitive to additional filters that are put in front of the lens. The filter can cause darkening of the corners (vignetting) where the camera 'sees' the filter. Some users report no vignetting even with 49mm filters at 4mm thickness + thread, eg Hoya 49mm HMC UV(0) filter. Others need to use a slim filter that is 3mm thick, eg Hoya 49mm Super HMC Pro1 UV(0), or use a 49-62mm step-up ring and mount a 62 mm filter (see step-up ring FAQ).
Bear in mind that if you stack filters, (i.e. use more than one at once),
you are more likely to see vignetting in your images. This is especially true
if you stack the circular screw-in type, or use the square system on top of a
circular UV. For example, with the square Cokin P series, you will see vignetting
below about 35mm (film SLR equivalent) if you use the Cokin polariser and holder on top of a screw-in UV.
Bear in mind also that different users see varying amounts of vignetting, depending
on the alignment of the CCD inside their particular camera - so what works for one
may not work for all. If in doubt, always take test shots in your local retail store
using the proposed filter(s) before buying.
You can see standard and slim filters in John down under's Lenses and Filters gallery.
For more details see the Filters FAQ.
A step-up ring is an adapter that mounts on the front of the lens and converts the thread to a different size. Aside from step-up there are also step-down rings for cases where a reduction is needed. The GT lens used in all the D7x series and the Ax series has a 49 mm front thread. A step-up ring can be used for:
The normally recommended step-up ring for the GT lens is 62 mm (49-62mm step up). Also see the Filters FAQ.
Pretty much any type that can be mounted with an adaptor. Despite the feeling, the GT lens is robust enough for most of the converters out there. The 2 new converters Minolta just released (ACW-100 and ACT-100) are both quite heavy with the teleconverter topping at approximately 500g, the same weight as the camera. The 2 converters are shipping and they are distributed with an updated firmware which permit to specify whether no converter, the tele or the wide converter are used. The firmware is available for the D7i, D7Hi, A1, and A2. The reason the converters are shipped with a firmware update seems to be that this version enables vignette compensation when the aperture is fully open and the converter switch is activated. It also reports the correct focal length in the Exif data. It is speculated that on the A1 and A2, the new firmware makes the AntiShake more effective when used with the converters. Both Minolta converters have a very good optical quality and produce very sharp images. They both mount directly to the 49 mm thread of the GT lens. The ACT has a front thread of 86 mm, while the ACW does not have any and Minolta does not recommend to add any filter to it.


Left ACT-100 - right ACW-100
Aside from the Minolta converters there are literally tens of converters out there that can be mounted directly or with an adapter to the Ax series. The main issue is to get good quality glass and a converter with minimized vignetting. Several Olympus converters are quite popular and well respected. The models are:
The Sony VCL-HGD1758 (1.7X) is also popular with some users.
Clifford Brown, another member of the MTF forum has compiled a list of many available converters and his finding on each of them.
Minolta offers the optional battery pack BP-400. It's really a great battery pack/vertical grip and it is highly recommended by most of the users who have tried it. It adds some bulk to the camera, but it makes it very well balanced as well. The battery pack can be mounted without removing the battery door, and accepts 2 NP-400 batteries (so you'll just need to buy a second one if you already have the one that comes with your camera). It is rated for approximately 660 shots with these 2 batteries. It also comes with an adaptor that allows you to use 6 AA batteries to power the pack. This can be very useful not only for reducing the cost but also for emergencies. The grip does not replicate all the buttons like some DSLR models do, but it incorporates a very handy vertical portrait release button. It also comes with a great hand strap that is very well designed. And if all this was not enough to convince you, note that the grip also has the tripod mount aligned with the lens. A highly recommended accessory.
There are 2 different optional remote releases:
They are both identical except for the length of the cable. RC1000L is approximately 5 m while the RC1000S is approx. 50 cm. They can both trigger auto focus and shutter.
There is no Minolta wireless remote release available for the Ax, but at least one Minolta Forum user has made a wireless release.
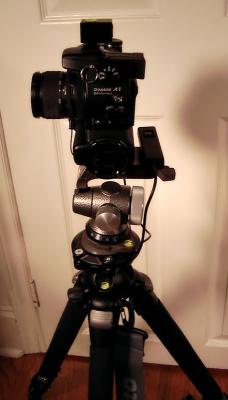
There is really nothing different about the Ax with respect to tripod, monopods, head etc. In fact, the only difference is that AntiShake and the extremely high shutter speed available (1/16000 on the A1, 1/4000 on the A2 ) make the tripod less necessary. But when you want tack sharp images, you are interested in panoramas or just like the slower and more contemplative approach typical of medium format cameras, a tripod with a good head is a must have accessory. Top brands in this category are Gitzo and Manfrotto. You can quickly exceed the cost of the camera with the prices of top quality tripods, but many people agree that it's better to buy a good tripod for life that to go trough several over the years. Common tripod wisdom states that of these three qualities:
you can only select 2 at the same time. In other words, if you want a light weight tripod, you either have to sacrifice sturdiness or buy an expensive tripod. The factors to consider when buying a tripod are driven by the type of usage you'll put it through. A studio tripod is very different from a tripod for a nature photographer. As for the tripod head, this is another area with many choices available. For general photography ball heads are quite popular, and in general you should consider one with a quick release mechanism. Aside from a tripod, a very good support to consider is a monopod and/or a small table-tripod. The monopod is quite useful for all the places where you are not allow to use a tripod (and there are many). And the small table-tripod is just a very convenient tool to always keep in your camera bag. Another convenient and useful small support is the bean bag, pictured here with an A1
Just to give you an idea of a particular setup used by one of the authors, here is an example with a Manfrotto 055 with the central column/horizontal arm removed, a very handy 438 Manfrotto leveling head and a Gitzo 1276M offset ball head. In this case the requirements were to have a convenient setup for panoramas (the leveling head allows you to very quickly level the tripod base without adjusting the tripod legs) with also a fast and convenient head for general photography. Weight was not the main concern in this case. Note that this particular tripod head has a separate pan adjustment and so can be used for distant panorama. Leg warmers and spiked feet, and a camera hot-shoe level (this should have really been part of the ball-head!), complete the package for this particular set of requirements.
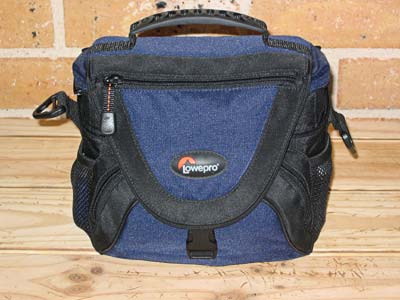
There are just too many options to really list them here. The important things to consider with bags are cost, weight, bulk, accessibility, ease of adjustment, durability, waterproofness (if required), and whether there is sufficient room in the bag for kit expansion , e.g. tripod straps, additional pockets for memory cards, filters and things. Many people actually have 2 different bags, one for the full kit and a compact one just for the camera.
Here is the bag (Lowepro Nova 1 AW) used by John down under:

Many threads are also available on MTF, where people post their own recommendation
on this subject. Here
are
a few
examples.
Another area that you may want to look into is a rain cape or an underwater bag. They will allow you to use the camera even when it's raining or snowing, conditions where you should not be using the camera without some protection. A plastic bag will go a long way.. .but if you feel uneasy about looking unprofessional there are options for you. Underwater bags are a bit of an overkill just for the rain, but you may get a lot of joy from the purchase in your next Caribbean vacation.
The Ax requires a CF card or microdrive card to store photographs. Opinions and needs vary on what size and how many cards to use. A reasonable starting point is cards to total 512MB. Some people prefer a single 512MB card, but others suggest using 2 x 256MB or even 4 x 128MB cards in case any stop working. For the A1, 512MB of CF storage provides well over 100 extra fine JPEG pictures or about 70 RAW pictures. The A2 fits less full-size pictures on a CF card. A faster card will not only fully support write speeds that the camera can support, but will allow fast file transfers to a computer via a USB2 or firewire card reader. Generally, 40X or faster CF cards will provide good speed benefits for file transfer to a computer.
If you are considering a microdrive, please be aware that microdrives are altitude limited. According to the Hitachi spec, microdrives are only rated to work up to 3,048 metres or about 10,000 feet, although they can safely be taken to 12,000 metres if not operating. Apparently they need sufficient air to operate reliably and higher altitudes may not provide enough air. Here are 2 references (thanks to Wayne Hollingsworth for contributing all this information about microdrives at high altitudes):
Card readers are quite cheap and useful. A USB2 CF card reader will transfer files quickly and reliably from a CF card to a computer. For the A1, which provides for a USB interface to a computer, the USB2 reader will be much faster. For the A2, which provides for a USB2 interface to a computer, the USB2 card reader may not be quicker. However, in either case, a card reader connected to a computer does not rely on the camera's battery and may be easier than connecting your camera to your computer each time.
It is best to fully charge a new NP-400 battery that comes with an Ax before using it. After that, it is better to charge the battery often, especially before use, rather than letting it run down too much, or the battery life may be affected. Don't worry about the Ax losing any of its settings while the battery is out of the camera as the camera can remember the settings for quite a long time.
Spare batteries are not a bad idea as you cannot use your Ax without power. There are some generic or at least non-Minolta batteries available that can replace the NP-400 at a much lower cost, but opinions vary on the effectiveness and even safety of some when used with the Ax.
Many users also like to use the BP-400 battery grip with NP-400 batteries, NiMH rechargeable AAs or even AA alkaline batteries in case of an emergency. See the FAQ on the battery pack.
Refer to the ticking flash FAQ.
Those lines can appear on the Ax LCD monitor when the light is very bright. They are nothing to worry about and will not appear in the picture.
I wish we knew ;-), but whatever they are they are completely normal and happen on all the Ax. OK, we could get an electronics guy to explain it for the inquiring mind, but the bottom line is that you do not have a faulty camera if you see them.
Some users report a magenta band running down the left of their A1 monitors and photographs under certain conditions. For those who experience it, the band tends to be present or more pronounced under low light conditions and when using higher ISO speeds. At ISO 100, the band should rarely be noticeable. If the band is present, users can either live with it if it is fairly mild, as is the case for at least one of the contributors to this page, or seek to have Konica-Minolta repair or replace the camera under warranty.
There are 2 different lines of thoughts for this:
Note that lens protection is needed not just from hard objects, but also from dirt, moisture and even salty air by the sea. These substances do not only interfere with light coming through the lens, but can also damage the special coating on the lens and reduce its effectiveness. Ideally, you want to stop those substances getting onto the lens in the first place by using a protective filter and/or avoiding undue exposure to those elements. If the lens does get dirty or wet, it is important to clean it as quickly as possible, especially if the lens comes into contact with salty water or moist salty air. See the FAQ on cleaning the camera for advice on cleaning the lens.
The Ax has a good design where the LCD is protected by having a beveled frame around it. But it's still easy to smudge it with your finger or nose. There are some hard plastic protectors, but the easiest and cheapest way to protect the LCD is by using a thin film LCD protector. You can either buy a larger PDA protector and cut it to size, or buy those camera specific kits at most photo stores. Pay attention during installation to get all the air bubbles out, and leave a corner slightly raised to facilitate removal down the road. Properly installed, this kind of protector will not interfere with viewing of the LCD. This thin film can also be applied to the EVF window, but it can result in a fuzzy image and is not recommended. The EVF window is more recessed and tends to stay cleaner and more free from contact than the LCD anyway, so protecting the EVF window is not really necessary.
It's not dishwater safe, if this is what you are asking ;-). Also, since it's a fixed lens system, you do not have to worry about cleaning the CCD. The main part that really requires cleaning is the lens and/or the filters that you may put in front of it. You should use a lint free lens cleaning paper with the adequate cleaning solution (available in all camera stores) or one of those new fancy and convenient cleaning pens (example here). The important thing is to clean rather quickly if you get salt water or similar on your lens: the GT lens and many other filters have a coating and leaving harsh liquid in contact with the lens for a long period may result in permanent damage to the lens. Use a gentle brush and blower to remove dust from the body and generally try to keep the camera protected from external agents. A good bag that keeps the camera protected will go a long way towards ensuring a long life for your Ax. Some micro fiber cloths that double as cleaners can be used to wrap the camera when in the bag for a long time.
In the unlikely event that you get dust in your lens or in the CCD then your only solution is to send the camera in for service.
The official line is that the operating temperature is between 0 and 40 Celsius ( 32 -104 F), but in practice it is possible to use the camera for extended periods in much colder temperatures. Several members of the Minolta Forum have used it for long outdoor sessions at - 30 Celsius. The main problem is the battery power. Lithium-ion batteries, just like all the others, do not perform well at low temperatures. You can address this by either bulking up with more power (using the wonderful BP-400 battery pack or another external battery pack) or by alternating batteries and always keeping one in your pocket to keep it warm enough. The best solution is actually to combine both approaches, but it all depends on your requirements in term of number of frames and shooting period.
Aside from this, the other major consideration is to avoid condensation by avoiding steep temperature variations (going from colder to warmer) in a short period of time. A few good links for suggestions on how to survive extreme cold environment are at:
I'm afraid we haven't heard of a single forum user that has tried this and survived. We'll report details when the first of these stories surfaces on the Web. In general a good suggestion is to try to avoid warming up the camera unnecessarily to keep the thermal noise at bay. Since the Ax have a very quick startup time, when you are in warmer climates, consider shutting it down (or let it go into pause mode) when not using it.
Because the manufacturer warns against it and it could harm the camera! :) Page 162 of the Minolta A1 user manual advises that pointing the camera at the sun can damage the CCD sensor and/or the storage medium (e.g. compactflash card). This is because the sensor of a compact digital camera is always exposed to incoming light, whereas the sensor of a DSLR is only exposed briefly - when the shutter is lifted whilst the photograph is actually being recorded. For this reason, the manual also advises owners to always replace the lens cap when the camera is not in use and to store the camera out of direct sunlight. If you frequently use your camera in very bright light or fail to protect it, over time you may notice an increase in problems such as "hot pixels" and/or streaking or black areas of lost data in your photographs.
There are many other sources of ideas, but here is a link to Petteri's lesson on space, figure and ground as a starter to give you some ideas on how to compose your photos better. It might even give you some ideas on how to become a better photographer!
Another idea is to take part in our world-famous www.dpreview.com Minolta Challenges! :o)
Finally, don't forget to grab your camera and try all sorts of shots on all sorts of subjects. Also don't forget to check them on your computer as often as you need for more useful feedback than your camera can provide. Remember, the film is the right price, so why not 'waste' some shots trying out different things?! ;o)
This question is very broad. The best idea is to read the other FAQ as there are plenty of ideas there, perhaps starting with the FAQ on what I do now that my Ax has arrived for suggestions on further information.
In addition, you could try using the Ax's preset exposure modes on the exposure-mode dial. The manual is the best source of information on what they do.
This is another topic on which it's possible to deliver a technical lecture. However, there are plenty of resources on the web and in the bookstores which already do just that. So here we will just cover what is useful to know in order to get good results with the Ax in the aperture/shutter priority modes, although the relationship principles still apply in program and manual exposure modes. Why bother with priority modes when there is a perfectly good "P" mode? We'll come to that!
Aperture and shutter speed are two of the variables which control how much light reaches your camera's sensor. Too much light and the image will consist of a blank white square (and possibly damage your sensor in the process). Too little and the image will be uniformly black. If your image looks too pale with "burnt-out" white areas, chances are it's been over-exposed. Similarly if the image seems quite dark, it's under-exposed.
Aperture and shutter speed work in different ways to control the amount of light.
The aperture is an opening in front of the sensor, whose size can be varied by a measured amount. It controls how MUCH light reaches the sensor. An aperture setting of "f2.8" for example, refers to a LARGE opening in front of the sensor, to let in more light. An aperture setting of "f11" refers to a SMALL opening in front of the sensor, to let in less light. This is why photographers sometimes refer to "wide" and "narrow" apertures instead of "large" and "small". Basically, the higher the fstop number is, the narrower will be the opening, and the smaller will be the amount of light reaching the sensor.
The shutter is a cover across the front of the sensor, which is lifted for a measured amount of time when you take a photograph. It controls how LONG the sensor is exposed to light. Note that the Ax uses an electronic equivalent of the shutter except for very slow shutter speeds, so the CCD is almost always exposed to light entering the lens.
Because the aperture and shutter each control the amount of light in different ways, to ensure the sensor receives the correct amount of light for a good photograph the aperture and shutter settings are linked. The camera is programmed so that if the shutter speed setting is increased (thus reducing how long light reaches the sensor), then the aperture setting will be reduced (thus increasing how much light reaches the sensor) and vice versa.
For example, if the camera's metering system decides that the correct exposure for a scene is a shutter speed of 1/50sec when the aperture is f2.8, if you decide to change the aperture to f5.6 then the correct shutter speed should also be changed to 1/15sec.
Because you can alter the effect that is achieved. For example, if you are taking a photograph of a landscape then you might want to select a narrow aperture, such as f11, because the narrower the aperture is, the larger will be the area in front of and behind your subject which is in focus (larger depth of field or DOF). On the other hand, if you are taking a photograph of your kids, you might prefer the area behind them to be blurred in order to make your kids stand out from their surroundings. For that you could choose a wider aperture, such as f2.8, because the wider the aperture is, the smaller will be the DOF. On the other hand, sometimes it's worthwhile selecting a slow shutter speed - for example if you have got a waterfall right in front of you and want to convey movement by blurring the water. For that you could deliberately choose a slower speed, e.g. 1/10sec, because the slower the shutter speed the more likely the camera is to record any movement as blur rather than keeping it sharp. Or if you are at a soccer match and want to take a shot of your kid scoring the goal, if the kid is running then you might want to use a faster shutter speed, such as 1/1000sec, to ensure that none of the kid's movements are recorded as blur and his picture is sharp.
Bear in mind that, in addition to aperture, focal length (zoom) and subject distance (focus distance) also have a bearing on DOF. A wider aperture (smaller fstop), longer zoom and a closer subject will all result in a shallower DOF than a narrower aperture (larger fstop), wider zoom and focusing on something quite far away. If you would like more specific information, you could try out this depth of field calculator (many thanks to Jim of dpreview's Minolta Forum for supplying the link). Remember that the actual focal length range of the Ax zoom is 7.2mm - 52.8mm, not the commonly used 28mm - 200mm equivalent when compared with 35mm cameras.
That's your decision. It depends on a number of things, such as the subject you are taking, your own personal taste and the effect you want to achieve, also limiting factors such as the amount of light available. The best thing to do is to practise with different settings and decide which you like best. Try keeping your camera in "Aperture-Priority" mode and see how you get on. If you practise, then over time as your experience grows it will become easier to instinctively know what will work best in order to obtain the image which you see in your mind's eye.
Of course you can, if you want! Lots of people do just that. However, an understanding of what aperture and shutter speed do will help you understand why a particular image has not turned out how you envisaged it and, if you do choose to experiment with settings, it will ultimately help you to improve your photography and get even better results.
Also, bear in mind that if you use "P" mode and let your camera make all the decisions for you, your camera will use programmed "average settings" for the sort of scene it thinks you want to take. Sometimes cameras can get it wrong - it might be "fooled" into getting the amount of light required wrong, for example, or it might focus on the wrong thing. Or it might only "notice" the tree right in front of you, and not "realise" you want to get the landscape behind the tree in focus as well. If you control at least some of these decisions yourself, you are more likely to get the image you want and gain a better understanding of your photography. Your brain is a far better decision-making tool than a camera's processor. Below is an example of the same picture taken with aperture f3.5 on the left and aperture f11 on the right.


If you want to expose a bit more or less in AUTO, P, A or S exposure modes, you can dial in some exposure compensation. To do that, simply press the exposure compensation button on the back of the camera and use the front control dial to increase or decrease the exposure compensation to expose a bit more or less than the standard amount the camera would normally choose. In A and S exposure modes, as also explained in the histogram FAQ, you can also set your Ax so that while the front control dial changes the main setting you want to control (aperture for A mode and shutter speed for S mode), you can assign the rear control dial to change the exposure compensation in the camera's 4th setup menu (spanner menu). As you alter the exposure compensation, you will be able to see that the opposite parameter will change. For example, in A mode, changing the exposure compensation will change the shutter speed to match. That provides pseudo-manual functionality even in A and S exposure modes (within the +/- 2Ev limits of exposure compensation) and is another example of how the Ax offers a lot of scope for each user to customise the camera's operation.
Also, note that the control dials can be used in AUTO, P, A and S exposure modes to vary the shutter-aperture combination while keeping the exposure constant to provide good control over DOF and movement. For A and S exposure modes, all you need to do is turn the control dials (unless you have configured the rear control dial for exposure compensation as described in the previous paragraph). That works even if you have already locked exposure with the AEL button. For AUTO and P exposure modes, you first need to press the shutter release button half way or use the AEL button to lock the initial shutter-aperture values. You can then turn the control dials to change the aperture-shutter combination (this is called the program shift function). Note that the aperture and shutter values can only change within the limitations of the camera's range of values. That means that, for example, you will not be able to go higher than f11 for aperture even if you make the shutter time longer than needed for a good exposure at f11.
Finally, you might want to consider using the histogram to help with setting exposure as explained in the histogram FAQ.
Here are a couple more links that provide a simple look at what shutter and aperture do and could be a useful starting point if you need further information:
Did we get a catchy title or what? ;o) The Minolta Ax both have Anti-Shake (AS) technology and this really helps with getting nice handheld shots at longer shutter times. But with a little bit more effort and some simple ideas, you can make AS even more effective, or simply be able to take longer shutter time shots without AS support at all. You should obviously use any kind of support available to stabilize yourself, but if there is none available the best thing to do is to apply some relaxation techniques. Here are a few suggestions that have been presented by Chris on the www.dpreview.com MTF. Do not keep your arms clamped in tight to your chest cavity or your heartbeat will cause problems. Do not keep you arms held out or you will not be fully relaxed. The key is to just let your arms rest against your chest. This way, there is enough flesh to take up the movement of the heartbeat. Any tense muscles anywhere in the body will detract from the stability. Total relaxation and natural balance is the ideal.
The next thing to master is relaxation and breathing. Anyone here who meditates
will get this very quickly. As you exhale, the body relaxes. Use this to get a
steady shot. Exhale gently and effortlessly about two thirds of the way and
then gently hold what is left of the lungful. Take your shot just as it all
gets warm, comfortable, stable and relaxed.
Lastly and very importantly is the follow through. When you hear the shutter
release, don't react by allowing your hold to relax or change. Consider that
the shot goes on for at least 1 1/2 to 2 seconds after the shutter closes.
Anyone who uses a bow will tell you how important this is.
Another suggestion directly from the world of archery is to use balancing
weight: many people have reported better long shutter performance when using
the battery grip. Others report good results by mounting a small table tripod to the
bottom of the the Ax and then resting it against their body.
Just to give you a frame of reference, using these techniques several people reported usable shots to up to 0.5 seconds, and even 1 second with some additional support. Here is a 1 second shot taken without tripod and without remote release.

Try it, and you'll be surprised how much difference a little relaxation can make. Not now: there are more topics to read on this page!
The Ax is able to take macro photographs. Macro simply means the camera can focus relatively close to the subject. The Ax lens must be at wide angle (28mm) or telephoto (200mm). Macro mode is then engaged by sliding the Macro switch forward on the left side of the lens. The ranges of focus distances are described in the manual, but needless to say they are somewhat closer in macro mode than they are in standard mode. Telephoto macro enables the user to magnify subjects quite a lot. However, be aware that the combination of the long zoom and being close to the subject makes for quite a small DOF and it might be best to choose a small aperture (large fstop) if possible to avoid the DOF being even smaller than it needs to be. Depending on the available light, a small aperture might be easier to accommodate if the flash is used so that the shutter speed does not have to be too low.
M. Plonsky suggests a method for focusing that can work well with handheld shots, eg of insects. He suggests using manual focus with a fixed focus distance and moving the camera back and forth while looking at the LCD monitor to see when the focus looks right, then shooting like crazy! The tilting LCD can be very useful for this kind of work, especially when subjects are low. The EVF can also be useful for judging when the focus is about right if you can access the EVF while you are framing/shooting.
Additional lenses or close-up lenses (CULs - also known as diopters) can be added to increase the magnification and reduce the focus distance. They also tend to reduce the DOF, which can become very small. A reversed 50mm lens with very wide aperture, eg f1.2, can be used with a coupling ring to provide extreme closeups; the DOF with this option can be miniscule (see M. Plonsky's excellent insect macro site for lots of good information). CULs are the cheaper option and provide a rating from +1 to +10 to indicate the strength of their effect (note that +4 or +10 does not mean 4X or 10X). These lenses can be stacked for an increased combined effect, but the image quality can suffer. When stacking CULs, most sources state that the more powerful CUL should be placed closer to the camera. An exception would be if stacking in that order will bring the glass surfaces of adjacent lenses in contact with each other. Another exception may be when the thread size of the stronger CUL is larger. A narrower aperture (larger fstop) is a good idea not only to stop DOF getting ridiculously small, but also to keep the light entering the camera lens coming more through the centre part of the CUL where the image is less degraded.
You can see Hoya +4 and +10 CULs in John down under's Lenses and Filters gallery.
You can see some samples of the magnification of A1 macros with and without CULs in John down under's Macros gallery.
Some people report that they cannot use the inbuilt flash for telephoto macros, but it seems to work quite well for others if it is diffused with a proper diffuser or a makeshift one like some facial tissue, a cut-off table tennis ball or a flashgun diffuser over the flash, or even a nylon kitchen cutting board or translucent plastic cut to fit around the front of the lens. P-TTL or manual flash control is then the best control to use to compensate for the reduced flash intensity from being diffused. The Rolls Royce solution for macro flash photography is to use a dedicated macro ring flash that is compatible with your camera. However, macro ring flashes are specialist items and are not cheap, so it may be worthwhile exploring other options.
You can see the cheap but effective homemade diffuser that John down under uses in his Macros gallery.
This shot was taken at f8 using the A1 inbuilt flash with tissue to act as a diffuser. This crop has been resized to 50% of its original pixel dimensions:

Here is some more useful Short Courses information on close-up photography.
Creating panoramas is relatively easy with digital cameras. We'll just give some general ideas and a few pointers to specialized resources, and then we'll concentrate on what is the best way to set up your Ax for panoramas. Your digital camera can be easily transformed with panorama into the widest lens that you have ever seen! The basic idea is to stitch together multiple images taken with some overlap. Theoretically the stitching can be done manually, but to correct for optical and lens distortion and for automatic alignment, there are many available software tools that will make your life much easier. If you take panoramas of distant landscapes and similar, things are pretty easy: you can do it without a tripod just by taking care of rotating around the camera while you take the photographs. Imagine you have a string with a weight attached to the camera at the start of the lens barrel and try to keep it stationary while you rotate. In most cases the best way to take panoramic images is to keep the camera in portrait position such that you'll get the most resolution possible in the vertical dimension. But in our opinion a tripod will always give you the best results and it will make your life much easier in the stitching phase. You can use a commercial L-bracket (or build an homemade one) if you plan to use a tripod and take portrait photos. Below you see an example of a very simple and cheap L-Bracket solution: a shelf stainless steel support with a couple of holes, a wingnut and a handle.
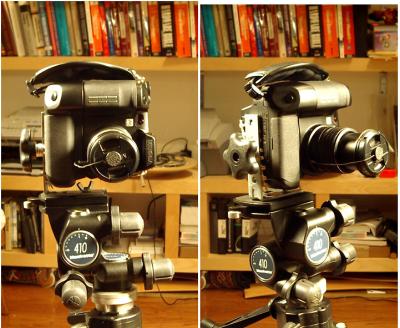
Note that the Ax do not have the tripod mount aligned with the lens (but the battery grip does) but to be honest for distant panoramas it does not really matter that much. The most important thing is to get the tripod leveled because otherwise your horizon will be out of alignment when you start panning. You'll need a level if you want to be precise, or you can use the Ax grid if you are OK with eyeballing it. Things get progressively more difficult as you start doing panoramas with subject close to the camera, of interiors and if you want to stitch multiple rows of images. In this case you need to be concerned with the nodal point of your camera, and use a specialized panoramic head.
In terms of Ax setup, the most important thing is to ensure exposure, focus, aperture and color settings do not change between images. First of all you'll have to consider which part of your panorama is the most challenging in terms of lighting and take the exposure reading from that area before you start. It's critical that you lock the exposure and the white balance. For white balance this means either using a custom white balance or use one of the specific Ax white balance presets: just make sure you do not have AWB activated. To lock the exposure, the most natural way is to use manual, but you could also use the AEL button. Again, the grid is very handy to judge the degree of overlap when you start panning the camera. Another thing that you have to be careful about is focus. You can either decide what you want in focus and not, set it and then switch to manual focus, or you can use AF in each of the shots and just be careful where you are focusing (FlexFocus will probably help you).
Remember that one of the most tricky things for a successful panorama is to visualize the final photograph and not just shoot overlapped frames all around. All the rules of a successful photograph apply here, with a few others. For example, it's generally a good idea to avoid strong horizontal lines close to the camera in your panorama because otherwise a warped distortion will be quite visible. Obviously there can always be the case where you want just that effect, but it's normally the exception.
If you want to see several panoramas taken with the A1 visit the page of one of the authors.
If you want to know more about panoramas the best resources available are:
panoguide (not completely up-to-date but still full of useful information)
We've all been there. :) You've taken your dog to the park and he's running towards you with a frisbee in his mouth -
the perfect opportunity to get a shot of him looking happy. However, when you look at the image on the computer at home,
the trees and field around him are sharp, but he's just a blur. Or you've gone out for the evening and decided to take a
photo of your drunken spouse standing in the fountain in the plaza. But when you look at the image on the computer, the
whole thing's a mess with a series of blobs of light and not much else.
Those are just a couple of examples, but I'm sure you know what I mean.
There are several reasons why a photograph can be blurred. Sometimes more than one reason will apply. The first thing to do
is look at the shutter speed which your camera has used. The Ax saves this information when it takes the photo in a small
file known as "exif data". If you upload your photos to pbase.com or use Dimage Viewer
to view them, then you should easily be able to see the exif data for the shot. Even in PhotoShop Elements 2, you can
choose File > File Info and choose EXIF from the Section dropdown menu. Full versions of PhotoShop and many other
image editing programs will also allow you to see EXIF data. Also see the
resizing and
compressing FAQ for information on preserving EXIF data when you save files.
If the subject taken was not moving and the shutter speed used was below about 1/60sec then it's still possible the camera
has recorded some movement as blur - remember that it's not possible for most people to hold the camera absolutely still
(you have to breathe occasionally for one thing :) ) and so if the shutter speed is slow enough it's possible for your own
movement to be recorded. Obviously there are ways round this problem when using a slow shutter speed, even if you can't use
a tripod. Have a read through of the FAQ on shutter-aperture,
tripods,
AS and
Zen for further information.
Another possibility is that the camera has recorded movement as blur because your subject was moving at the time.
If you are photographing a fast-moving subject, then switching on the "continuous focus" and panning (following the movement
of the subject with the camera) can help. The blur may not necessarily be due to using too slow a shutter
speed; it's also
possible that the subject was moving too quickly for the focusing to lock on. Generally, if the subject is moving at the
speed of a person running, or faster, then if you have used a shutter speed slower than about 1/500sec,
blur is a possibility. There is no hard-and-fast rule about what shutter speed you should use for this
sort of situation because it depends on how fast your subject is moving. Blur because of a fast-moving
subject is unlikely to be prevented by using a tripod or AS. Instead,
you could try to up the shutter speed by selecting a wider aperture (e.g. f2.8) and/or a higher
ISO (e.g. ISO 800). Just bear in mind that there are trade-offs if you need to do this: a
wider aperture will reduce the area in front of and behind your subject which is in focus (the depth of
field or DOF), and use of higher ISOs has been linked to more "noisy"/grainy images. If the subject is blurred
because the focusing has failed to lock on, the only thing you can do (other than slow down your subject ;) )
is try again, or perhaps focus manually to the distance from you where you estimate your subject will
be when you take the shot.
A further possibility is that the camera has had to use a slow shutter speed because there was not much light around.
This can easily be a factor if you are indoors, zooming in on something, or taking a shot at night.
Using the flash might help, but bear in mind that the on-board flash only has a limited range
(see the flash questions for more info). Again, you could try increasing the ISO setting, using a wider aperture,
turning on the AS or using a tripod (see also the "zen" question). Zooming out can also help as this allows
more light through the lens. If all else fails, try under-exposing the shot (this will allow you to
use a faster shutter speed) and "rescuing" it later in post-processing by adjusting the brightness. Bear in mind that
with this technique you may notice an increase in "noise". You could also try shooting in RAW if you decide to
under-expose, as it's easy to adjust the brightness of a RAW file (see also the
RAW FAQ) in post-processing and this will give you
better image quality than a JPEG. Remember also that in very low light, the camera's focusing system will struggle to
lock on and you may need to focus manually. Good luck!
Remember that blur and slow shutter speeds can also be an easy way to achieve special effects, as in this image taken by a passenger in a moving car

Digital images consist of a number of pixels. Each pixel has a colour that includes a brightness. Together the pixels make up an image. The Ax CCD has about 5Mpixels for the A1 (5,000,000 pixels) and 8Mpixels (8,000,000 pixels) for the A2 in the ratio of 4 pixels horizontally for every 3 pixels vertically.
A photo taken with the A1 at full resolution (max pixel dimensions) results in an image that is 2560 pixels wide and 1920 pixels high. You can set the Ax to take photos at lower pixel dimensions if you want to.
When you display a full size photo (eg 2560 x 1920) on your computer monitor, you can either view it at 100% size or some other size. When you view it at 100%, every pixel of your photo shows up as 1 pixel of space on your monitor. If your monitor display is set to say 1280 x 960 pixels and you view your 2560 x 1920 pixel photo at 100%, it is clear that only half the photo height and half the width can fit on your monitor at any one time. In reality , you will see even less as there will be borders, etc in your viewing program that take up some of the monitor's space. To see the whole photo all at once with those monitor settings, you need to view the photo at much less than 100%. If you view the photo at say 25% size, that means 25% of the width and 25% of the height of the original, or 640 x 480 pixels, which can easily fit in a viewing window on your monitor. Viewing at a size smaller than 100% does not reduce the number of pixels in the image, just the number that you see on the monitor at that time. If the image is only needed for viewing on a monitor, another option for full viewing on a monitor is to resize the photo dimensions in pixels as explained in the FAQ on resizing and compressing. You can choose a new size that allows you to view the whole image on your monitor all at once at 100% viewing size, eg 800x600 pixels.
The bigger the number of pixels for any given image, the bigger the file size will be for the same level of compression (eg JPEG compression to save as a JPEG). You can create a smaller file size by reducing the image's pixel dimensions and/or compressing the file more. Refer to the FAQ on resizing and compressing. Smaller file sizes are faster to transfer and view and they take up less storage space. In general, it is best to use the smallest file size that will satisfy your requirements.
The image size in inches or cms depends on how many pixels per inch (ppi) or pixels per cm (ppc) you decide to make the image. That can be important when you want to print the image (where it is called dots per inch (dpi)), but does not matter so much for displaying the image on a monitor. Common printing resolutions vary between about 150 and 300 dpi. Also see the FAQ on preparing Ax photos for printing.
Here is a useful Short Course article on pixels and image sizes.
Here is a useful Luminous Landscape link on resolution.
Images with smaller dimensions in pixels may be viewed more readily on a computer monitor and can be stored as smaller files. Files with smaller file sizes take up less storage space and are faster to transfer and view, especially for users of dial-up internet service. In general, it is best to use the smallest dimensions and file size that will satisfy your requirements.
You use a computer program to reduce the size or dimensions of an image in pixels. For example, in PhotoShop Elements 2, you need to use Image > Resize > Image Size and change the dimensions in the boxes to lower values. It is usually best to leave Constrain Proportions checked so that you only have to enter a new size for the width or height, but not both. It is also best to leave Resample Bicubic checked.
So how big should you make your image? That depends on what you want to do with it. You may even want to have more than one version so that you can save the optimal size (with optimal image processing) for each separate requirement, eg posting to the internet, viewing from hard drive on your monitor and printing. One way of avoiding the need to have different versions is to process your image to a point from which you can easily derive each result when you want it. For example, save as a large image with most of its processing done except for the final resizing and sharpening, then open when required and sharpen ready to print, or downsize and sharpen ready for the internet or PC photo album. In general terms:
Whether or not you resize an image, you will probably want to save it at some stage. If you want to save your image as a JPEG, you should generally choose a level of quality or compression to give you the lowest file size that will satisfy your image quality requirements. In PhotoShop Elements 2, choose File > Save As to preserve EXIF data (data about your photo captured at the time the photo was taken) or File > Save for Web if you don't need the EXIF data and want a smaller file. You can then choose the JPEG quality. It is a good idea to enable preview for PSE2 Save As to see what the chosen quality (and resulting JPEG compression) will look like for the compressed image even before it is saved. For viewing on a computer, you should not need to go any higher than 8 (out of a max of 12) for quality in PSE2 Save As and you may well be able to get away with 6 or 7, sometimes even 5, without losing much visible image quality. In PSE2, if preview is selected for Save As, or you are using Save for Web, you can also see a file size estimate for the quality chosen before you save. As you try different qualities, look for visible artifacts in smooth areas adjacent to boundaries and check the detail of textures in the image.
Repeated opening and resaving of JPEGs will reduce the quality of the image each time as there is some loss each time the image is compressed when saving. For that reason, some people prefer to convert their Ax pictures to TIFF initially and do all their processing with TIFF files as that is a lossless format, then convert back to JPEG later for posting to the web. The downside is that TIFF files are much bigger and slower to process than JPEG files and cannot be posted to the web. TIFF files are suitable for printing.
Each pixel of an image has a colour depth described in terms of how many binary bits are needed to describe the different number of colours that pixel can be set to. Common colour depths include 24 bits and 48 bits. 24 bit colour depth is often called 8 bit colour as each of the 3 colour channels red, green and blue (RGB) that make up that pixel is described by an 8 bit value. 8 bits means 256 different values or levels, so 24 bit colour means 256x256x256 or over 16.7 million different colours per pixel. Likewise, 48 bit colour depth is often described as 16 bit colour as the RGB channels can each take on a 16 bit value or over 65,000 different values per colour channel.
24 bit colour is what is displayed on the internet and is sufficient for many people for computer-based editing and viewing applications. Most monitors will not even support 48 bit colour. sRGB colour space is the standard for use on the internet and it only supports a subset of the entire 24 bit colour spectrum. Also see the colour space FAQ. JPEG also only supports 24 bit colour and is the most common format for images on the internet. However, printed images with the right equipment can display much greater colour depth and may produce better results from pictures with more than 24 bit colour depth. Furthermore, post-processing with greater colour depth is also more accurate before reducing to 24 bit colour depth for a final product for monitor or internet and can produce smoother 24 bit images than those processed entirely at 24 bit colour depth, although that difference may not be noticeable to many people under many situations.
Greater colour depth results in larger file sizes and those images can take longer to process. Also, many image editing programs like PhotoShop Elements 2 only process at 24 bit colour depth, so higher colour depth input to those programs is wasted.
MRW and TIFF photos from an Ax are at 36 bit colour depth (12 bits per colour channel). JPEG pictures are 24 bit colour. Users need to decide what they want to do with their images to determine what colour depth to use.
Here is a useful Luminous Landscape article on colour depth and another one from Short Courses on the arithmetic of colour depth.
The colour space defines what range of colours will be available in an image and how they are to be displayed. sRGB is pretty much a universal standard for displaying internet images. sRGB also tends to be the default colour space used by programs when none is specified. Many people are happy to stick with sRGB out of the camera (Ax natural sRGB) and in all processing and output, even for printing. However, sRGB has some limitations when compared to other colour spaces with a wider gamut of colours like AdobeRGB, which may be more suitable for better quality prints. Note that images saved with the AdobeRGB colour profile will look washed out when viewed on the internet as web browsers cannot properly display the range of colours available with AdobeRGB. For posting to the web, it is always best to prepare the final image for posting as sRGB. We will refer you to these references for more information on colour space:
Workflow is simply the sequence of actions you take to process your digital images. If you are doing many of them, it may be important to you to figure out what works best and repeat that process to get the job done. Changing your workflow all the time can really slow down the process and take some of the fun out of the job if you have limited time. First of all, you need some idea of whether you want to avoid post-processing as much as possible and get nice images straight out of the camera. This is important as it will affect your whole workflow and the amount of post-processing you will be doing. That said, even if you have made up your mind on your general approach, workflow is another topic with no simple answer. There are many ways to skin a rabbit!

Before providing some references for you to check, this basic sequence might provide a basis for you to modify to suit your own needs. This list will be aimed more at someone who favours neutral camera settings and wants to post-process to get better images than the in-camera processing can provide on its own:
You can crop the picture to create the desired framing at any stage of the process, but it is better to do it up front to save on computer resources and processing time with a fuller image containing unneeded areas.
Correct perspective. Once again, this can be done at any time, but might be better early to discard parts of the image early on that will not be needed in the end; see the perspective correction FAQ.
Remove noise first before other processing so that you do not enhance any noise that will be present; see the noise FAQ.
Adjust white balance; see the white/color balance FAQ. This could alternatively occur later in the workflow.
Check and adjust levels to 'fill' the histogram range or achieve the desired brightness effect for your image. Some people like to use auto levels, but the results are rarely as good as those that can be obtained from manual levels adjustments. Keep in mind that if you intend applying Local Contrast Enhancement in the next step, that will increase the brightness range of the image, so you will want to ensure you leave enough room at the left and right (dark and bright ends) of the histogram to accommodate some brightness growth in both directions from LCE. If you don't, you may lose detail in the shadows and/or blow highlights at the bright end of the spectrum.
Perform Local Contrast Enhancement. You should not need to use any other contrast adjustment. LCE also saturates colours more, so you probably won't need to boost the colour either. See the Local Contrast Enhancement FAQ.
Adjust levels and/or curves. Curves can provide greater control over different parts of the brightness spectrum for more contrast in some brightness ranges and less in others.
Adjust colour saturation if desired.
Resize your image for its final use as one of the last steps so that you can process with maximum information in the steps up to that point. Resizing might be the last step before final sharpening; see the resizing FAQ.
Sharpen last after producing the image at its final size. There are many ways of sharpening. See the sharpening FAQ, which even provides a method for sharpening that can used at almost any time through the workflow and can be adjusted and even removed at any time.
Here are some references for more workflow and processing ideas:
Luminous Landscape digital workflow primer
Luminous Landscape instant PhotoShop
Luminous Landscape PhotoShop workflow
There are also numerous other processing possibilities that can be added into the workflow. Here are some ideas:
Luminous Landscape blending of high dynamic range images to help overcome the challenge of very dark to very light scenes that exceed the camera's dynamic range (brightness range) capabilities.
Luminous Landscape contrast masking as another way of helping to overcome camera sensor dynamic range (brightness range) limitations.
After your initial level and other tonal adjustments, one simple but very effective post-processing technique you should be aware of is "Local Contrast Enhancement" (a.k.a. defogging). This technique is based on using the Unsharp Mask (or you equivalent in imaging programs other than Photoshop) with a low intensity, very large radius and low threshold. The amount of contrast enhancement that you should apply really depends on the image, but a good starting point is:
Make sure you use this technique before you apply the real final sharpening. As for regular sharpening this is not something you can remove and adjust after it has been applied in regular PhotoShop, so make sure to save a version of your image before applying this or be prepared to use undo or backtrack through your processing history if you want to try something different.
The example below is a rather extreme case where you can see how even very strong haze can be attenuated by this technique. In general the effect is much less dramatic and more just a little boost to the contrast but this example illustrates the technique quite well.
You should also note that this technique saturates the colours more and extends the range of brightness values as well. For that reason, it is best to start with quite a neutral image from your camera (don't set increased contrast and colour saturation in your camera and probably avoid setting hard sharpness in your camera). If your starting image is exposed too much (not a big enough gap at the right of the histogram for brightness to increase), Local Contrast Enhancement might end up blowing the highlights to create white patches where all detail is lost. The same applies to the dark end of the spectrum where shadow detail can equally be lost during LCE. That is something to keep in mind if you adjust levels before using this tool.
Here is one reference for this technique : Luminous Landscape
Sharpening is one of the most talked about post-processing steps in digital photography. The sharpness of an image has pretty much nothing to do with the resolution, but there is a general confusion about these 2 different qualities of a digital image. Much has been written about this topic and we do not really want to repeat it here. The bottom line is that in general for a digital image to "look good" it has to go through a sharpening process; this can happen inside the camera or in a digital post-processing software. Sharpening during post-processing allows for better results, but that may not suit everyone. The amount and type of sharpening also depends on the final medium the image is going to be reproduced on.
Here are several references that do discuss in great details the subject: Luminous Landscape on USM, Petteri's pontifications, Bruce Fraser, ByThom, Ken Bennett. This reference to Luminous Landscape sharpening tricks provides an option to sharpen in a way that can be adjusted or removed later for greater control and flexibility. If you really get serious about sharpening, there are several commercial tools that can be used in conjunction with Photoshop that will give extra flexibility and quality.
Also see the printing FAQ for more links on sharpening for printing, as sharpening requirements for optimal print quality may be more severe than for viewing on a monitor.
When you take a photo, if you point the camera up or down at all instead of keeping it level, then the perspective of vertical objects in particular will become quite noticeable in the photo. We have all seen that if you point the camera higher than level, vertical lines will lean in towards the middle of the frame at the top. Likewise, if you point the camera lower than level, vertical lines will tend to lean out from the middle of the frame at the top. If you would prefer the lines in your image to be vertical instead, many computer programs are available that will let you correct the perspective to 'straighten up' those leaning lines. Choosing perspective correction from your program will give you an outline of your image with some control points that you can drag with the mouse cursor (usually sideways, but can be in other directions to distort the image differently) until the lines are vertical or more to your taste. Note that in order to then have an image with square corners, parts of the image that are outside the vertical margins need to be discarded, unless you don't mind having blank areas around your image instead.
Another factor that normally needs some adjustment is the color balance. You can minimize the amount of correction needed by capturing the image with the most appropriate white balance, but sometimes you may still want to correct your colors in post-processing either for accuracy or just for creative control. For simplicity, I'm assuming you are using one of the versions of Photoshop, but all the concepts map easily to other image processing software. Some people prefer to use the automated tools available in their software, but others will not be satisfied with the results those methods can produce and prefer to retain more control over the process. A good starting point is to set the white point in levels using the Highlight Dropper tool. If the image has a strong color cast, or if you want to significantly alter the tonality of the image, more drastic changes can be done with the Color Balance control.
As for all the post-processing techniques, we'll mainly provide you further links on this subject.
Also refer to workflow links in the basic workflow FAQ.
This one is often a very simple issue, but can be quite annoying. Most of the time, there is nothing at all wrong with the picture itself, but the problem is the way the image is being viewed. The most common cause of jaggies, or that stepped look on diagonal lines when they should really look smooth and straight, is that the image is being viewed at the wrong size.
To avoid or at least lessen the incidence of jaggies, view the image at 100% or at an even fraction or multiple of 100%. Viewing at 100% should provide the best quality result, but 25%, 50% and 200% should also largely avoid the jaggies, certainly when compared with odd sizes like 33.33%, 66.67% or even 150%. If you let a computer program fit a large picture to your screen, you will almost certainly end up with an unfavourable zoom that creates the jaggies. In PhotoShop, Ctrl - and Ctrl + will let you quickly zoom out or in to fixed presets, including 25%, 50%, 100% and 200%.
Some programs are better than others at producing images that are free of jaggies. Anti-aliasing is one approach that can avoid hard, stepped edges. If your software seems to be producing jaggies that show up even when you view your images at 100%, you might want to consider looking for alternative software.
Photo requirements for printing differ in some ways from requirements for preparing a photo for viewing on a monitor, perhaps via the internet. Some of the key differences are:
Also see this Computer-Darkroom information on managing colour when printing in PhotoShop 7 and CS.
In order to post a photo to appear in a message in the Minolta Talk Forum at www.dpreview.com, it is necessary to store the photo as a JPEG file somewhere else on the internet and link that exact location to the point in the message where the photo is to appear. Not all photo hosting sites allow such linking, but some that do include pbase.com, smugmug.com (both paid hosting sites) and photobucket.com (free hosting site with a very usable album storage limit, but not as well-featured as the paid sites). The editors and many other MTF members have chosen PBase for many of their activities. There are also many other suitable photo hosting sites.
As an example of how this works, when photos have been uploaded to photobucket.com and are being displayed in a gallery, each one has a URL in a box underneath it that includes the filename with its .jpg extension. If you select that URL, copy it and paste it into a dpreview message (including the .jpg extension), that picture will appear in the message when you preview or post the message. Likewise, when you are viewing a picture on PBase.com, copy the full URL including the .jpg extension into your dpreview message to see that picture in the message. The picture in the dpreview message preview will be limited to 480 pixels wide, but the picture will be full size in the posted message.
As the dpreview message area is only 480 pixels wide, pictures 480 pixels or less wide will fit into that area without needing to expand, whereas pictures wider than 480 pixels will need to expand to be fully seen. In general, it is best to keep the photo size as small as practicable without losing its value. It should be rare that anyone would need to post a photo to a dpreview thread that is bigger than 800x600. Sizes of 640x480 (exactly 1/4 of the width and height of a full size A1 picture) and 480x360 will often do a good job.
File sizes should also be minimised as much as possible. The smaller the file the quicker it can be viewed and that is important for the benefit of dial-up users in particular, so please spare a thought and be a good dpreview citizen. A rough indication is to try to keep file sizes below 100kB, but larger files may be needed for 800x600 pictures to avoid compromising the viewing quality too much. Also see the resizing and compressing FAQ.
Here are a few tips on posting messages in dpreview.com threads, to add to the tips in the FAQ on posting photos in dpreview messages.
Note that you can click on someone's name against a message or thread to see that person's profile. Not only does that give you some information about the person, but it also lets you see what threads they have taken part in and lets you send an e-mail to that person unless he/she has chosen not to disclose his/her e-mail address.
The Minolta Challenges are friendly competitions that are organized every 2-3 weeks or so by members of the Minolta Talk Forum at www.dpreview.com. Even if you don't have pictures from a Minolta camera, you can still enter pictures in the Exhibition gallery. You can read all the rules here and we look forward to see your submissions in the Challenges galleries!
Short Courses [on Digital Cameras and Digital Photography]
Digital Photography For What It's Worth
This paragraph could be just endless and we do not intend to replace a search in a well stocked library here. We'll simply list some of the books that the authors have read and enjoyed. While we'll focus on a few technical and creative "how-to" books, we pretty much all agree that the most instructive and enjoyable books are actually those presenting the work of other photographers. They can provide great sources of inspiration and help you in forming your personal style.
National Geographic Photography Field Guide 2nd Edition : Secrets to Making Great Pictures by Peter Burian , Bob Caputo , a classic in a convenient format. Updated for digital.
Digital Photographer's Handbook by Tom Ang, a great all around book covering both technical and creative aspects.
The Photoshop Book for Digital Photographers by Scott Kelby, a photographer's view on PhotoShop. Fill of tips and tricks and includes a handy gray card.
Mastering Digital Printing: The Photographer's and Artist's Guide to High-Quality Digital Output by Harald Johnson, everything related to printing, profiling, color calibration.
Digital Photography Expert: Light & Lighting by Michael Freeman, the title says it all.
These FAQ have been created so that users who have had the Ax for a while can share their experiences with people who are thinking about a purchase, or who want to know more about something specific. Remember that although the FAQ have been written to help you, the Editors and the Contributors are volunteers, not photographic experts, and that their opinions may differ from those of other people or may even change over time as their own experience progresses. The opinions of the author of a particular answer may not be the opinion of all contributors or of all of the Editors. We recommend that you do not rely solely on these FAQ for your information but also search the numerous resources available across the Internet for additional information and other opinions. Whilst the Editors and Contributors do all they can to ensure the FAQ are kept up to date as new information becomes available to them, they cannot be held responsible for any consequences suffered by you as the result of using these FAQ, including but not limited to material loss due to delays, omissions, inaccuracies, breach of copyright, down-time or differences of opinion. All material here is Copyright, can be freely used and distributed, but it must not be altered in any way without first obtaining the permission of the Editors. The Editors reserve all rights including the right to refuse to publish a submission in the FAQ and to remove a published submission. Viewing and usage of the FAQ constitutes acceptance of these conditions.
 A1.jpg |
| comment | share |
| flamingtaco | 25-Feb-2010 05:53 | |
| Guest | 15-Jan-2006 23:23 | |