photo sharing and upload picture albums photo forums search pictures popular photos photography help login
Type your message and click Add Comment
It is best to login or register first but you may post as a guest.
Enter an optional name and contact email address. Name
Name Email
help private comment
Kenneth MacDowell | profile | all galleries >> My Paintball Markers >> Non-Cocker Markers >> EVOLUTION OF MY RAINMAKER >> RAINMAKER (step I) tree view | thumbnails | slideshow

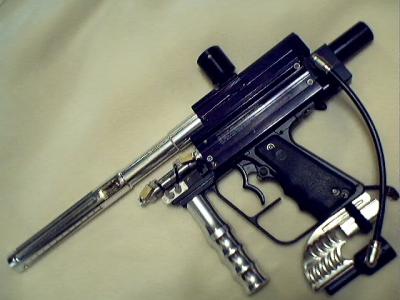
RAINMAKER (step I)

Changes:
-Mac Mount to permently mount the electronic mac valve and to help clean up that lovely mess that comes on a stock rainmaker
-VL fore grip design for an Automag
-Chrome STO autococker drop forward
-Internal set screw trigger travel adjustment
-Aftermarket Autococker stlye Low Pressure Regulator (LPR) to replace and relocate the factory LPR.
-Relocation of the 9 volt battery to under the grip frame. Originally it was located on the front end and strapped around the ram with velcro, sad brass eagle, very sad.
-Tippmann split grips
BE Rainmaker
BE Rainmaker
BE Rainmaker
BE Rainmaker
Mac Mount (homemade)
Mac Mount  (homemade)
Mac Mount (homemade)
BE rainmaker (battery relocation)