You are asking yourself why another photo of that pistol. Well, here is the rest of the story. The first time I took it out to the range the scope shot loose in about 15 rounds, I took it back home, took it apart and carefully reassembled it. Back out at the range it again shot loose in about 20 shots. That is not good.
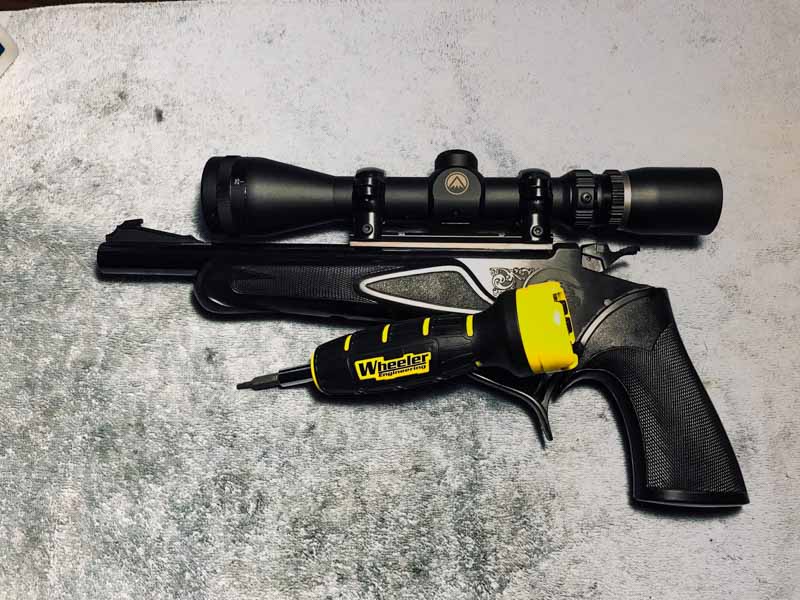
So I started looking around on the internet and found all sorts of interesting solutions. They ranged from pure crazy to quite sensible. When you get right down to it, the screws aren't holding. There could be several reasons for that including oil/dirt and improper torque. The former is easily handled with what I have, but I had no way to measure torque values. A quick trip to ebay found a torque screwdriver manufactured by Wheeler that is used by many gunsmiths. I have a big torque wrench out at the hangar that we use for bolts and spark plugs. The minimum torque you can measure is about 5 foot-pounds which is 60 inch-pounds. Way too much for the screws involved here. This particular torque screwdriver has a range of 15-60 inch-pounds which is just the range needed for gunsmithing work.
The first step was to clean and degrease. I did it carefully this time and found the parts covered in oil and other contamination, especially in the tapped holes on the barrel. Some carb cleaner, acetone and Q-tips are all you need (as well as some patience).
After everything was squeaky clean and oil free, the assembly commenced. First step was attaching the mount to the barrel. There are four #6 screws for this and the screwdriver came with a handy chart of maximum torque values. I applied Permatex thread locker to the holes and carefully applied a thin coat of oil to the mating surfaces. A little Permatex on the screws and I put them in place. In the old days (yesterday and before) I would tighten screws with the TLAR method (That Looks About Right). Always paranoid about stripping out a screw, I probably erred on the low side of the spec. When tightening screws it is good to do them gradually in some sequence so they all tighten up at the same rate. I limbered up the torque screwdriver and went at it. The torque limit for these screws according to the screwdriver manual is 18-20 inch-pounds. Looking around at other specs, I found that there was no hard and fast thing to refer to. Lots of data of all kinds of metallurgies. The sight base manufacturer recommended 25 inch-pounds. I decided to set the screwdriver for 18 and started tightening. Keeping up the sequence, I got them all to 18 in about five steps each. I found that 18 felt a lot tighter that I would have guesstimated in the old days. So I felt confident the installation was satisfactory.
The last step in the process is actually mounting the scope. One thing you have to do is make sure that the scope is properly aligned. This involves loosely mounting the scope and looking through it to make sure the reticle is aligned. You can do this with a gun vice and a set of levels, neither of which I have. Or you can do it with your eyesight (which I do have) and be done with it. And so it goes and the project is finished. Can't wait to get out to the range and give it a go. Unfortunately, the weather over the next few days is not looking good. I will just have to wait patiently (yeah right).
|