


|
|
|
|
|
|
| |
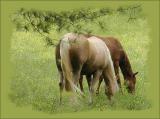
| 09-MAY-2002 | Isabel |
Here's an easy technique you may want to play with.
Open an image.
Open the Layers Palette and double click on the background layer. It will become Layer 0.
Hold down the Control Key and click on the New Layer Icon at the bottom of the Layers Palette.
The new layer will be beneath your original image. You will fill this layer with the color you want for your frame. Make sure this is the active layer when you do the following.
Choose a color. (I used the eyedropper to take a color from the image).
Click on the Fill Tool and click on the picture. It will be filled with that color.
Make the top layer (your picture) active by clicking on it.
Hold down the Alt Key and click on the Layer Mask icon at the bottom of the Layers Palette.
Your screen will now show the color that you filled on the bottom layer.
Choose a big thick brush and paint with white over the screen where you want the image to show.
If something shows that you want to hide, switch back to black.
That's it!
Experiment with different brushes.
The tutorial from which the above directions come was a video on the NAPP website. The author used a set up brushes called "thick heavy". PS CS does not have that set, so I went to natural brushes and tried a few.
Picture copyrighted by author - May not be used without permission