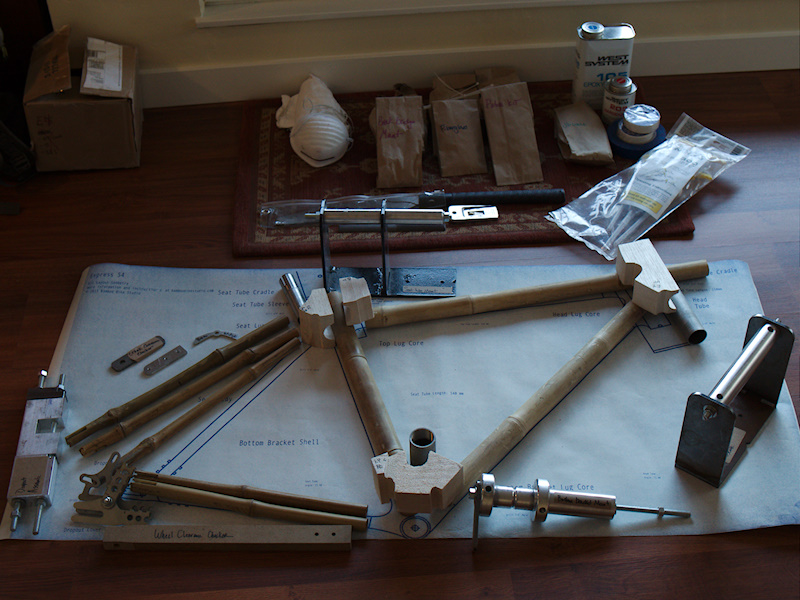
12-JAN-2013
81122944.jpg
The kit contents all laid out on the custom frame plan. Nearly everything needed is included, save for some wrenches, gloves, power drill etc.
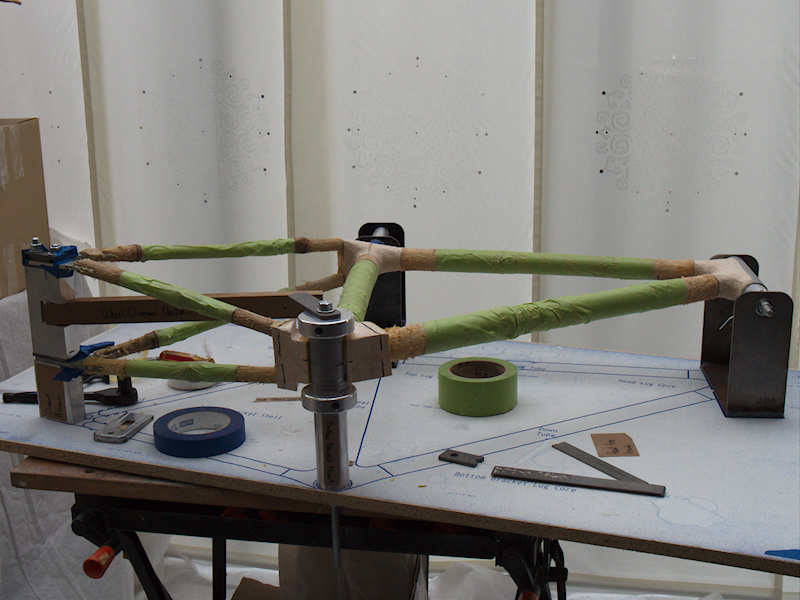
19-JAN-2013
81192946.jpg
Day 1: jig setup on a 2'x4' flat board (fiberboard from local hardware store). Balsa blocks mounted to jig points using epoxy to become frame lug cores. Bamboo cut to length, then roughed according the BBS's video instructions. Bamboo is then tacked inplace on the balsa core lugs, again using an epoxy adhesive. Seat post sleeve is also permanently epoxied into the pre-bored bamboo seat post. I used a high quality West Sytstem G-Flex epoxy with high density filler rather than the JB Weld included in the kit.
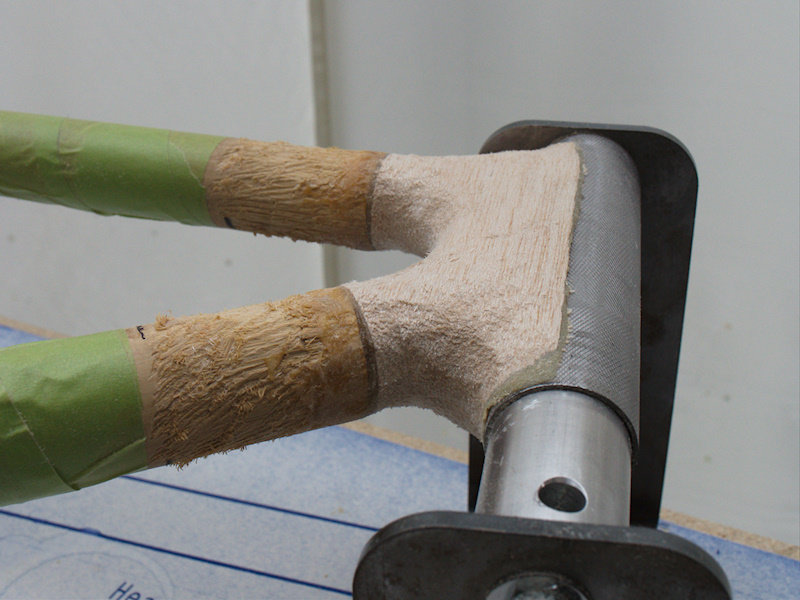
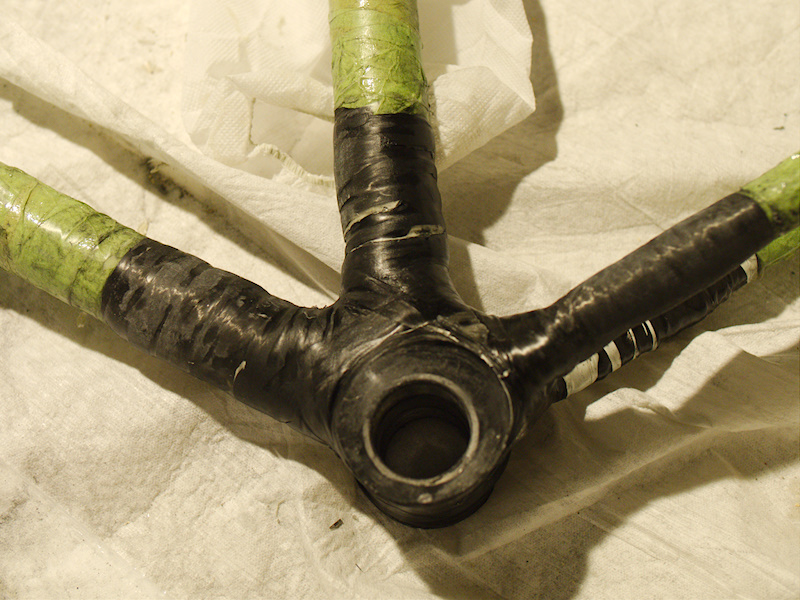
19-JAN-2013
81192947.jpg
Day 2:
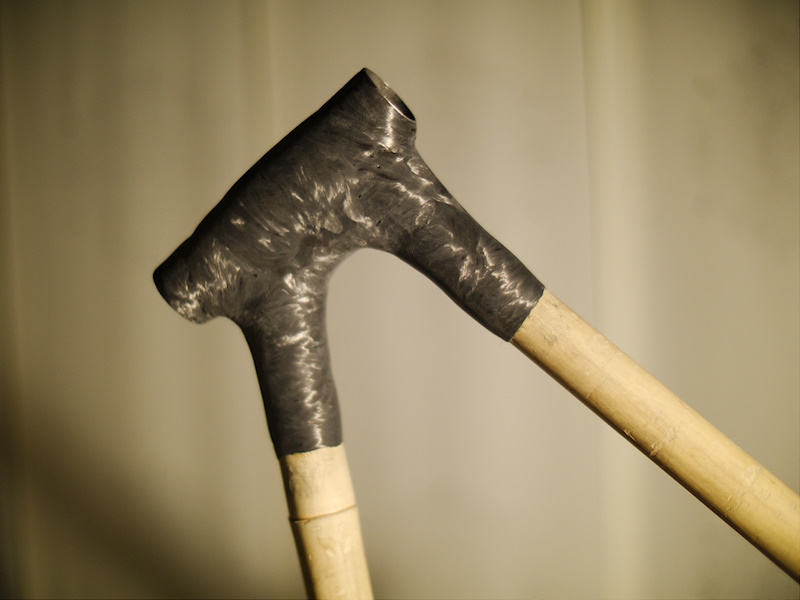
Head tube balsa lug core after shaping. Goal is to make smooth transitions from the bamboo tubes to the steel head tube. Fiberglass will first be applied to these joints before the frame can be lifted from the jig, remounted vertically prior to carbon wrapping. Note the roughed bamboo end...with lots of exposed fibers to enhance bonding strength. There is a definite technique needed with the pull saw to achieve this...I practised on a spare section of bamboo. According to BBS website, you should aim to complete epoxy bonding within 48 hours of perfoming this roughing to reduce drying out of the fibers...which reduces bonding strength.
19-JAN-2013
81192948.jpg
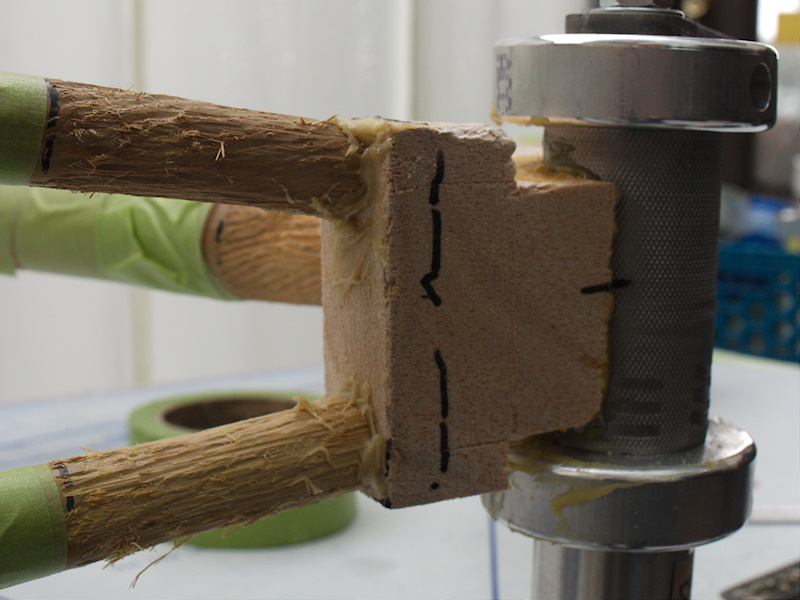
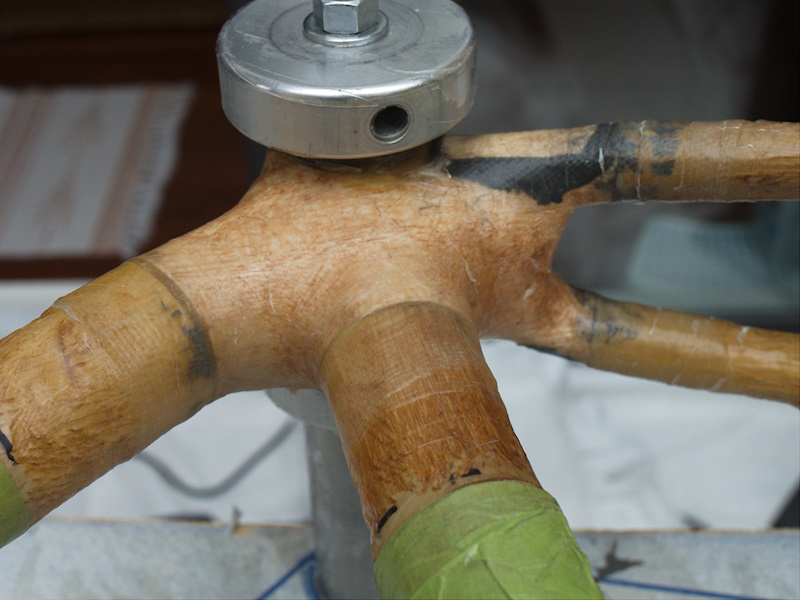
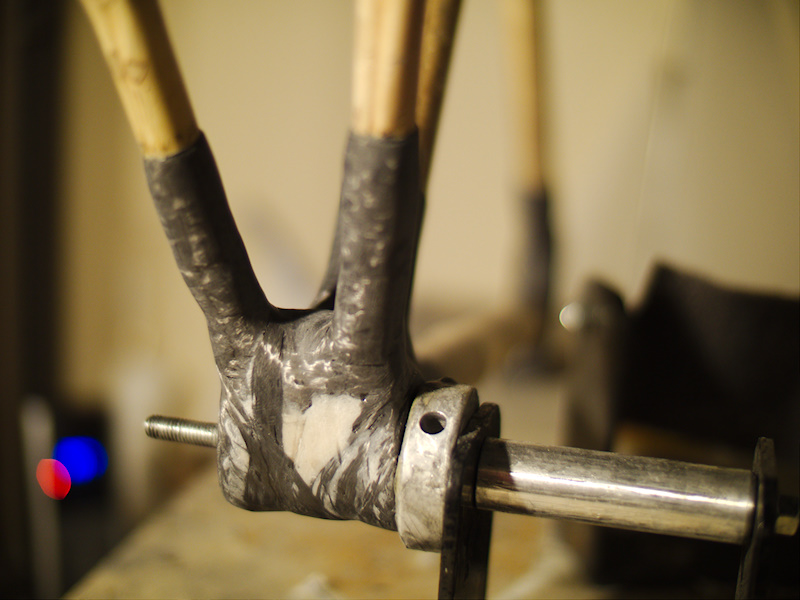
Bottom bracket balsa lug core prior to shaping with the included file. The frame tubes are tacked to the core "landing pads" and marker lines indicate the first areas to file down...forming 1 cm rasied pads filed circular & flush with the bamboo ends.
19-JAN-2013
81192949.jpg
Seat lug core nears completion of filing...still needs area between the seat stays faired out.
19-JAN-2013
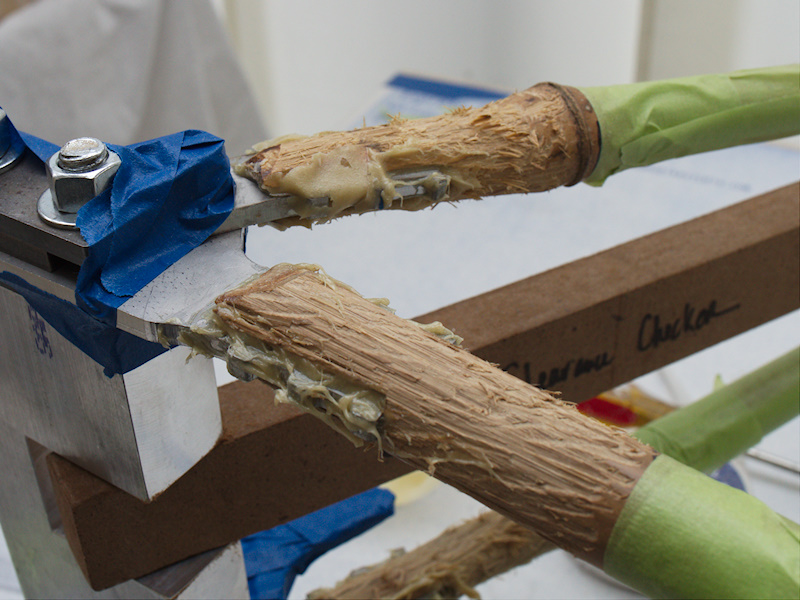
81192950.jpg
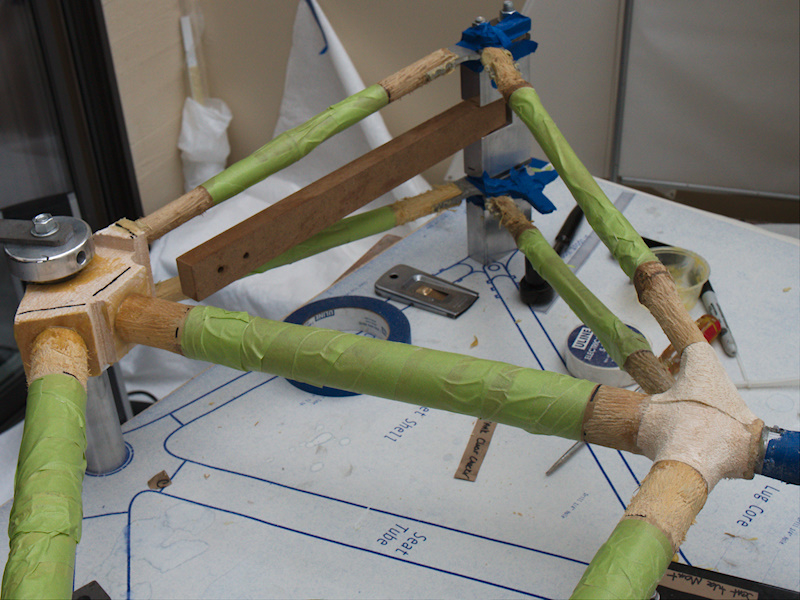
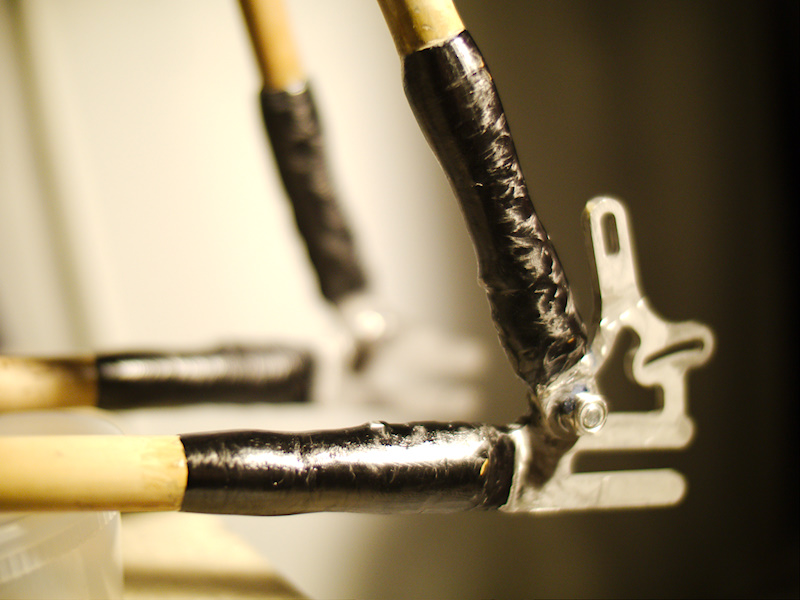
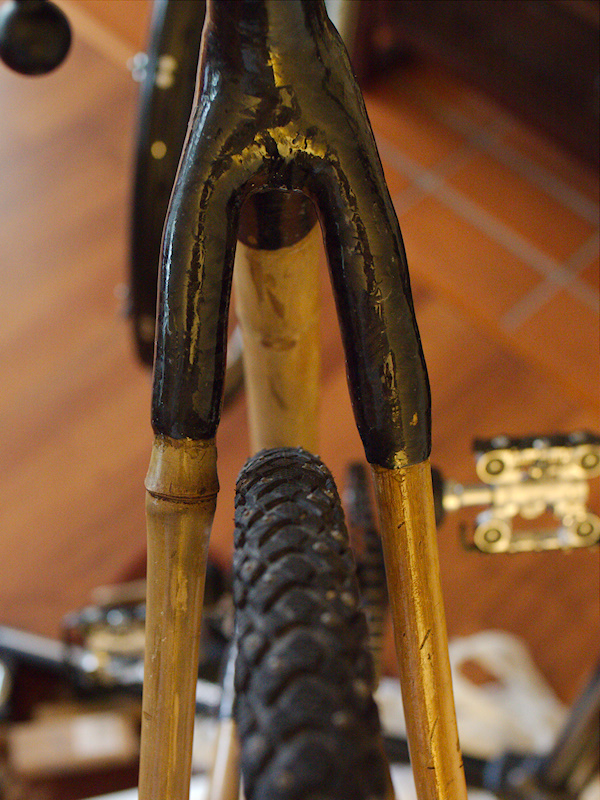
Rear dropout brackets supported at the maximum 130mm spacing of the jig. Bamboo Seat Stays & Chain Stays epoxied to the dropout connection points. Note the Wheel Clearance Checker arm between the stays.
19-JAN-2013
81192952.jpg
Bottom Bracket lug core from below prior to fairing. Marks indicate landing pad fairing zone (1cm deep circular & flush to each stay). A mark is also indicating approximate centerline of bottom bracket.
I used a high quality G-Flex epoxy (4-7 hrs set time) thickened with a high density adhesive filler...although kit comes with 5-minute JB Kwik for this work. In hindsight I would go with a faster curing epoxy next time...as I basically lost most of a day waiting for it to set. None of these bonds (except seat post sleeve) are structural at this point...all strength comes from glass & carbon work later.
19-JAN-2013
81192956.jpg
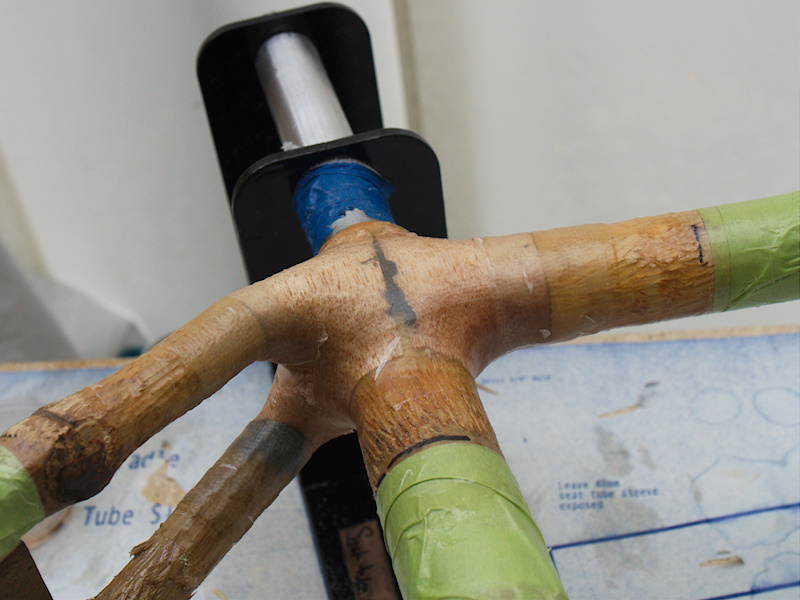
View of the rear triangle area. Note the wheel clearance checker now positioned between chain stays.
20-JAN-2013
81202960.jpg
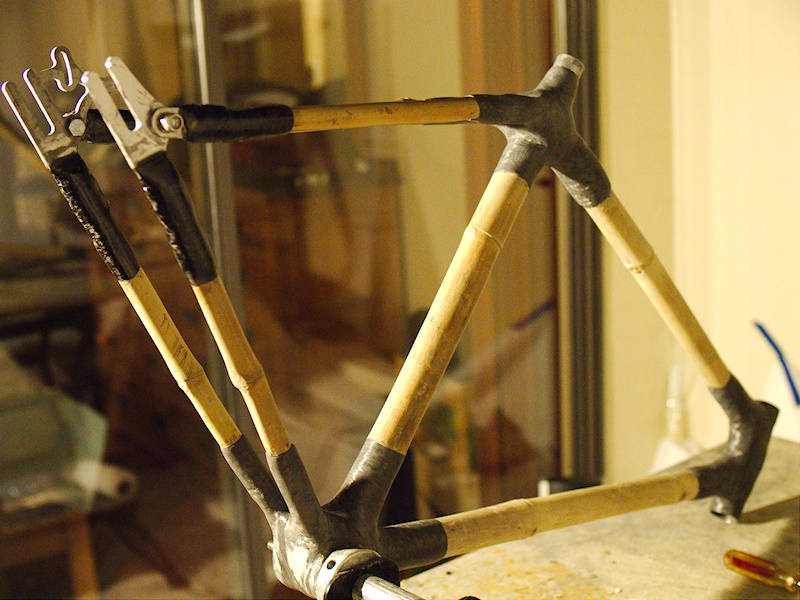
Day 3:
Bottom Bracket faired & glassed, ready for carbon wrapping. I followed the BBS instructional video recommended glassing steps for all the lugs. It worked out pretty well.
20-JAN-2013
81202961.jpg
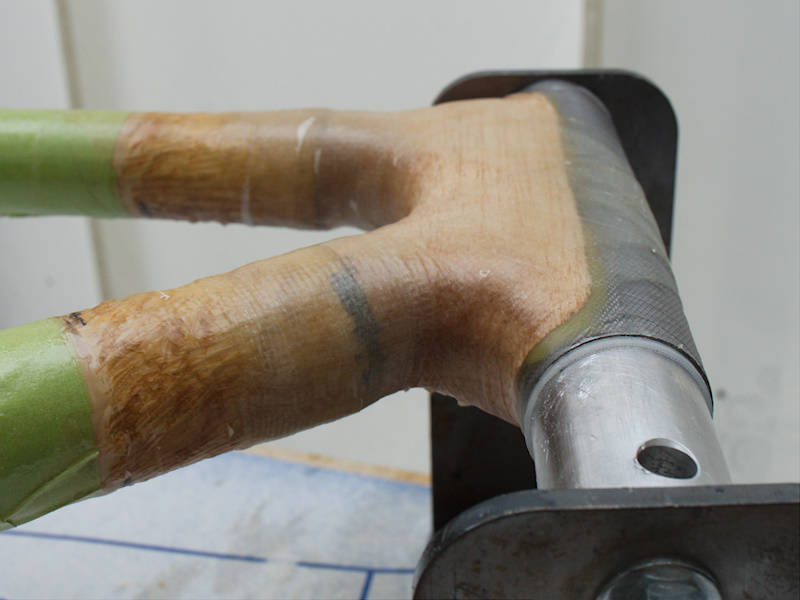
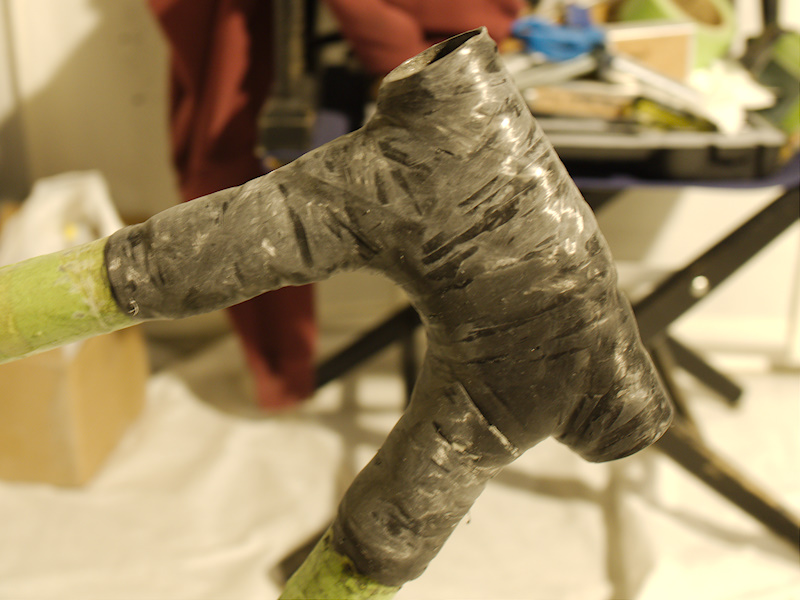
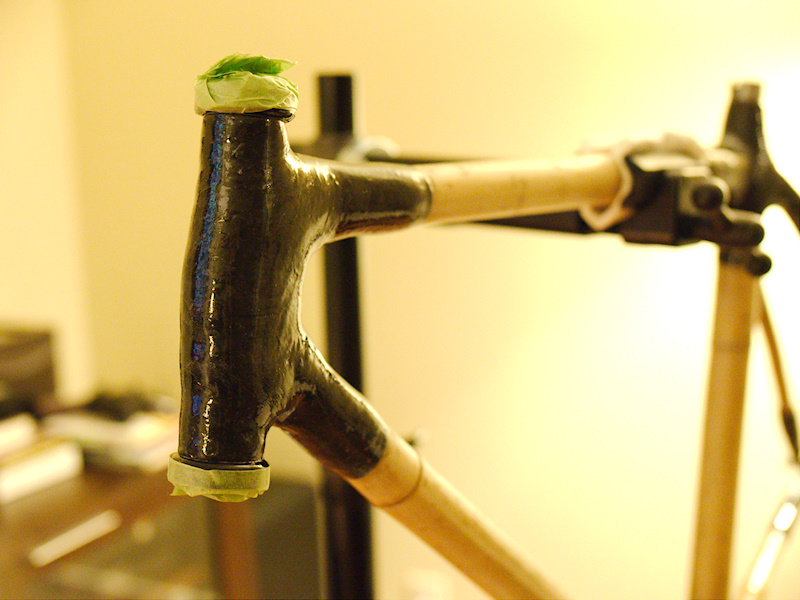
Head tube lug core faired & glassed.
20-JAN-2013
81202962.jpg
Seat lug core faired & glassed.
20-JAN-2013
81202965.jpg
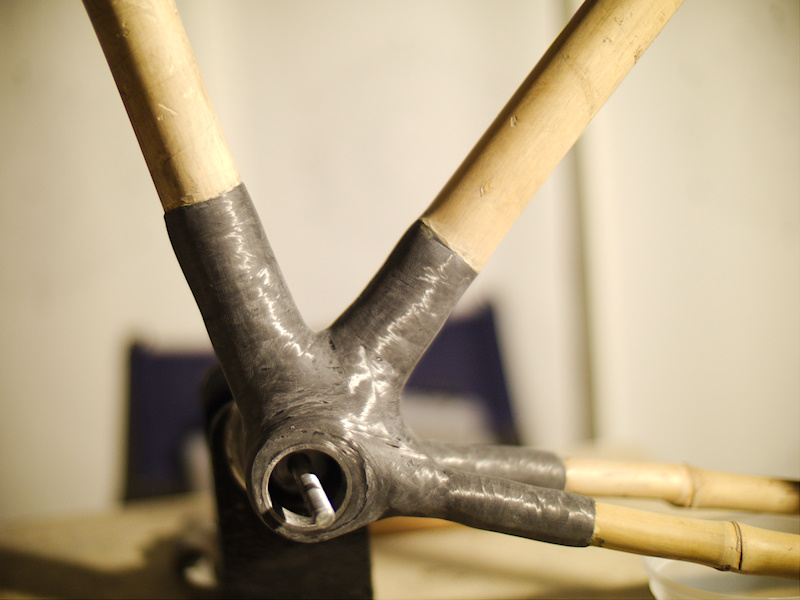
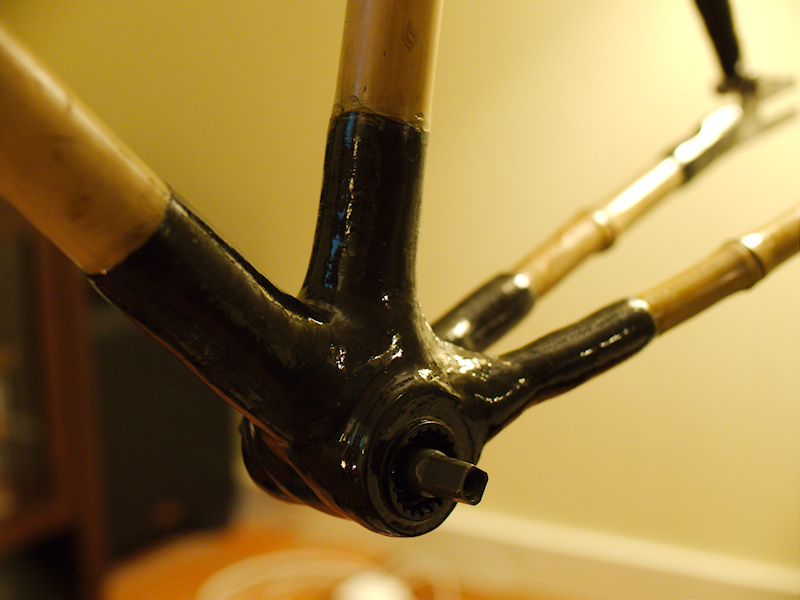
Bottom Bracket faired & glassed. After all the glass work is completed, the frame is strong enough to support its own weight and is removed from the jig. After re-configuring the jig, the frame is mounted vertically, spupported from the bottom bracket and rear dropout. This allows for better access for rough filing/sanding the glass work and then for the carbon wrapping phase.
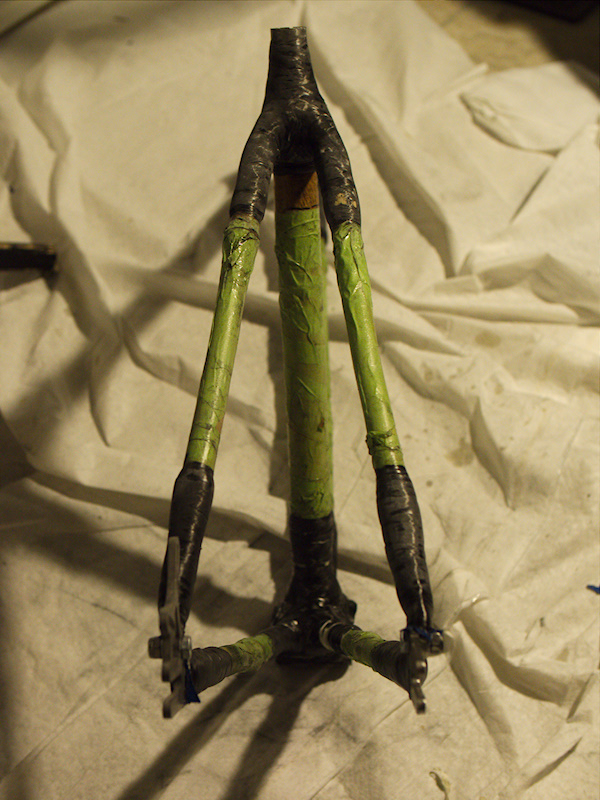
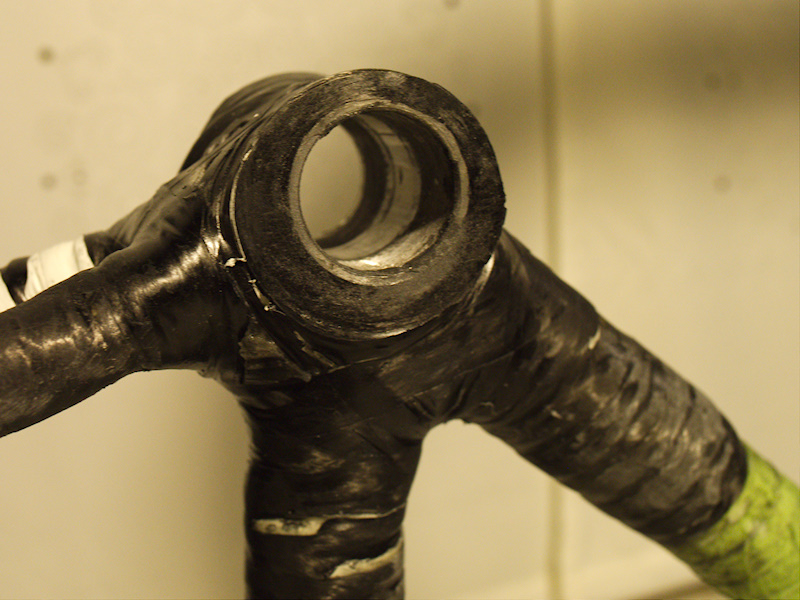
21-JAN-2013
81212971.jpg
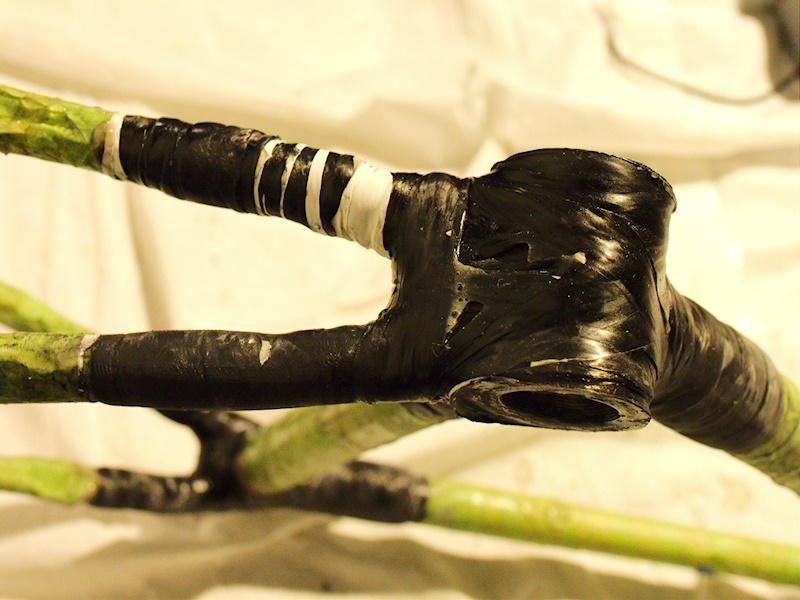
Day 4: Carbon Wrapping Completed
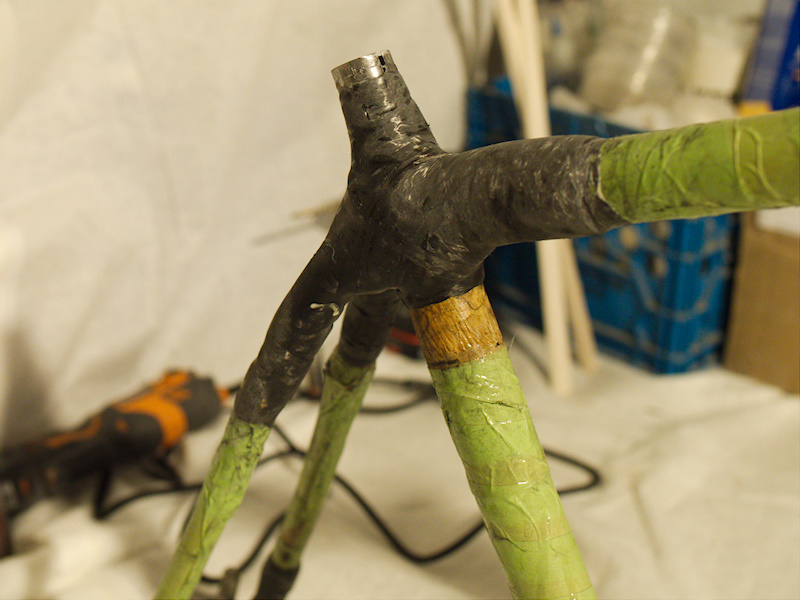
Head tube lug after initial filing/sanding. Recommend a power detail sander for this work. Knocking down the ridges is important to reduce stress risers that can lead to cracks. Though the surface now looks grey, it will go dark black after a finish coat of polyurethane is applied.
I followed the BBS recommend carbon wrapping procedure as best I could, but it was my first experience using carbon tow and hand layup. The wrapping sequence is fairly complex so take notes while watching the videos and draw diagrams if needed. I would switch to the slower setting West System epoxy hardener to give more working time...I found I was hurrying too much while doing this work.
21-JAN-2013
81212973.jpg
Seat Lug carbon wrapped and intial sanding completed.
21-JAN-2013
81212974.jpg
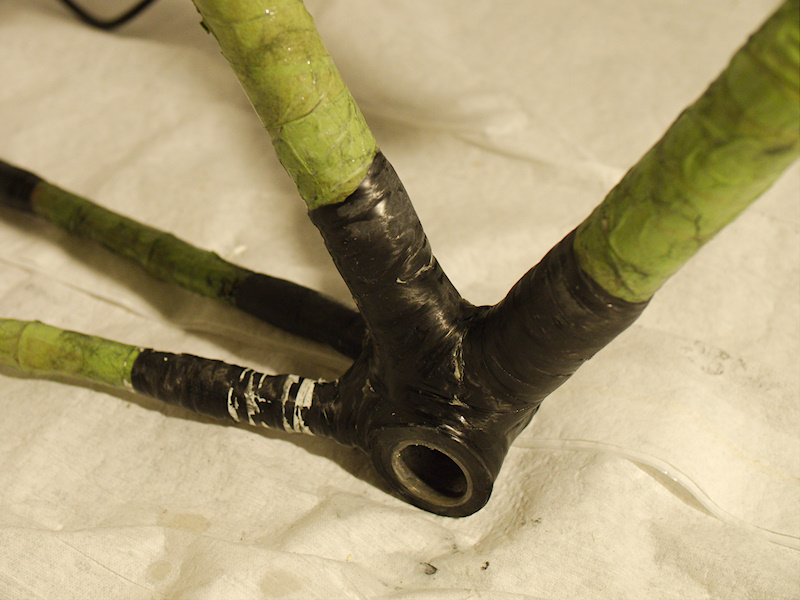
Bottom Bracket lug carbon wrapped and initial sanding underway.
21-JAN-2013
81212979.jpg
Rear view of frame. The rear jig allows up to 130 mm clearance between dropouts. My Alfine 11 speed internal gear hub requires 135 mm clearance. After discussing with BBS, the recommendation was to add 5 mm spacer (extras in kit) between drops in the jig AFTER re-configuring the jib for vertical mounting. This allows both dropouts to move away centerline 2.5mm...if this spacer is added while the frame is still mounted horizontally, the upper (driveside) dropout will lift up 5 mm away from centerline. Thus the dropouts will no longer be equal distance from centerline.
21-JAN-2013
81212981.jpg
Side view of bottom bracket showing carbon build up around bottom bracket shell.
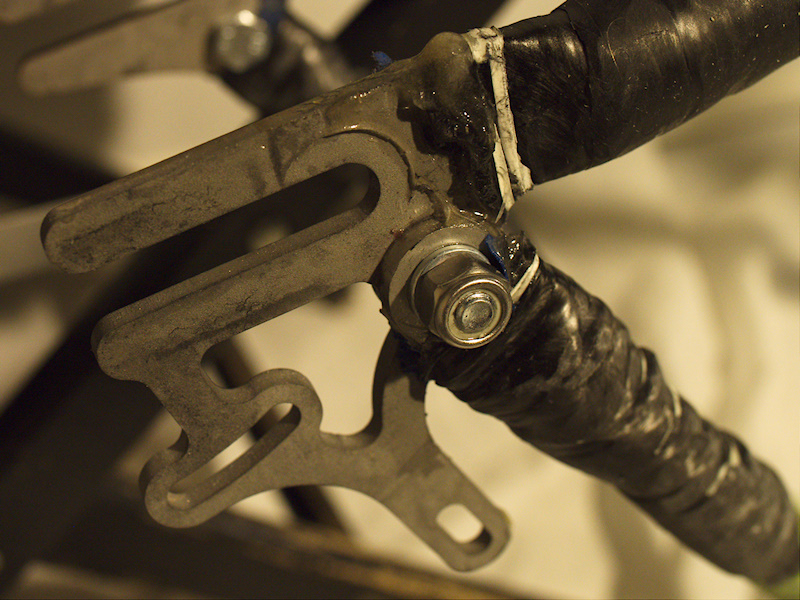
21-JAN-2013
81212985.jpg
Another view of bottom bracket.
21-JAN-2013
81212986.jpg
Rear dropout (non-drive side) showing the disc brake mount points. I will need to figure out how best to add a fitting for a rear bike rack mount & rear fender mount.
21-JAN-2013
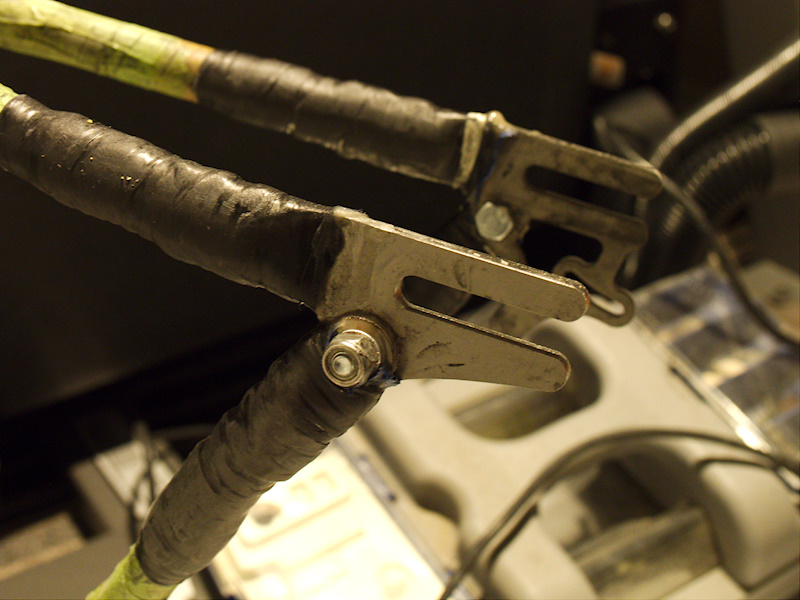
81212987.jpg
Rear Dropout, drive side. With horizontal dropouts, chain or belt tensioning is done by moving the axle fore/aft in the slots. Note that with a belt drive bike, you need a way to open the rear triangle on the drive side to install/remove the belt (no way to remove a link like on a standard chain). The bolt seen here releases the seat stay end from the dropout, so using a belt becomes possible.
21-JAN-2013
81212988.jpg
Underside of bottom bracket showing the carbon wraps. I'll fill the voids with thickened epoxy and fair it down for better asthetics.
28-JAN-2013
81282994.jpg
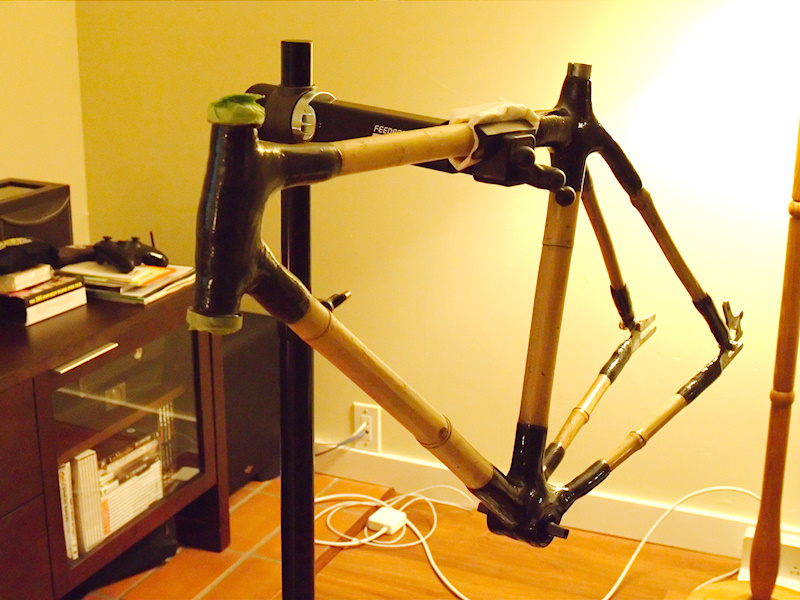
Day 5: Overall frame ready for finishing.
28-JAN-2013
81282990.jpg
Bottom Bracket ready for finishing.
28-JAN-2013
81282991.jpg
Seat Lug ready for finishing.
28-JAN-2013
81282993.jpg
View of bottom bracket lug showing some filled epoxy added to fill in some voids.
28-JAN-2013
81282995.jpg
Head tube lub ready for finishing.
28-JAN-2013
81282992.jpg
Day 6 & 7: Finishing of Lugs & Bamboo Surfaces
First a thin layer of slow-set epoxy was brushed on all carbon areas to create a smooth, hard surface. After thorough curing overnight, surface was lightly scuff sanded to remove any stiple bumps, then a coat of polyurethane was applied to provide UV protection to the epoxy (which will degrade without it). A full 5 coats was applied over a few days to achieve a high-gloss, protective layer.
The bamboo was scuffed with steel wool and then treated with Teak Oil, which is basically a varnish that penetrates into hard wood before curing to water & UV resistant, natural looking finish.
01-FEB-2013
82012996.jpg
Here the 68mm English Threaded Shimano bottom bracket is installed.
01-FEB-2013
82012998.jpg
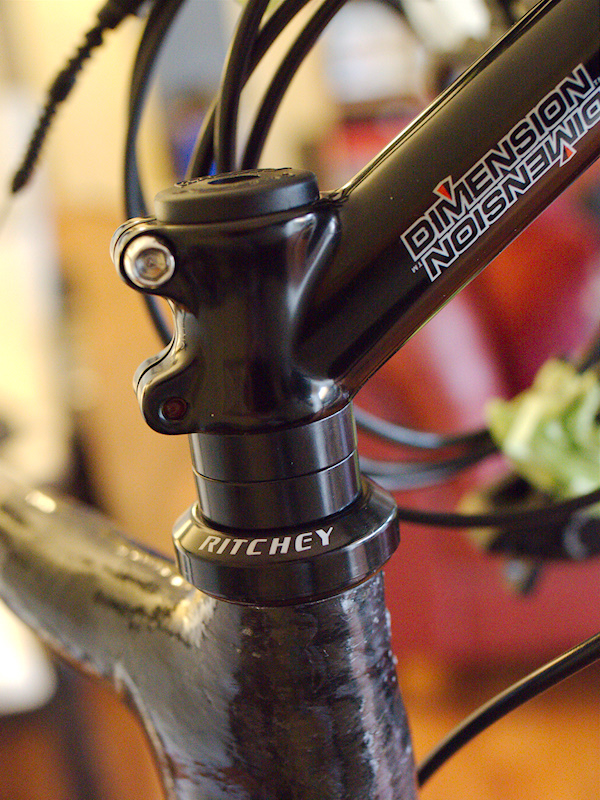
Heatset bearing cups installed. This was done using the 2 large aluminum bottom bracket jig plugs as washers with a threaded rod & nuts to compress the bearing cups into the headset. Shown taped off to keep clean until fork is installed.
01-FEB-2013
82012999.jpg
Frame now ready for rest of components.
03-FEB-2013
82033019.jpg
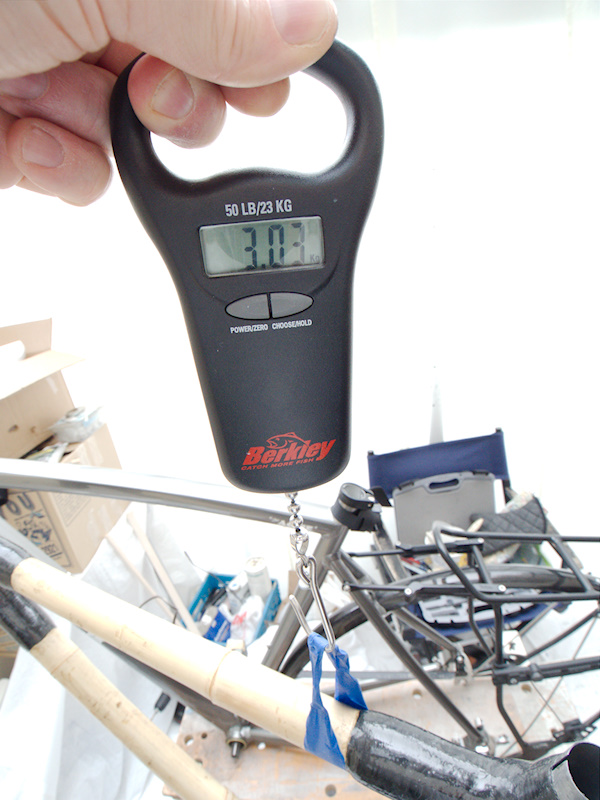
Frame being weighed at about 3 Kg. This compared very closely to my all aluminum Spot Acme frame at 3.5 Kg (with rear pannier rack & fender still installed).
02-FEB-2013
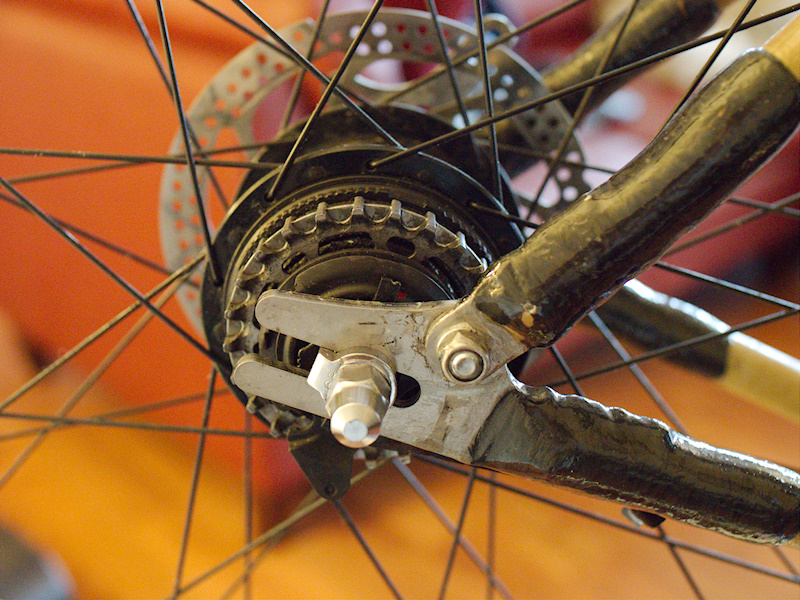
82023003.jpg
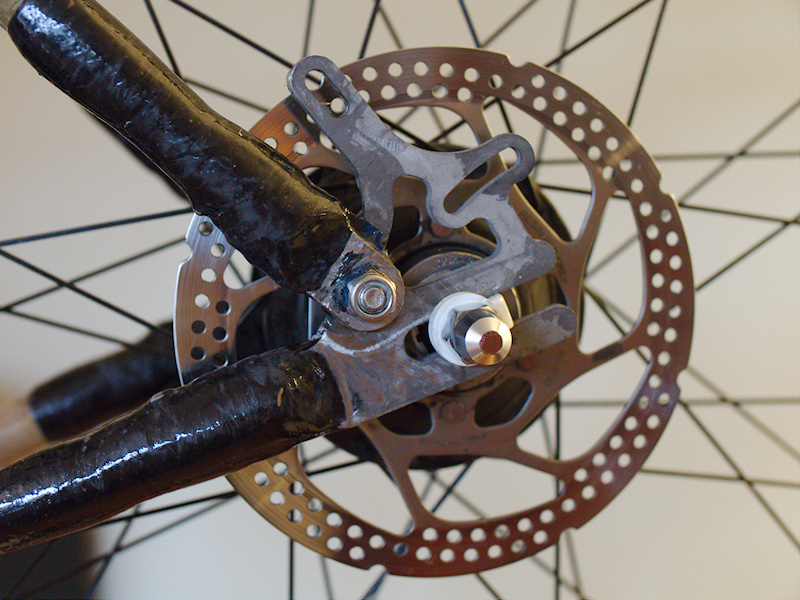
Rear wheel seated in dropouts showing integrated brake disc and disc caliper mounting points. Note the white No Turn washer under the axle nut. This is a specific Shimano part for mounting the internal gear hub in horizontal dropouts. Drive-side uses a chrome coloured No Turn washer.
02-FEB-2013
82023002.jpg
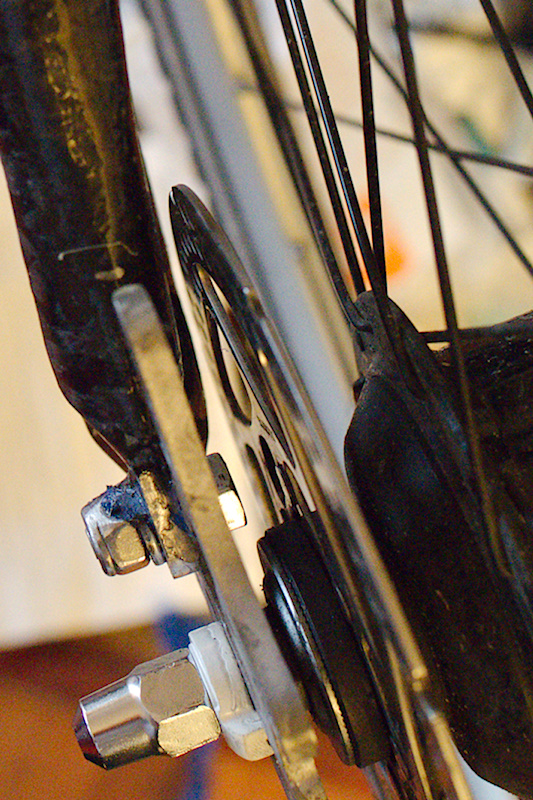
Detail showing rear disc clearance from chainstay. This was a lingering concern during the build process and I was glad to see no mods were needed to clear the stay.
02-FEB-2013
82023005.jpg
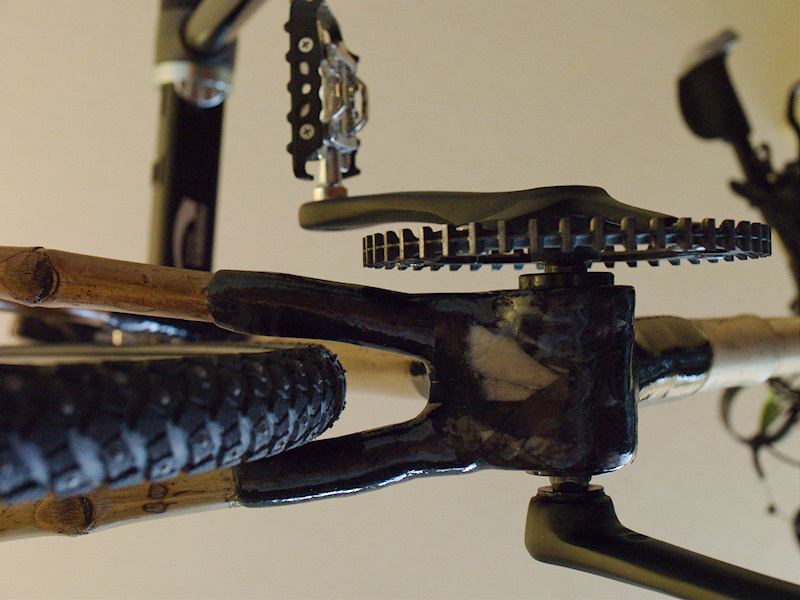
Rear Internal Gear Hub with belt drive cog wheel (24T, for CenterTrak Carbon Belt system)
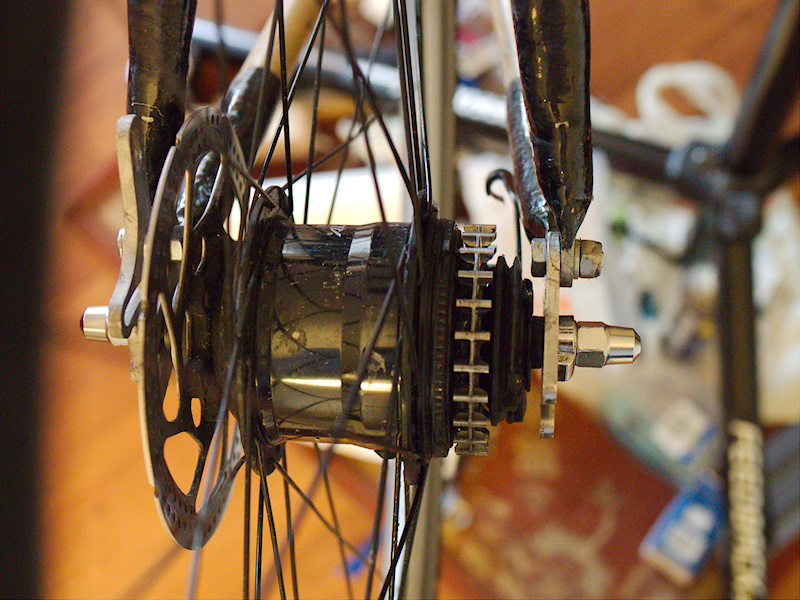
02-FEB-2013
82023004.jpg
Side view of rear hub. Note that the 113T belt off my Spot Brand Acme bike did not fit as this frame has a slightly longer wheel base. After confirming the new frame dimensions, a 118T belt was ordered. Note the chrome No Turn washer. The Seat Stay attachment bolt will need to be undone when fitting the new belt into the frame.
02-FEB-2013
82023007.jpg
Detail view of front crank showing plenty of clearance between crank cog and chainstay. The bottom bracket axle is actually a fair bit longer than the Spot Brand Acme bike, which had quite a bit less clearance to the frame chainstay.
02-FEB-2013
82023014.jpg
Underside view of bottom bracket showing crank & wheel clearances.
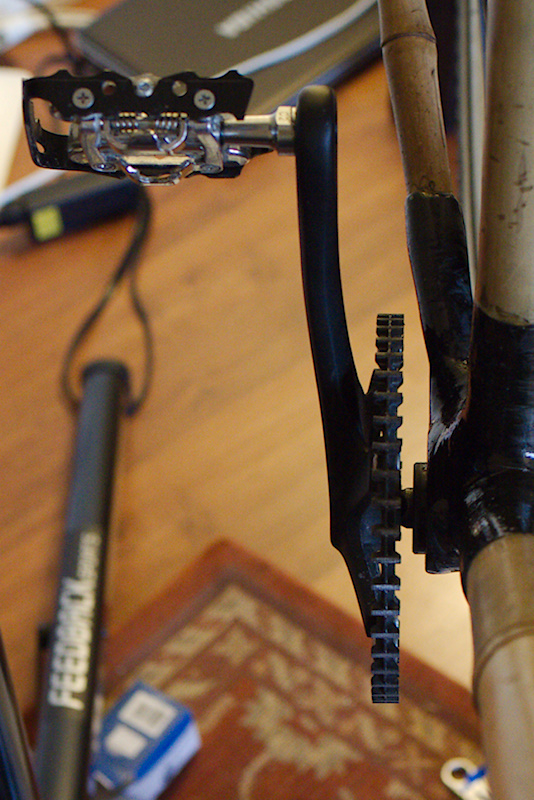
02-FEB-2013
82023012.jpg
Seat Stay top end detail showing wheel clearance. Plenty of room for a fender and rear rack...just need to work out where to place attachment points.
02-FEB-2013
82023001.jpg
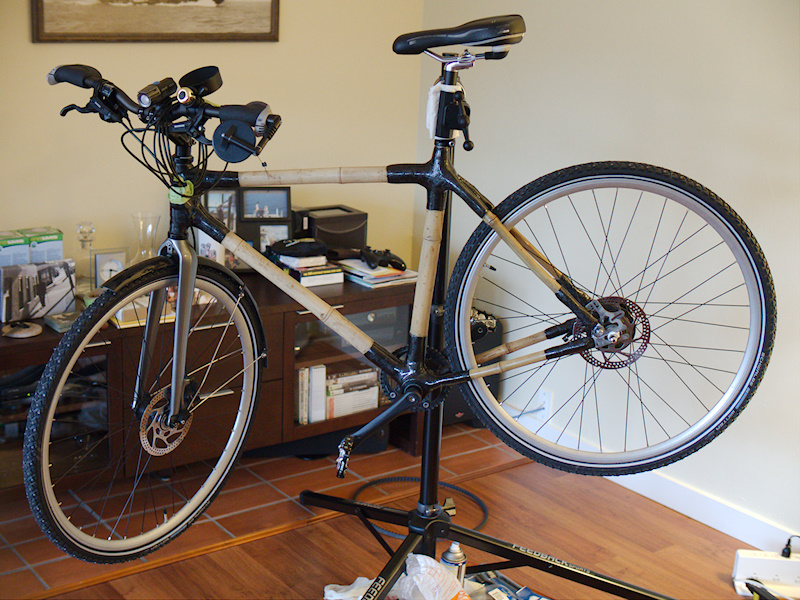
Complete bike awaiting new drive belt and a rear brake caliper adaptor plate.