


|
|
|
|
|
|
| |
| 16-FEB-2007 | |
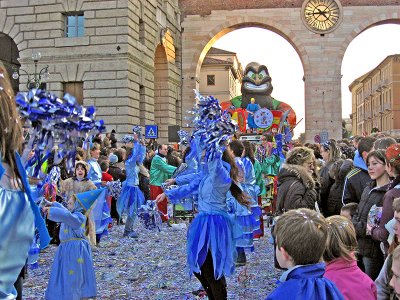
Here I masked the white portions by:
. magic-wanding the white part
. select-inversing it
. select-feather .4 for an 800x600
(might be 5 to 30 for your original)
Then I did a manual Levels move.
In the next pic you see the black-point
sliding lever moving down to 'black' area to include
some currently-gray material in that dark range so
that the darkest-gray then becomes black.
I also moved the white point level marker to get some
other, lighter grays brighter (faces, building surfaces),
but the masking-out of the sky avoids the sky being
affected -- so the sky doesn't get even brighter,
which would not be good.
You can click on the pictures to get the larger images. Also you can
open up a new window for each photo to alternate between them.
On your monitor, your original will tend to look better, but the histogram will show you that
for standard monitor settings, the revised ones will look better to people with standardized settings.
Copyright © 1997++ Andrys Basten. Contact me if you'd like to use a photo.