photo sharing and upload picture albums photo forums search pictures popular photos photography help login
Joao Pedro Assumpcao Bastos | profile | all galleries >> Curiosities and News >> Film: a practical and easy way to "scan" BW film negatives (2022) tree view | thumbnails | slideshow

Film: a practical and easy way to "scan" BW film negatives (2022)

Português:
Na fotografia desde 1975, tenho muitas fotos feitas com filme. Minha preferência é o PB (Preto e Branco). Durante aproximadamente 35 anos, mantive um laboratório químico mas, a partir de 2012, quando mudei de residência, passei a utilizar somente meios computacionais para tratar minhas imagens. Inicialmente, adquiri o excelente scanner Nikon Coolscan V. Porém, o processo de digitalizar um negativo (ou slide) é muito lento (aproximadamente 4 a 5 minutos por foto). Os resultados são excelentes, mas ... nada prático. Atualmente, voltei a utilizar - também - filmes PB cuja revelação é feita por mim. Estou também revisitando meus trabalhos antigos e sinto necessidade de agilidade no tratamento das fotos. O propósito deste folder é mostrar uma maneira de digitalizar filmes, esperando que possa, eventualmente, ser útil a quem consultar essa galeria. É uma sequência de operações muito rápidas. Inicialmente, os negativos são macro-fotografados. Eu utilizo uma câmera Olympus E-M1 Mk II com uma lente macro Zuiko 35mm/3.5. Essa lente pode fazer fotos 1:1, o que em M43 significa fotografar um objeto de 13.5 x 18 mm; portanto perfeitamente adaptável para negativos 24 x 36mm. O autofocus é imediato e pode-se obter fotos onde o grão do filme é facilmente identificado. Assim, se extrai o "máximo" que o filme pode fornecer. Após, os negativos são tratados com o software ACDSee (muito mais prático e "direto" que softwares amplamente utilizados, na minha opinião). Não tenho a pretensão de colocar que essa é a melhor maneira de executar essa tarefa. Outras câmeras e softwares fornecem os mesmos instrumentos e pode-se chegar a resultados semelhantes. Mas, pessoalmente, após tentativas, essa forma de proceder é, para mim, a mais simples, rápida e eficaz.

English:
I started photography in 1975 and I do have a lot of analog pictures. My preference has been BW (Black and White). For approximately 35 years I had a chemical/wet laboratory but, from 2012, when I moved, I - also - moved to digital means for treating my photos. Firstly, I bought the excellent Nikon Coolscan V. However, although the results are very good, it takes about 4 or 5 minutes for a single picture (negative or slide). It is not very practical. Also, recently, I restarted using 35mm BW films (the development is made at home by me). I am revisiting my old photos and, finally, some agility is needed. The goal of this gallery is to present a way for digitizing the film photos, negatives or slides. Hopefully, it may be useful to photographers who deal with the same task. It is a set of fast and easy operations. Initially, the negatives are macro-photographed by an Olympus E-M1 Mk II with the macro lens Zuiko 35mm/3.5. This lens can take 1:1 pictures; for MFT, the dimensions are 13.5 x 18 mm, well adapted to 24 x 36 mm negatives. The (auto) focusing is very fast and precise. The film grain can be easily seen in the resulting photo; it means that we extract the "maximum" of the peliculle. Then, the negative is treated with ACDSee software (much faster and practical than some famous editing softwares largely used, in my opinion). I am not pretending that is the best way to digitize films, since many different cameras and editing tools can perform the same tasks with similar results. But, personally, after some tries this method seems to me, a very fast, practical and efficient.
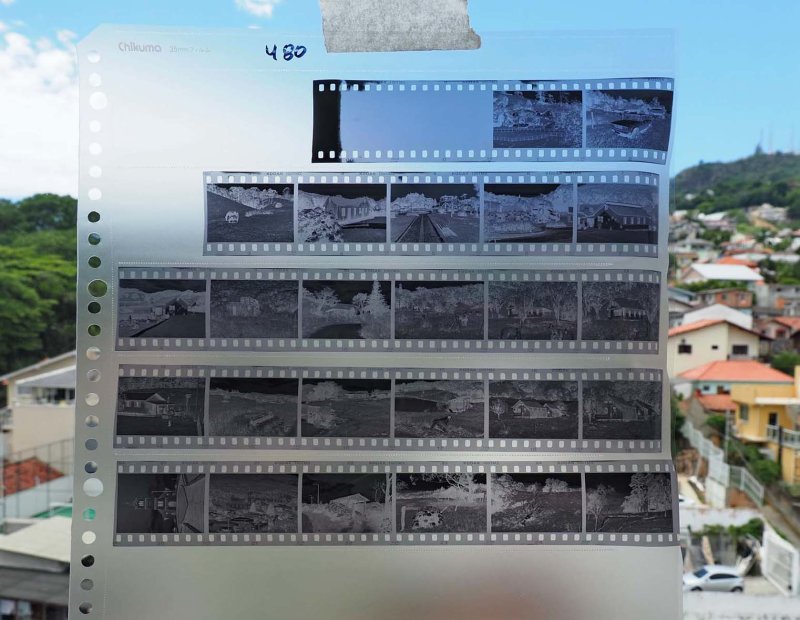
That is a BW film negatives to be transformed in positive images.
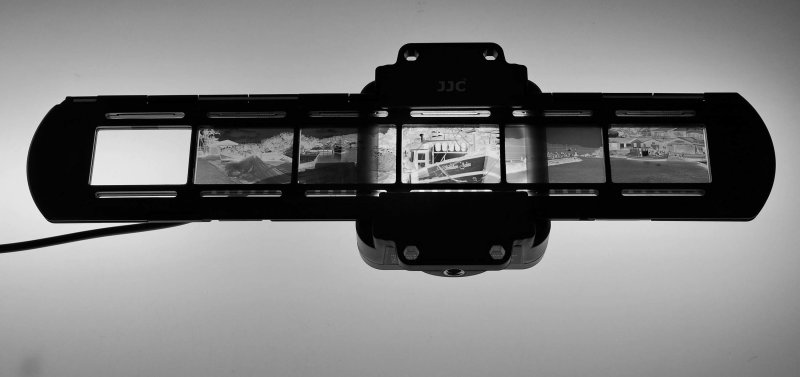
The strip is placed inside a support; a good support yields relatively flat negatives.
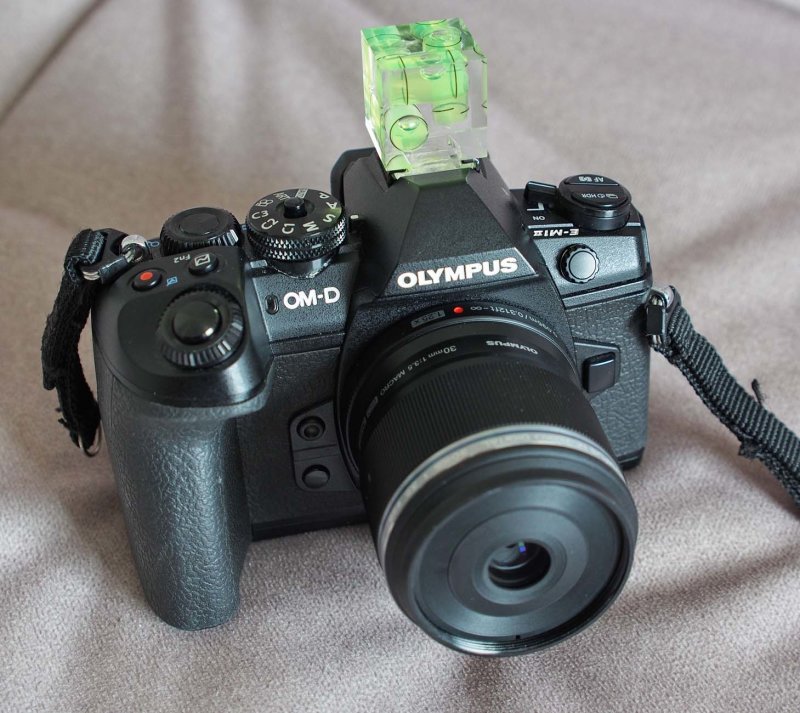
The camera used is an Olympus E-M1 Mk II with a macro Zuiko 30/3.5 lens.
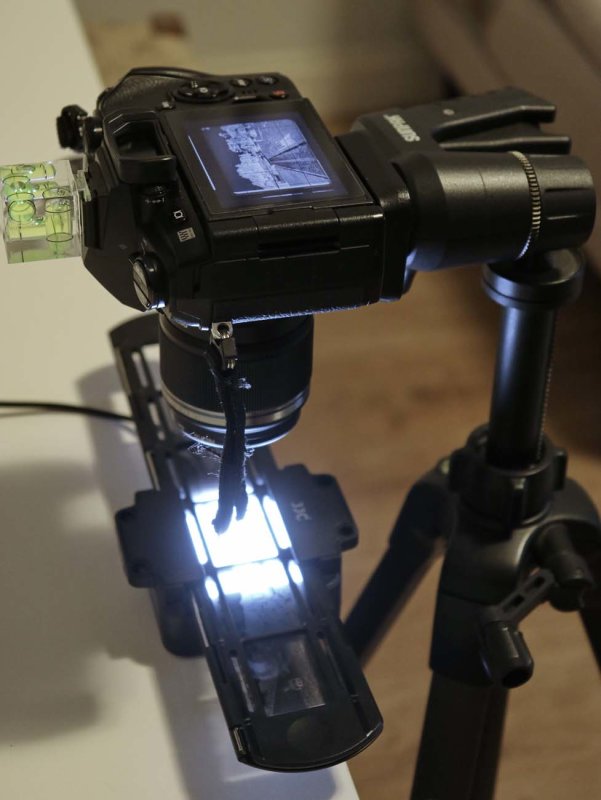
The camera (on a tripod and with a level) is placed over the support; a mirrorless camera is a good and fast tool to do it.
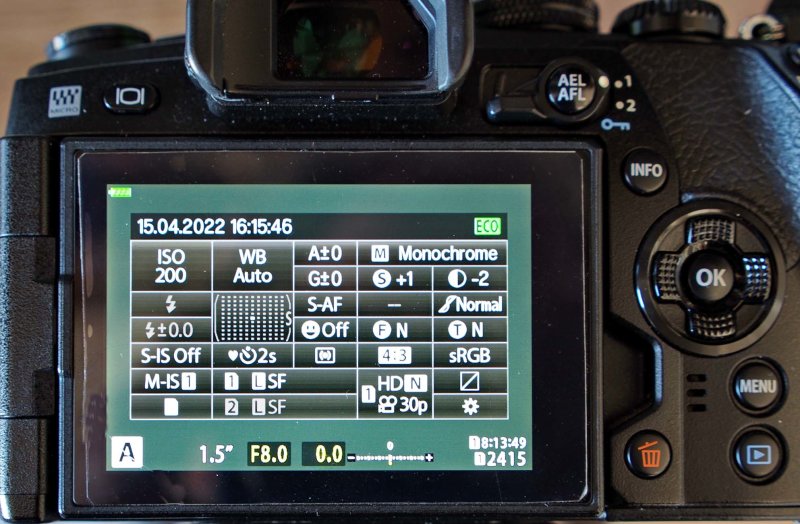
The camera is set with: Monochrome; 2 secondes delay (electronic shutter); the contrast is lowered.
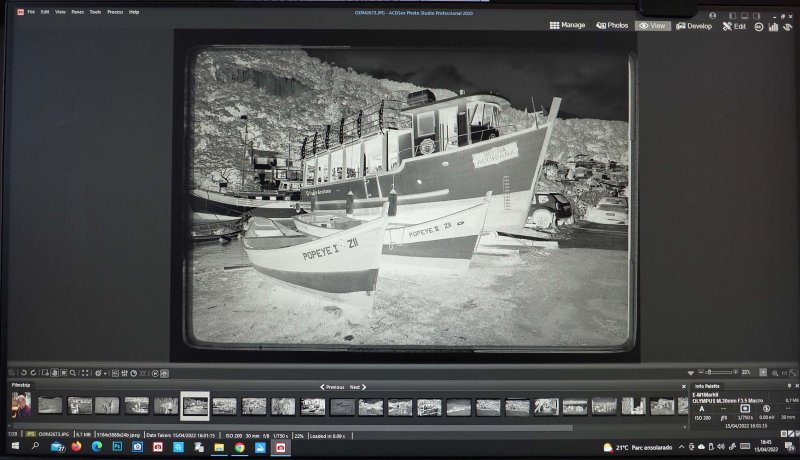
I choose this image with ACDSee.
Clicking on Develop to crop and rotate (if necessary) the frame.
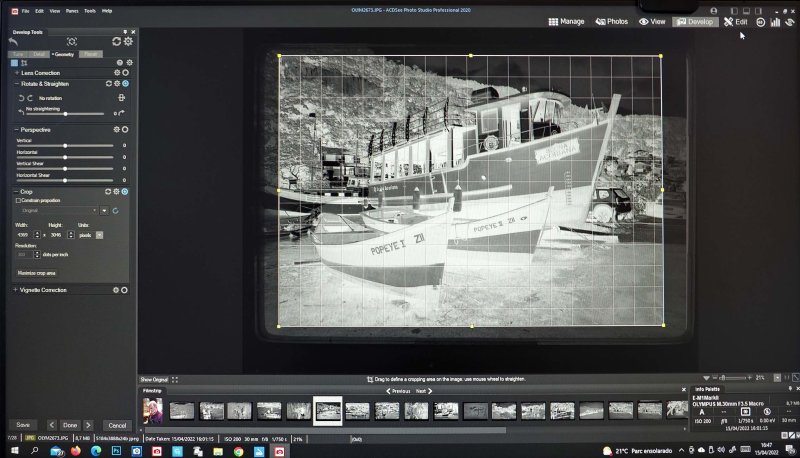
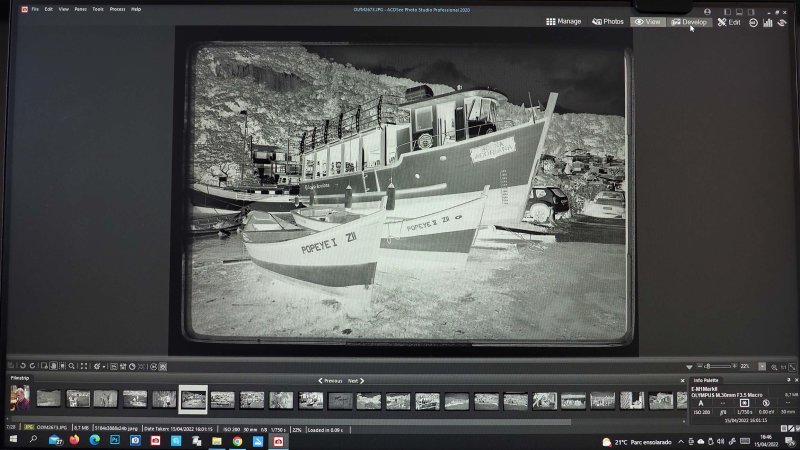
Clicking on "Develop" to crop and rotate (if necessary) the frame.
Clicking on Geometry.
Clicking on "Geometry".
Cropping and rotating (if necessary) in Geometry.
Cropping and rotating (if necessary) in "Geometry".
Typing on Edit for the next steps.
Typing on "Edit" for the next steps.
Click on Auto Levels for imposing a regular amount of contrast (and color when it is the case).
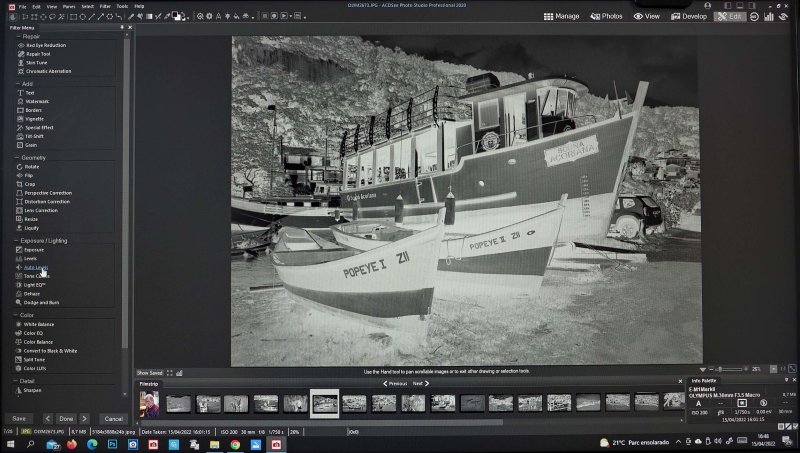
Click on "Auto Levels" for imposing a regular amount of contrast (and color when it is the case).
That is the result; type on Done (below, left) to finish this task.
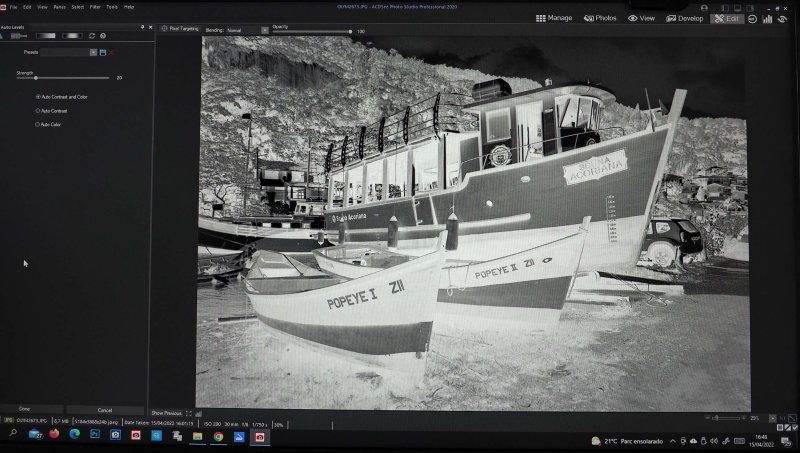
That is the result; type on "Done" (below, left) to finish this task.
Type on Special Effect.
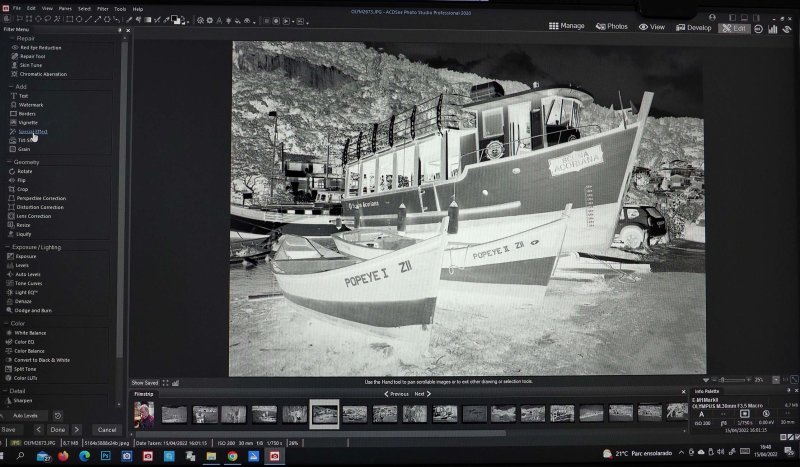
Type on "Special Effect".
Choose Negative for inverting the image.
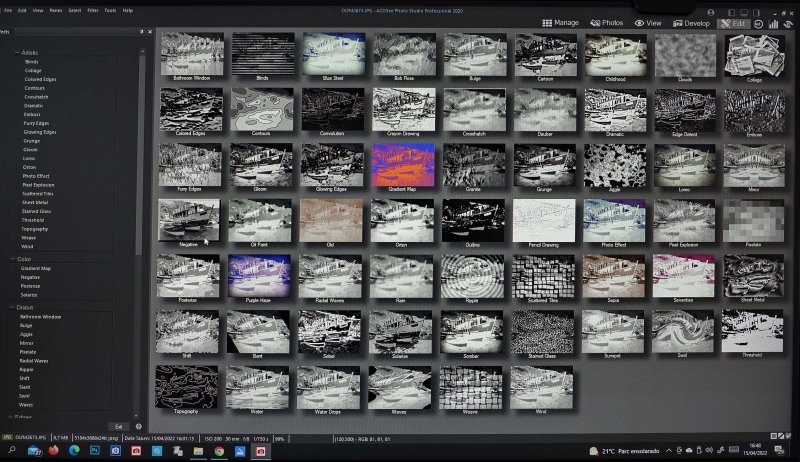
Choose "Negative" for inverting the image.
It is the result; type on Done to conclude this step.
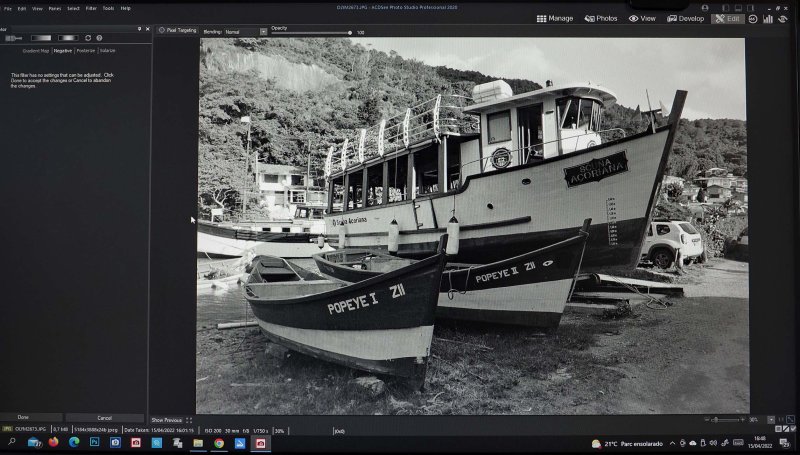
It is the result; type on "Done" to conclude this step.
Typing on Light EQ for adjusting the contrast and brightness.
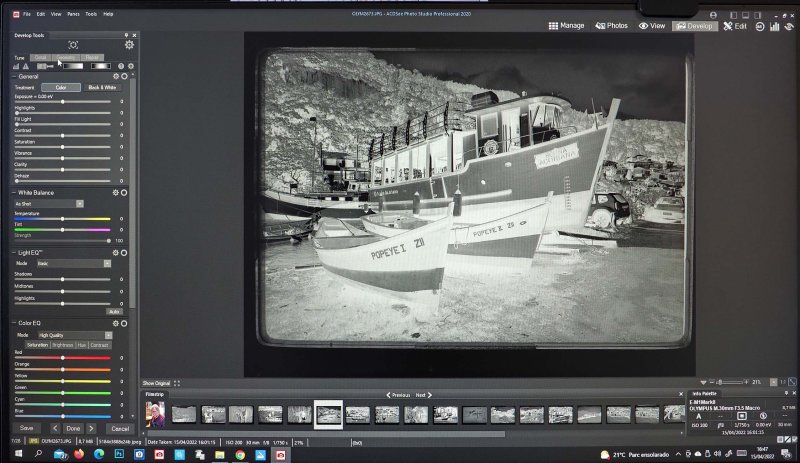
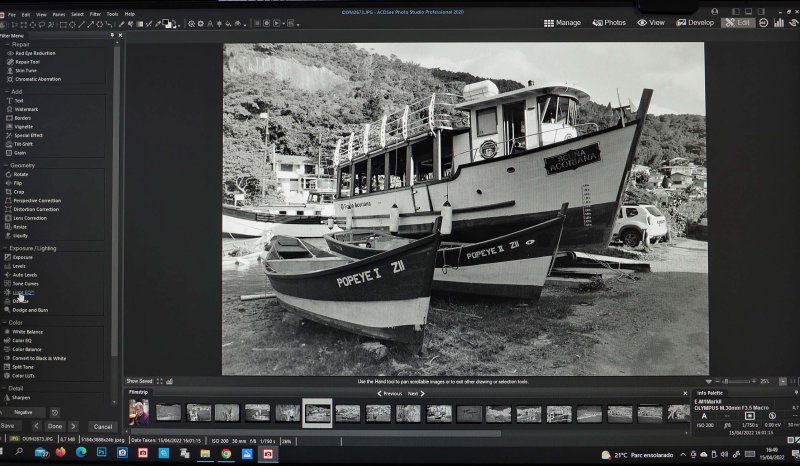
Typing on "Light EQ" for adjusting the contrast and brightness.
Here, it is possible to modify the contrast and brightness.
Often, with old negatives, it is necessary to use Repair Tool to eliminate dust and scracthes.
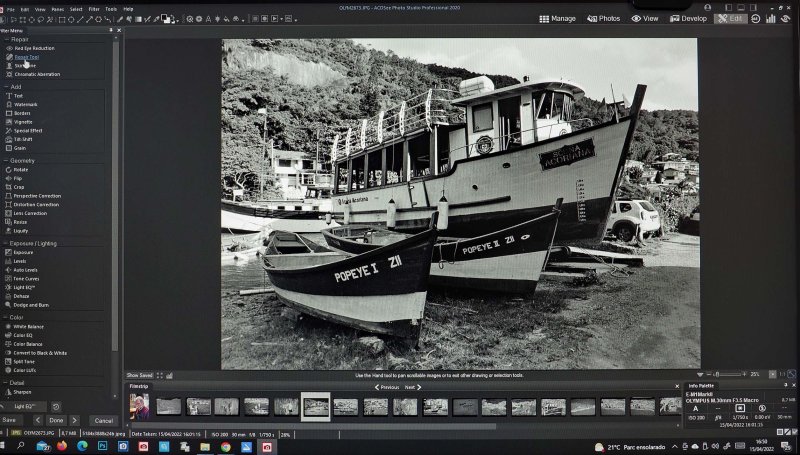
Often, with old negatives, it is necessary to use "Repair Tool" to eliminate dust and scracthes.
Inside Repair Tool, I use Clone to clean dust and scratches.
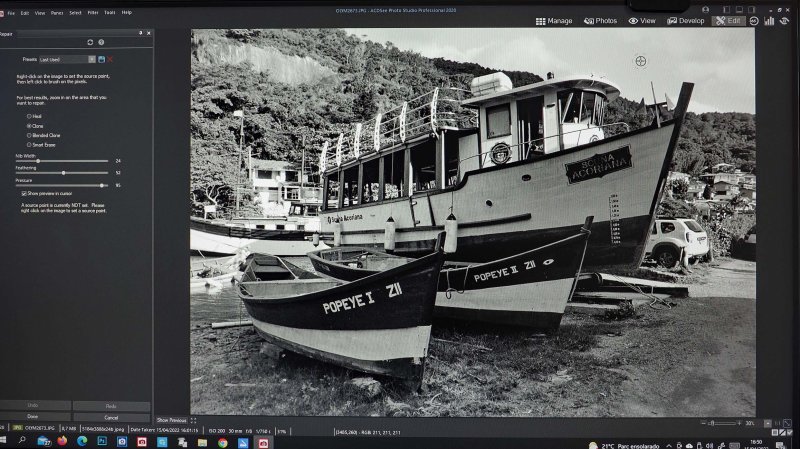
Inside "Repair Tool", I use "Clone" to clean dust and scratches.
Final photo. Click on original below to enlarge it.
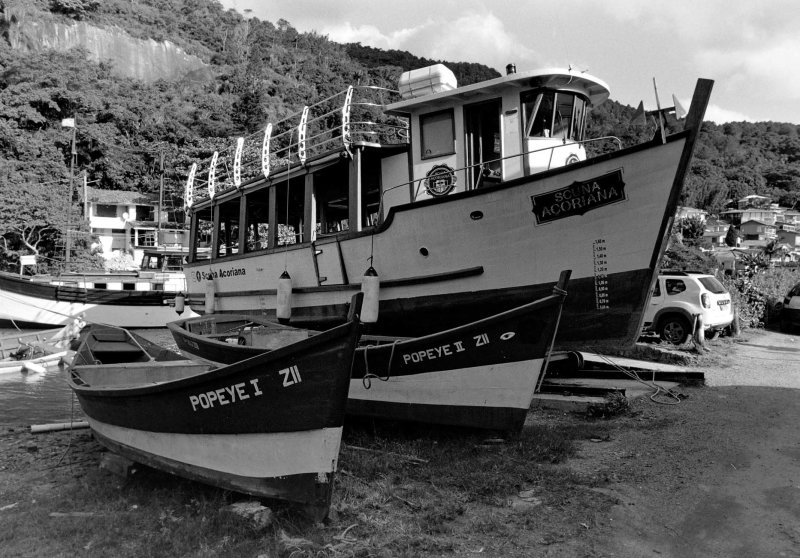
Final photo. Click on "original" below to enlarge it.