


|
|
|
|
|
|
| Steve Davis | profile | all galleries >> Projects >> Camera Cradle, March 2019 | tree view | thumbnails | slideshow |
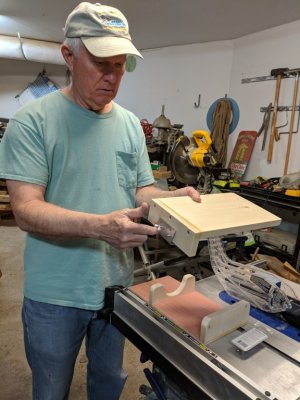
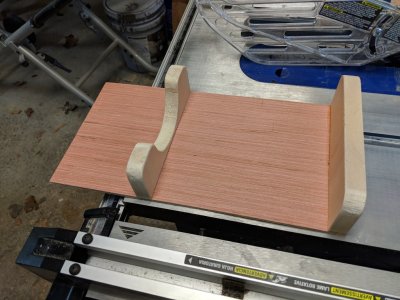 IMG_20190329_192432.jpg I decided to build the cradle in two parts. After taking measurements from my camera and lens, I cut the lens support (R) and backboard (L) from pieces of whatever passes for white pine these days, using a jigsaw. For the base, I used a piece of thin (less than 1/4") plywood scrap I had left from the interior of the shed project. I attached the pine pieces to the plywood using glue and screws. |
 IMG_20190329_192438.jpg I found some L-shaped bracing brackets at Loewe's to use to attach the cradle to the console--after checking to see the console armrest had crevices at the front and back (where it attached to the console lid) into which the brackets could slide. |
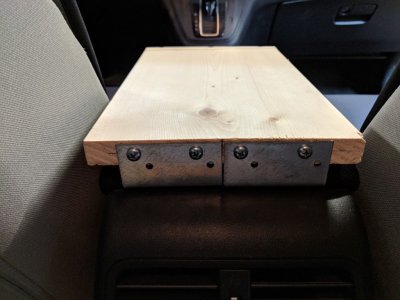
 IMG_20190329_192508.jpg I used three of the same type of L-shaped bracket, two on the back end of the base plate, side by side, for a wider, more stable attachment to the armrest, and one on the front that would be adjustable, so I could remove the cradle when we were not using it. |
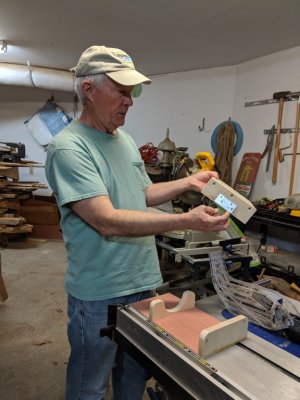
 IMG_20190329_192513.jpg The base plate and a downward-facing front plate were also glued and screwed together. I then drilled two holes in the face plate to match the width of the holes in the metal bracket and at a height that ensure the bracket would fit snugly under the front edge of the armrest pad. I put two bolts through the face plate holes for the bracket to slide onto. |
 IMG_20190329_192518.jpg Here, I'm showing how the bracket slides onto the bolts through the face plate on the cradle base. |
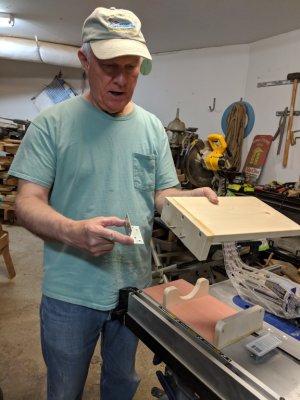
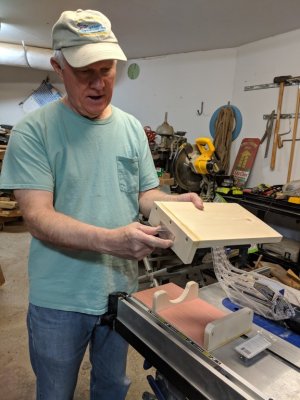
 IMG_20190329_192522.jpg Next, I used wing nuts on the bolts to permit easy tightening and loosening of the cradle on the armrest. |
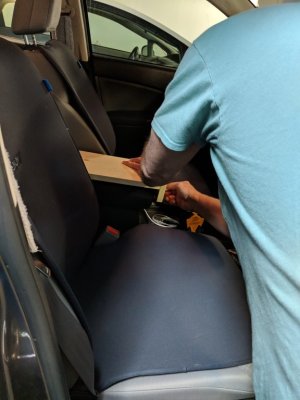 IMG_20190329_192641.jpg Before attaching the top half to the base plate, I tested the fit of the brackets on the armrest in the car, a Honda CRV. |
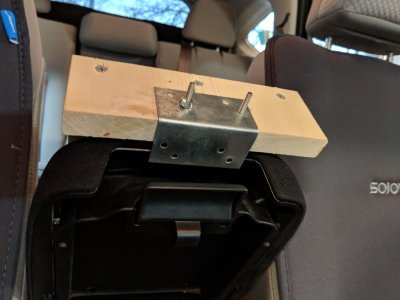
 IMG_20190329_192650.jpg Here is the base plate attached to the armrest. |
 IMG_20190329_192732.jpg Since the front bracket is positioned on the armrest that is attached to the top of the lid to the console, it is out of the way of the lever that opens the console lid. |
 IMG_20190329_192752_1.jpg Detail of the bracket attached to the console armrest. |
 IMG_20190329_192824.jpg In the back, the side-by-side brackets fit under most of the back of the armrest pad and provide more side-to-side stability to the cradle. The back brackets are attached to the back edge of the base plate using wood screws. |
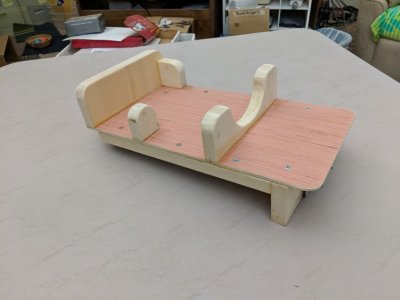 IMG_20190329_210641.jpg To stabilize the camera more on the cradle, I added a small side piece to the back plate and another piece on the opposite side to help prevent the camera body from sliding forward when braking the car. |
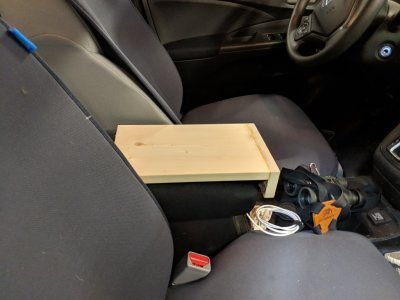
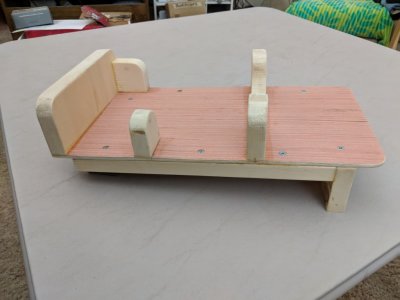
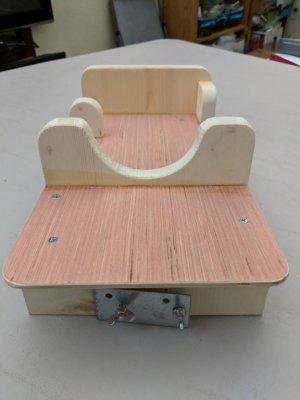 IMG_20190329_210654.jpg View from the front of the cradle after the base plate and top were joined using glue and screws. |
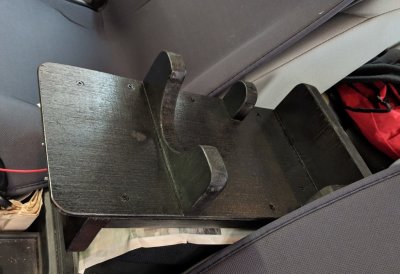
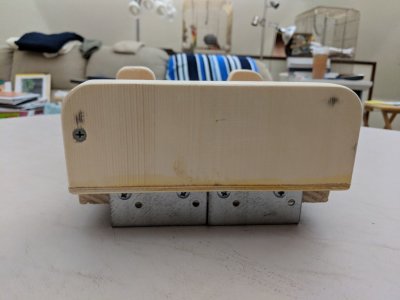 IMG_20190329_210714_1.jpg Back view of the camera cradle |
 IMG_20190329_210731.jpg I considered adding a velcro belt that would wrap over the top of the camera to help hold the camera in place, but decided against it. |
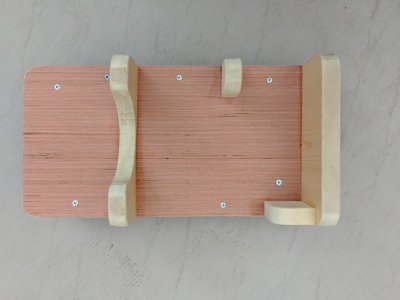 IMG_20190329_210744.jpg Top view of the camera cradle |
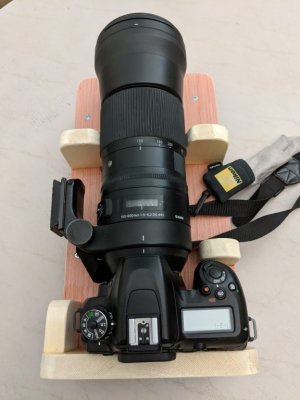
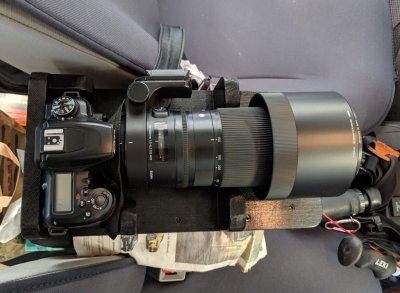
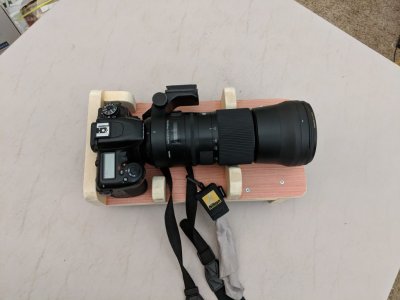 IMG_20190329_210817.jpg Nikon D7500 camera with 150-600mm Sigma lens sitting on the camera cradle |
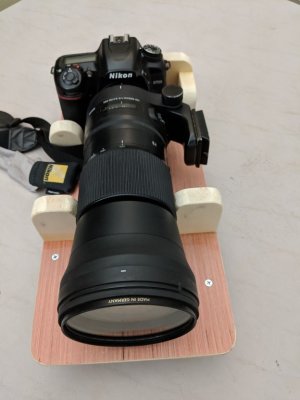
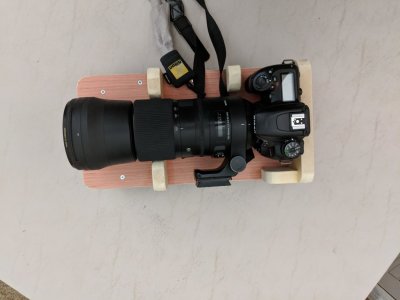 IMG_20190329_210827.jpg Camera and lens on their cradle |
 IMG_20190329_210842.jpg The added smaller pieces of wood do help limit the camera's side-to-side and forward movement. |
 IMG_20190329_210900.jpg The curved "cradle" piece of wood is placed so that the rubber adjustment band of the lens rests on it. |
 IMG_20190405_153615b.jpg The final step was to give the cradle a coat of black paint to protect the wood. I put a piece of newspaper between the cradle and the armrest till I was absolutely sure the paint was totally dry. |
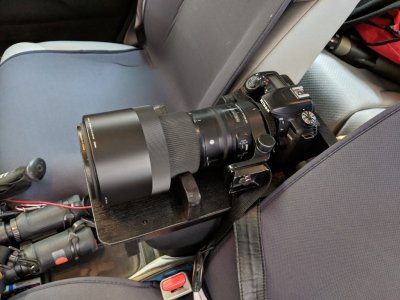 IMG_20190405_153747b.jpg Camera and lens on the cradle in the car |
 IMG_20190405_153811b.jpg With the paint dry and the cradle and camera in place, we were ready to go birding. |
| comment | share |