After doing the layer sharpening, I will merge the layers into one and save the image. To review:
Use the tools in Adobe Camera RAW to optimize your image, and make use of the clipped highlights and shadows feature. It can provide you with a good visual guide to select which sliders to adjust in the RAW Converter.
Export your images into PSCS as 16 bit TIFF files to make use of the extra headroom.
Crop your image, either using an artistic crop or crop to a standard frame size.
Identify and optimize elements of your image that can enhance your subject or diminish the impact of your background.
If you ever intend to print your image, save as a 8 bit TIFF, but do not sharpen. You can always add the sharpening when you get ready to print. Remember, you cannot "undo" sharpening!
If you resize your images for the web, they will need to be sharpened. Sometimes you can get very good results if you only sharpen your subject. This is easy to accomplish using a layer mask.
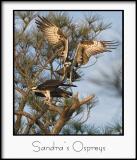
Thanks Sandra for the use of your image and, as always, comments and suggestions are welcome.
All the best,
jim