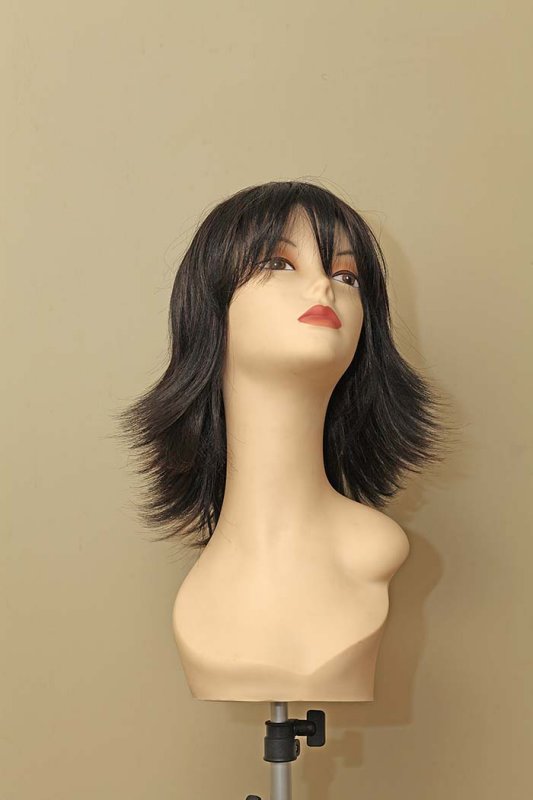
06-DEC-2011
Here the Flashright dome has been turned so the opening is facing photographer's left. I can see that it has little affect on giving a directional light pattern on the subject, but the overall softness is better than when the opening is directly facing the subject.
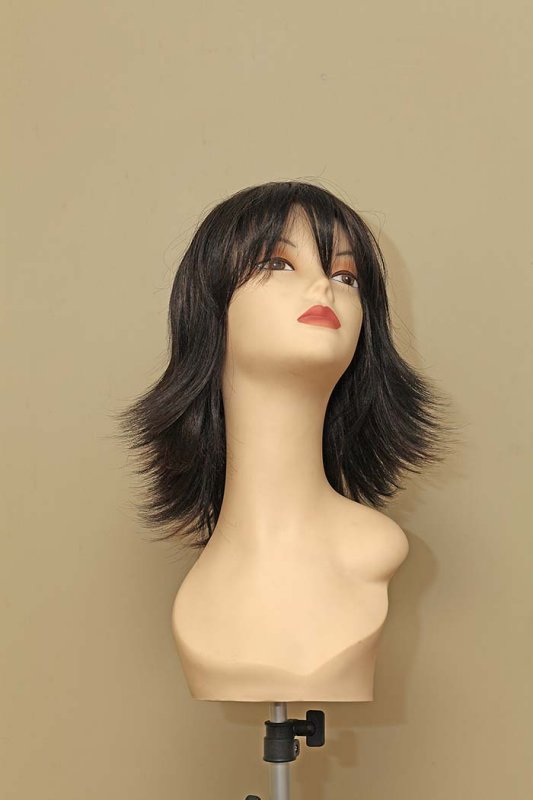
06-DEC-2011
Here, the Flashright has had the dome turned so the opening is facing the photographer's right. Turning the dome to one side or the other appears to have little to no affect on the light pattern on the face. Note, there is still a distinct shadow on subject left, whereas the shadow should be on subject right if light was truly coming from a subject left direction. It is obvious that even when the dome is turned to one side or the other, light is still primarily hitting the subject in a forward pattern.
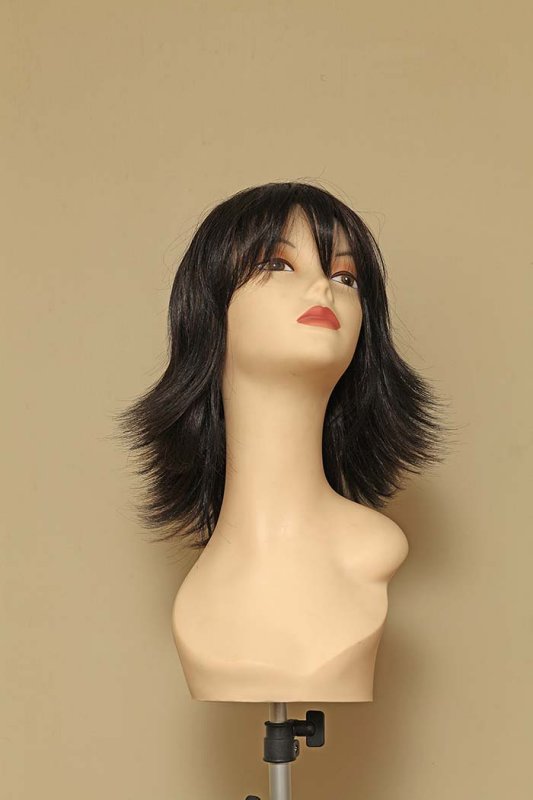
06-DEC-2011
Here the Flashright dome is turned so it is facing the rear. If the room is not too large, this is probably the best way to use this device. Pretty much the equal of the Lightsphere as to softness and even distribution of light on the subject.
06-DEC-2011
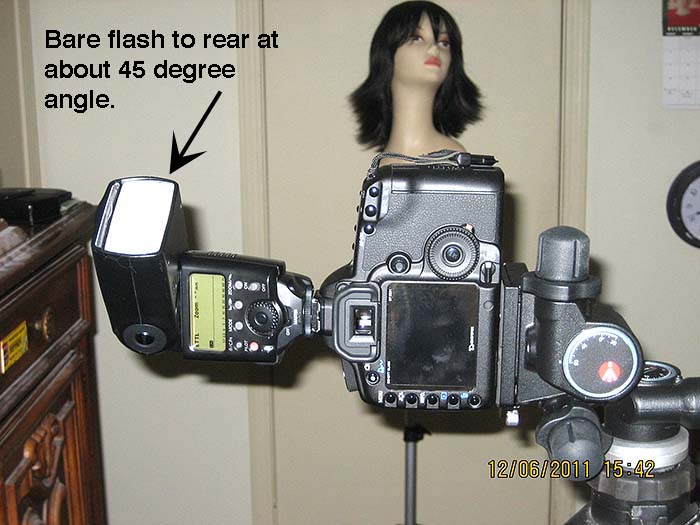
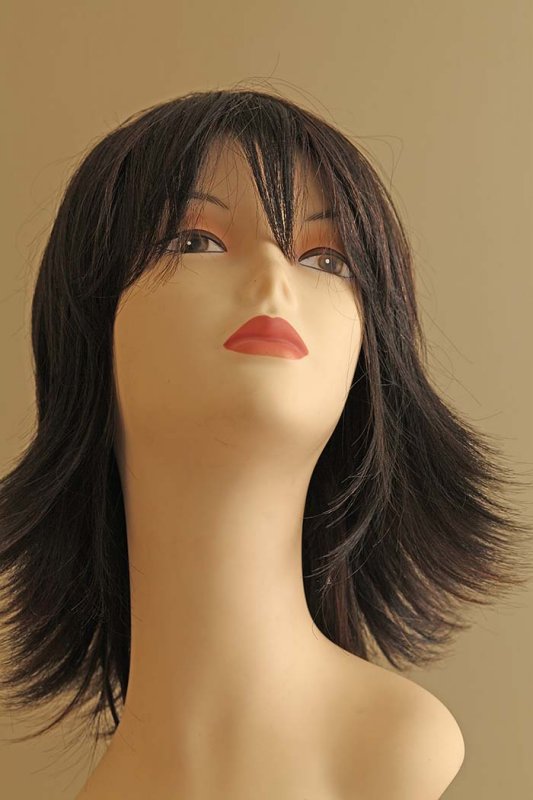
Now, before laying out some side by side shots, lets look at what can be done with bare flash. We already know that the bare flash aimed directly at the subject looks really terrible, but do we REALLY have to use these gizmos perched on top of the flash to get a nice photo? Not always, and in fact, maybe even most of the time you do not need the fancy diffusers. The higher end flashes rotate and tilt for a reason. Unless you are in a very large room, you can simply rotate the flash head away from the subject and make very effective use of bounce flash. There are some tricks to getting it right though. First, set the flash zoom manually so that it is at it's maximum telephoto range. On this Canon 580 EX flash, that is 105mm. When bouncing flash, there is no need for a wide angle pattern. You want to project a powerful beam of light instead of scattering it. Second, never point the flash straight up to the ceiling. This gives the famous "raccoon eye" look to your subject because light is falling down from above. Instead, you want to aim the light to your REAR, at about a 45 degree angle. This gives bounce light from a more forward direction to the subject, as well as from above. Here is the flash turned as stated. Using through the lens flash metering is fine, at close range there is seldom a need for EV compensation. At further distances, a +1 EV may be needed.
06-DEC-2011
Here is the result of turning the bare flash to the rear at a 45 degree angle. Results are as good as any of the diffusers. The color hue is somewhat like was seen with the Fong Lightsphere. This is likely due to the light bouncing from all over the room and placing the color cast from the walls onto the subject. This kind of thing really emphasizes the need to use a color correction method and to shoot RAW when proper color is vital.
06-DEC-2011
In this photo, the bare flash was pointed straight out to photographer's left. Because of a dresser with various items on top, including some glass and plastic, the light made some odd shadows, however, it does show that when you use bare flash in this manner, you actually can produce a directional light pattern on your subject.
06-DEC-2011
For this photo, I wanted to direct the bare flash straight out to photographer's right. To do this I had to remove the camera from the tripod. I moved closer to where there was more of a bare wall onto which I could bounce the light. As can be seen, this produces a very distinct, more appealing portraiture oriented directional light patten on the face. Again, color cast is being picked up from the wall coloring. An ideal situation would be to have an assistant to hold a large, neutral reflector from which to bounce the light. At any rate, an easy color correction tool such as the WhiBal would take care of the color issue easily. The main purpose of these bare flash tests are to show you can often create better photos without the pricy diffusers.
07-DEC-2011
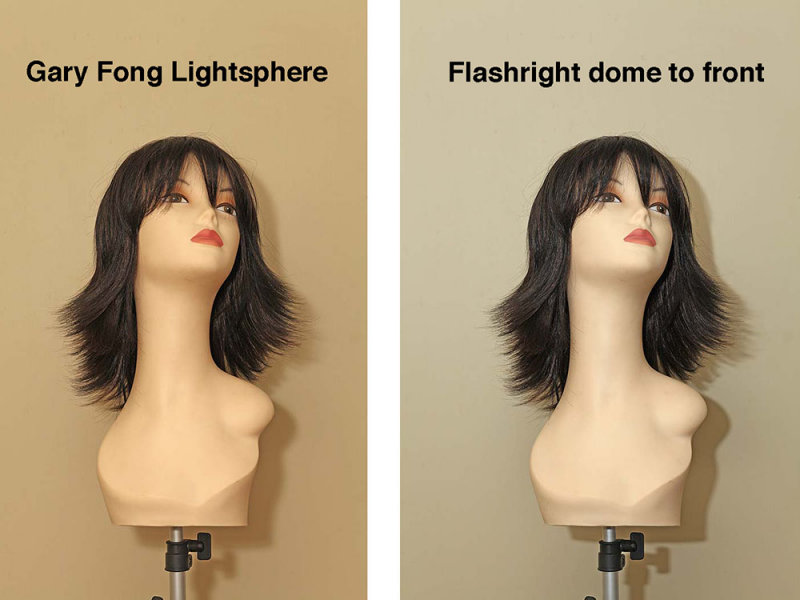
The Lightsphere and Flashright side by side. This is with the Flashright aimed to the front. The Lightsphere has some advantage as to softness and evenness of light. The vast color difference shows how the Lightsphere is using bounced light from all over the room, while the Flashright is a more direct source and not as reliant on bounce.
07-DEC-2011
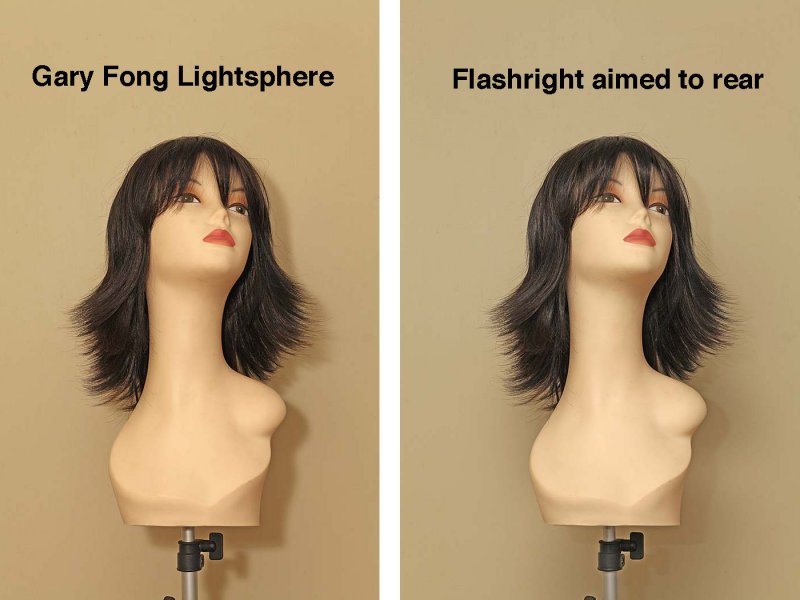
Another comparison between the Lightsphere and Flashright, only this is with the Flashright turned fully to the rear. The Flashright wins this one! As mentioned earlier, this is the ideal way to use this device, though it might not be as effective in a very large area.
07-DEC-2011
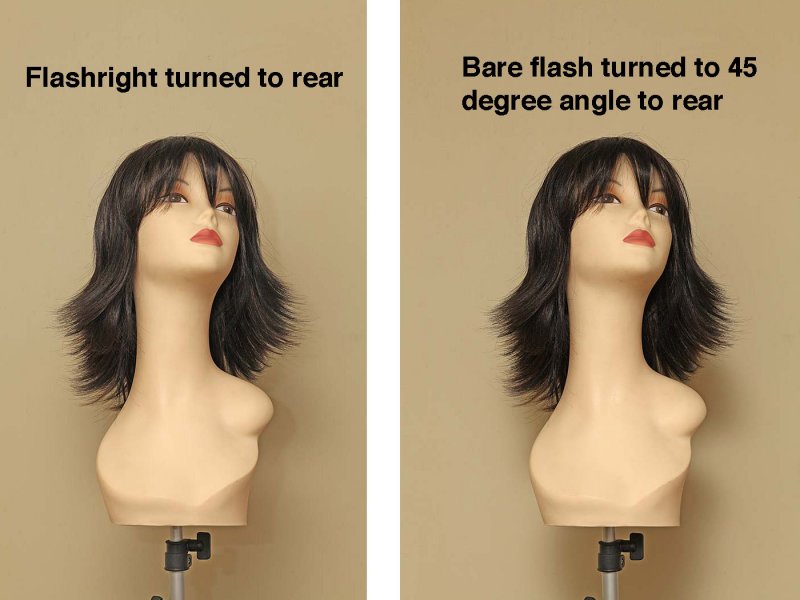
Since I have declared the Flashright to be the "winner" over the Lightsphere, just how necessary is it REALLY? Here is a side by side of the Flashright turned to the rear and bare flash facing the rear at about a 45 degree angle. There is some more distinct shadow with the bare flash. If eliminating that small extra shadow is worth the cost of the Flashright is something only you can decide. Keep in mind, the subject is close to a beige door. In a more real life situation. the faint amount of extra shadow created by using the bounced bare flash would never be seen.
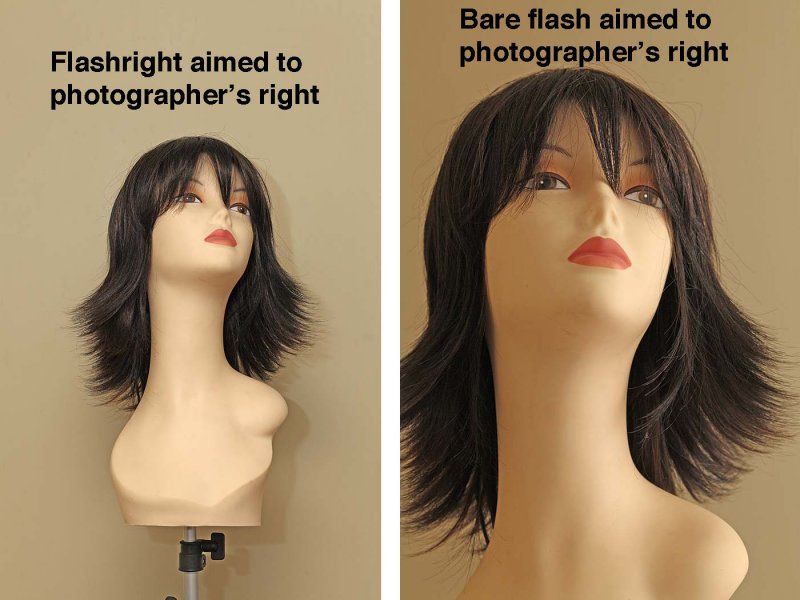
07-DEC-2011
One last comparison. As one of the selling points for the Flashright is it's (supposed) ability to give direction to light, here is how it compares to bare flash bounced from the right side. In these tests, and in general shooting, I have yet to see that the Flashright gives ANY direction to the light pattern when turned to either side, however, as can be seen, using bounced bare flash certainly can. Again, when using bounced bare flash, remember to zoom the head to it's max telephoto range.