Post-processing is the technique of turning a calibrated image into a more pleasing photograph. This area of astrophotography is often considered more "art" than science-- meaning there are many software packages and techniques which can be used to produce a final image, and skill and experience play a larger role in creating a stunning image. Whereas calibration can be defined mathematically (which is why professional astronomers use similar techniques to produce a workable image), CCD imaging post-processing techniques would be familiar to all professional photographers and graphic artists. In many cases a calibrated CCD image could be used for scientific purposes. However, once post-processing techniques are started an image loses it's scientific value.
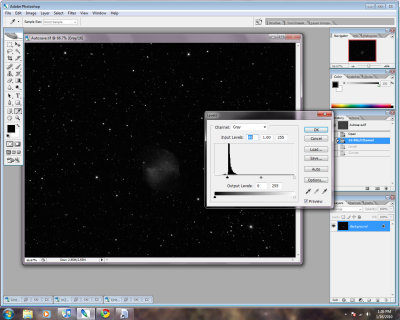
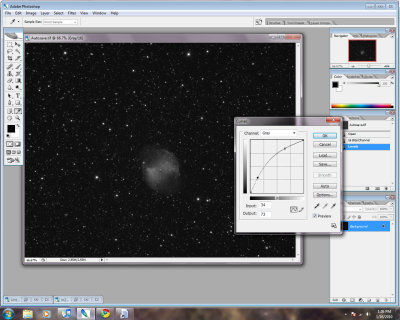
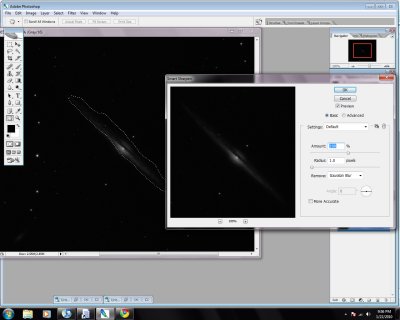
The post-processing software I use is Photoshop, the industry standard image software used by photographers around the world. The software I use to control the CCD camera, AstroArt, does have many post-processing features. However, like a lot of amateur astronomers, I find Photoshop more flexible and straight forward to use. The three primary functions I use in Photoshop are: 1) "stretching", using Photoshop's Levels and Curves features, 2) "sharpening", using Photoshop's Smart Sharpen feature, and 3) the selective use of some 3rd party tools by Noel Carboni. I use Noel's tools to sharpen and reduce the size of individual stars and to reduce overall background random space noise.
In general the goal is to bring out subtle details in the target object, nebula or galaxy, while keeping stars small and random space noise to a minimum. The technique I employ to "stretch" the image is the iterative use of the Levels feature to set the image black point and the Curves feature to pull out details in the galaxy or nebula. Normally it takes 3 to 5 interations to produce the effect I'm looking for. I then use Noel Carboni's tools keep the stars smaller and then reduce background space noise. Sometimes I use another iteration of Levels and Curves. Finally, I will play with Photoshop's Smart Sharpen feature to selectively sharpen parts of the image. Since I started using a light pollution filter, controlling light gradients (caused by light pollution in my suburban location) in the images has not been an issue.