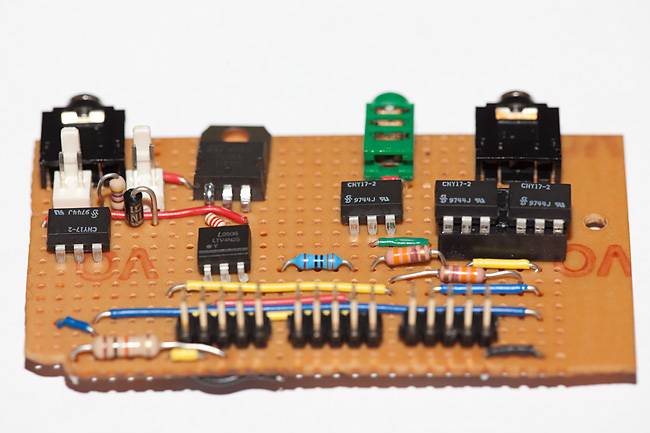
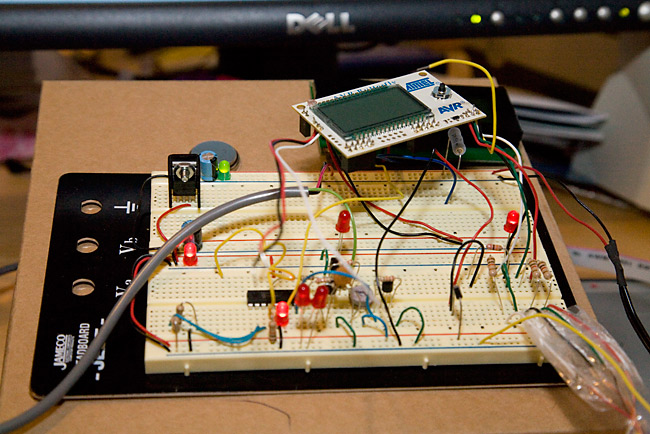
02-SEP-2009
Sept 2 2009 - Latest timer circuit board
I added circuitry for comtrolling the motor of the automatic dropper. I don't think I can add a lot more to this board now - I'm starting to think about a proper PCB for mark IV (I may experiment with one of the services that etches them for you rather than trying to do it myself though...)
Getting the motor to work was more of a challenge than it should have been due to me not understanding the difference between the VCC and VCC_EXT connections on the butterfly. I connected the motor on the same pin as the onboard piezo, and this meant I had to use a 0 to turn the motor on rather than a 1 (the piezo crackles if held low).
Using the pizeo pin had a coupe of advantages. Firstly it means I can easily test the motor drive/speed code without a motor attached, and secondly it means I can use one of the onchip timer circuits to control the motor speed without needing any interrupt code (which I am trying to avoid because I want my timings to be as repeatable as possible). It may be that the piezo whine while the motor is running will become annoying (in which case I may rethink).
01-SEP-2009
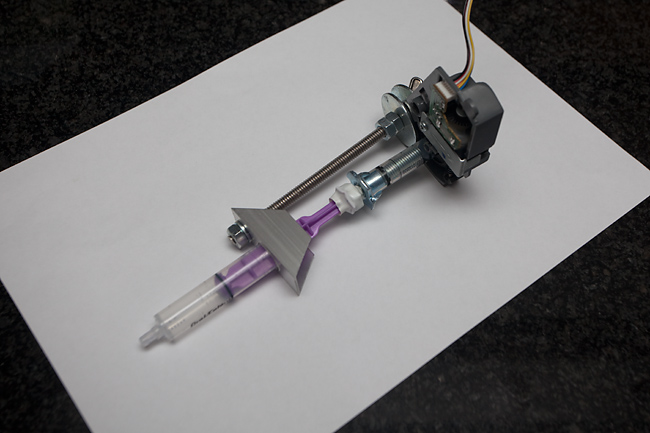
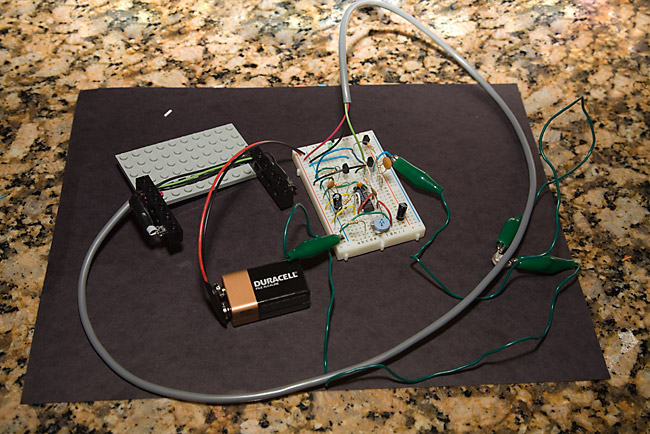
Sept 1 2009 - Dropper components
The component parts of my automatic dropper. It seems to work ok in dry testing - will do a propper test once I have integrated it into the microcontroller
01-SEP-2009
Sept 1 2009 - Automatic dropper
One thing I found annoying when experimenting yesterday was the need to walk to the dropper, release a drop, walk back to the camera to see the result, adjust the time delay, and repeat. Rummaging in my junk box I found a motor that seemed perfect for building an automatic dropper, and this is the result.
I'll set it up so that it's driven by the microcontroller so that it can shut off after each drop, and restart after a suitable delay. There is also potential for capturing multi-drop pictures, I suppose...
31-AUG-2009
Aug 31 2009 - First results from Timer Mark III
A 3-day weekend was the perfect opportunity to kick off the microcontroller-based timer project again. This time I took the time to make a proper circuit board (well, stripboard but at least the wires don't fall out) and proper 3.5mm jacks for all connections so I can set it up more easily.
After much work recreating the timer source code for the microcontroller (and much wasted time looking for the previous code) the inital results were disappointing - it was designed to be accurate (and more importantly repeatable) to a few microseconds - which should mean that the target milk drop would be at the same point every time - but clearly something was wrong as the position was varying by up to 10 cm.
Poring over the sources again I realized the key debouncing was introducing an indeterminate delay - once I took that out I could adjust the position that the drop was captured in a millimeter at a time.
By the time I had it working I was pretty much out of time for taking any pictures, so this was just a quick demo to show my daughter what sort of thing was possible.
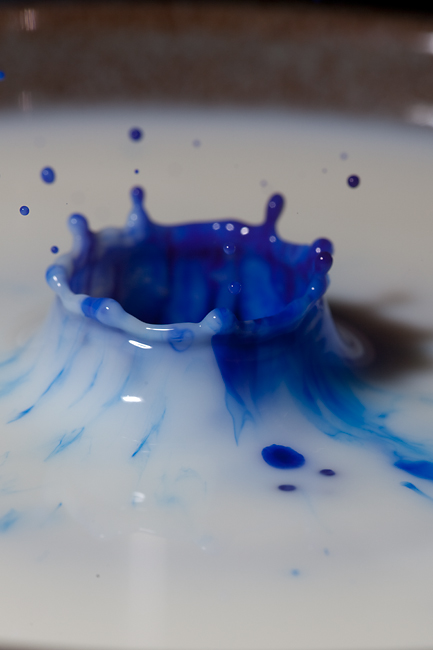
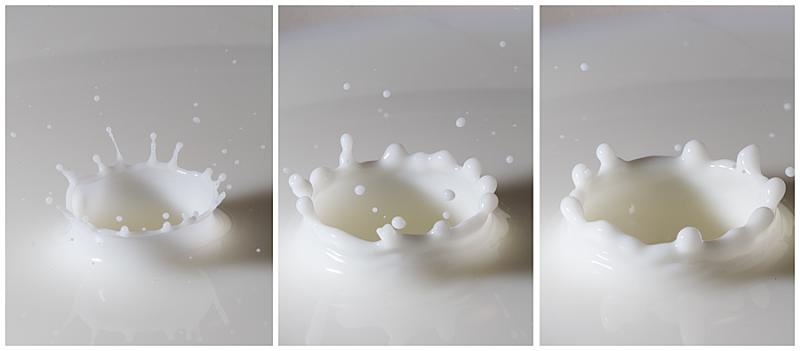
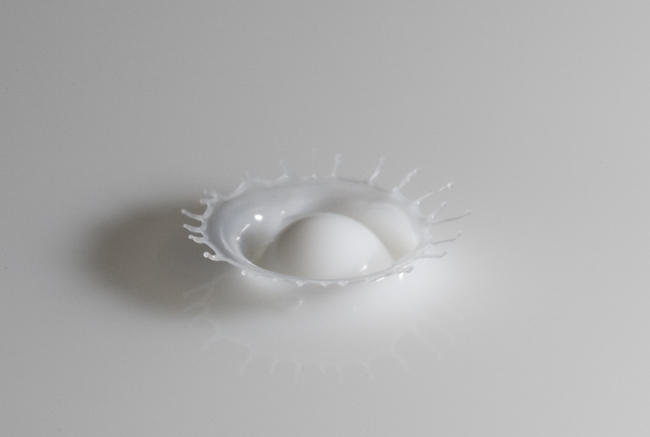
Jan 30 2006
Jan 30 - Splash
Been tinkering with my microcontroller-based trigger/timer for so long, thought it was time I actually used it for some real shots!
It did make life easier than my previous attempts with an analog timer - accuracy, repeatability, plus the fact that I could use it to trigger the camera (when beam first tripped) AND flash (240 milliseconds later) made it easier.
This is a sequence of three different drops, from slightly different heights (if it's dropped from higher, it's going faster when it cuts the beam, so it reaches the surface slightly earlier relative to the flash time).
27-NOV-2005
Nov 27 - Timer circuit Mk II
The bane of my life - lulls you into a false sense of progress then locks itself for no reason!
19-NOV-2005
Nov 19 2005 - Milk drop from Timer Mk I
Tried some more shots with my new gate/delay circuit. I know it's a cliche, but there are good reasons for using milk drops for this kind of thing, mainly that it is really quite easy to get some quite dramatic shots.
It's also a lot easier to trigger the sensor with a milk droplet since it absorbs the light better!
I used 580EX at 1/128 power this time - much shorter flash duration than the AB800 and consequently much better action-freezeing effect. Also chose a more suitable lens rather than using what happened to be on the camera at the time!
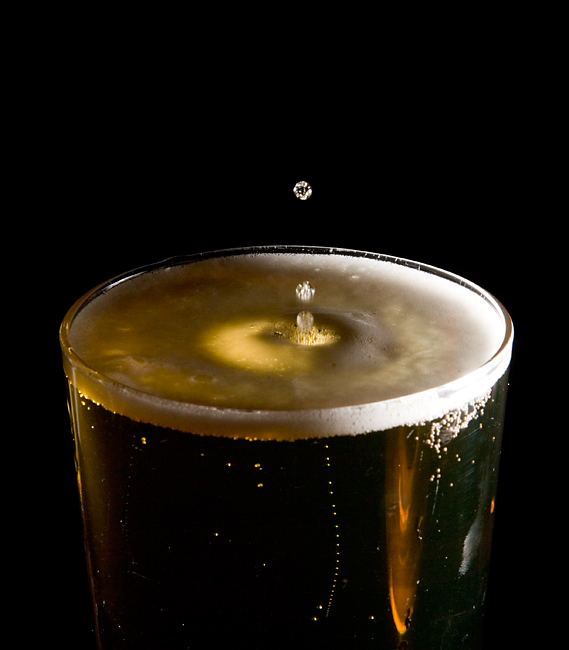
18-NOV-2005
Nov 18 2005 - Beer drop from Timer Mk I
First try using my IR gate/delay circuit for high-speed flash photography.
Lots of lessons learned here:
1. The AB800 flash used here is too long for this kind of work - doesn't really freeze the motion.
2. An accurate drop-generator would make life much easier
3. Timer is a little hard to adjust in a repeatable fashion - I think I'll build a digital (micropocessor-based) circuit instead.
4. The beer goes flat if you spend an hour messing with it.
Still, I was quite pleased with the results for my first attempt.
17-NOV-2005
Nov 17 2005 - Timer circuit Mk I
Built myself one of these (see www.hiviz.com) to try out some high-speed flash photography. Took all evening to get it to work so there was no time to actually use it (see November 18th/19th for that).