|
|
|
|
|
|
| Peter Kwok | profile | all galleries >> Special Exhibits >> Canon 5D Mk III HDR: In Camera vs. Post Processing | tree view | thumbnails | slideshow | map |
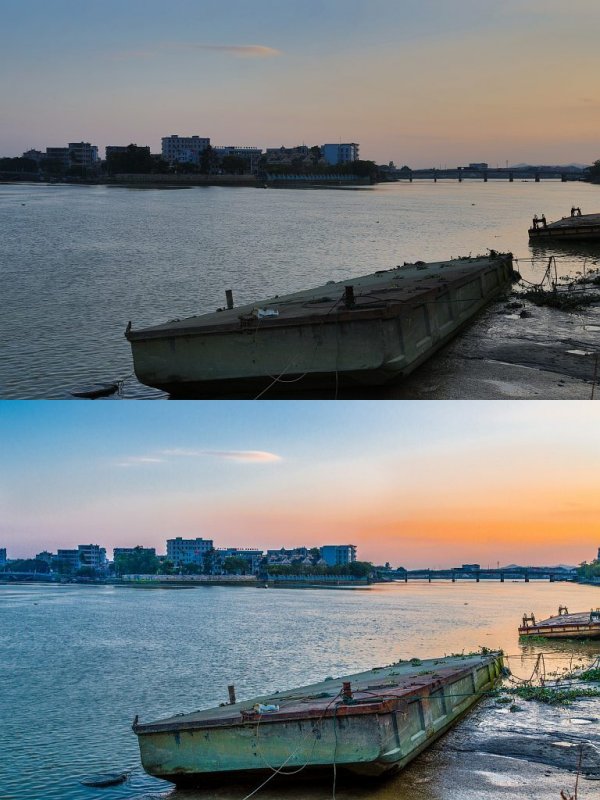
| HDR stands for high dynamic range. Cameras shooting a high dynamic range (contrast) scene with very bright and very dark areas end up with all white or all black patches with no discernible details. There in no way to adjust the camera to capture both. Human eyes, on the other hand, have no problem seeing details in both bright and dark areas at a single glance. For example, we can see clouds in the bright sky and objects in the shade. HDR photography is the method of capturing such scenes with multiple shots, attempting to duplicate what the eyes see.
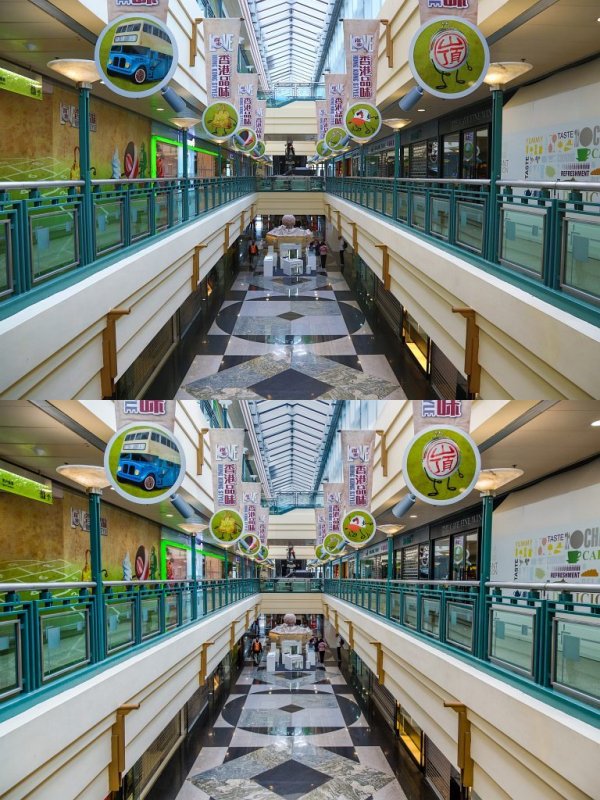
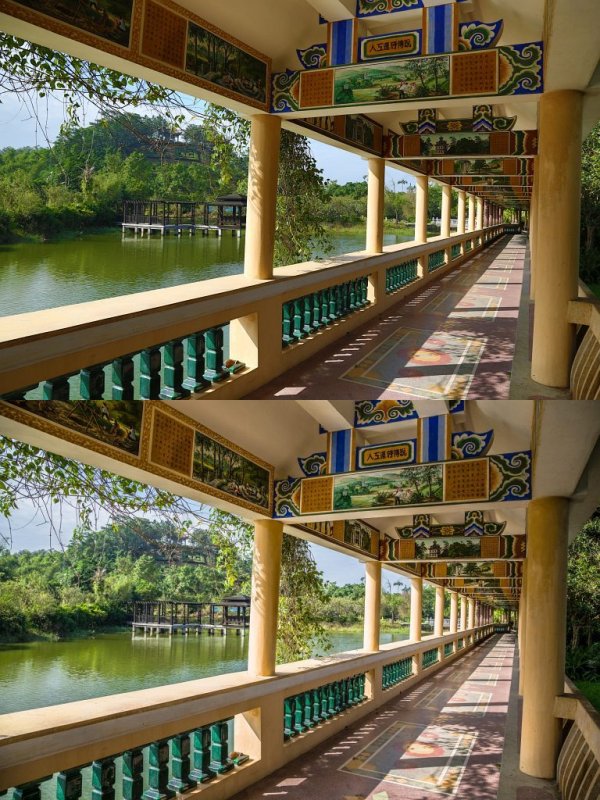
My Canon EOS 5D Mk III has in-camera HDR shooting capability. It shoots 3 frames in rapid succession with different exposures and combines them into a single photo where details in both the bright and dark areas are retained. In addition to the combined photo, it also saves the 3 original shots. I can process the 3 original raw files on my PC to produce one HDR photo. In this write-up, I will try to compare both processes, in-camera vs. post-processing by software. I dislike HDR produced by most software. They tend to give an unnatural surrealistic style by making clouds appear like impending storms. In addition, their attempts to brighten dark areas produce halos. The in-camera HDR of the 5D Mk III is simple to use and produces pleasing results most of the time. In the examples here, the 3 exposures were �2 EVs apart and the effect was set to �Art standard�, which keeps overall contrast low and color slightly saturated, without making the scenes look surrealistic. It can also automatically align the 3 shots. This is an important feature, since I do not carry a tripod. The disadvantage of the in-camera process is that the effect must be picked before taking the shot. I cannot try another effect later. To do so, I would have to resort on software post-processing on my PC. HDRsoft is the company that developed Photomatix Pro, the most popular HDR processing software. Their website has galleries of surrealistic photos submitted by users. I was not impressed by their results or the price tags, probably because I am not proficient in using the tone mapping adjustment sliders on the trial version. My primary raw processing software is Adobe Lightroom (LR). Since version 4.1, LR added the ability to process 32-bit HDR tiff files, presumably generated by Photoshop. HDRsoft also added a tool to just to align and merge raw files into one 32-bit tiff file. This plug-in software works seamlessly with LR. Tone mapping would be performed on LR which I am familiar with. Most on-line reviews rate HDRsoft better than Adobe in aligning the images. Now, I can have the best of both by buying this $29 plug-in tool from HDRsoft. Workflow for processing the merged 32-bit tiff file by LR is simple. I start with the turning the �Highlights� slider all the way down and the �Shadows� all the way up. I then play with the �Clarity� and �Vibrancy� sliders until I get the effect I want. I always tinker with local adjustments. After all, this is the most creative part of post processing. In 2015, I changed by workflow to exclusively use Lightroom 6. I found its HDR alignment tool better than HDRsoft in term of eliminating ghosts such as moving people or wind blown plants. In addition, its DNG intermediate file is smaller than 32-bit TIFF used by HDRsoft. |