


|
|
|
|
|
|
| Nick Koske | profile | all galleries >> Racing >> Racing (cars, bikes, boats, whatever) >> Laguna Seca Photography Guide | tree view | thumbnails | slideshow |
Updated 10/17/06
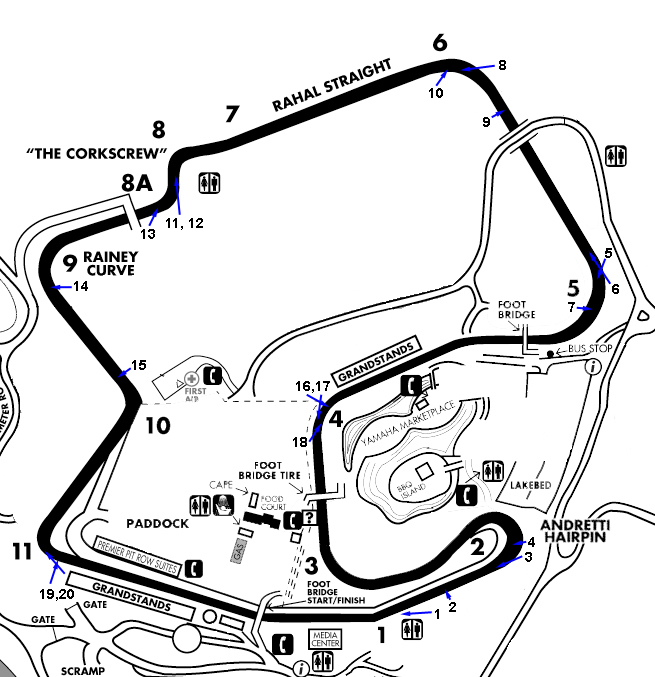
This is a guide for taking pictures at Laguna Seca as a fan with no special access. One major rule of shooting at Laguna is follow the sun (I suppose that's true for most shooting). Laguna Seca these days is in a constant state of change so some of the locations may or may not be available at a certain time so I'll try and keep it updated with current information as well as the new locations I find. All of my shot were taken with a 70-200 f2.8L, by it self or with a 2x or a 1.4x converter. I typically don't use the 2x converter an longer because I want my shots to be as sharp as possible. One other thing that comes in handy for those of us elevationally challenged, is a small step stool. I'm about 5'10" and most of the fences surrounding the track are neck to chest level. At this level it's sometimes hard to get my camera into a good position for following the car, the stool allows me to get above the fence. Below is a map of Laguna with the locations and direction of each shot in this guide and if you click on the images you will see larger versions.
I've been going to Laguna since I was months old, my father raced SCCA DSR there, so I've walked around the place a time or two. I started talking pictures for a high school photo class and became hooked with photography. Then in 1998 the FIA-GT cars came to Laguna and I brought my camera. That's where my racing photography began.
Location 1:
I always start in the same place. Turn 2, known as the Andretti hairpin, is where I setup camp. It's a great place to relax between track sessions and hang out during the support races. The hillside on the outside of the Andretti hairpin provides an excellent vantage point of the entire track. You can see Turn 1, Turn 2, Turn 3, Turn 4, Turn 5, up the hill towards Turn 6, the exit of Turn 9 into Turn10, the front straight under the bridge, and the pit exit. The Andretti hairpin is a very slow speed turn at the end of the fastest portion of the track. The cars are under heavy braking and provides a great passing location. I got hooked on this spot watching the FIA cars braking into T2 and their carbon brakes lighting up. Turn two is a pretty large complex with many available shooting locations.
Front straight is one of my favorites spots. Shots under the bridge and at T1 are cool because you you can get the bridge in the shot as well at the T&S tower.
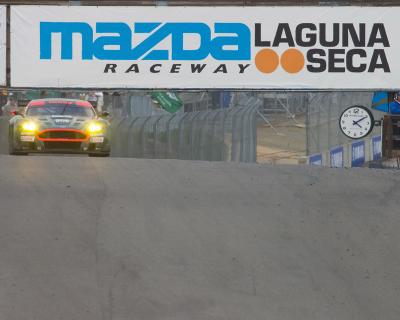
Image 1: Aston Martin DBR9 Cresting the hill down the front straight, 400mm, 1/250, f6.7
The T2 braking zone is a cool place because you can catch the cars back fire as they down shift and catch red hot carbon brake rotors glowing. The best shots happen later in the day when the sun is able to hit the sides of the cars.
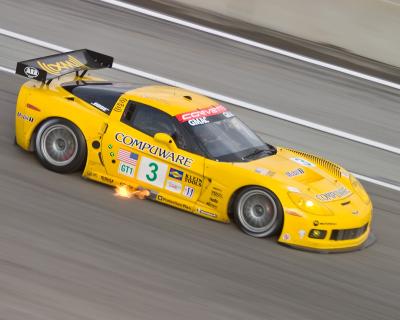
Image 2: Corvette C6.R entering T2 braking zone, 160mm, 1/180, f5.6
For the start of races I usually stand on the outside of T2 near the road around the track. This spot can provide for some exciting starts as the cars brake into T2. You'll know you're in the right spot because there is usually a ton of people there.
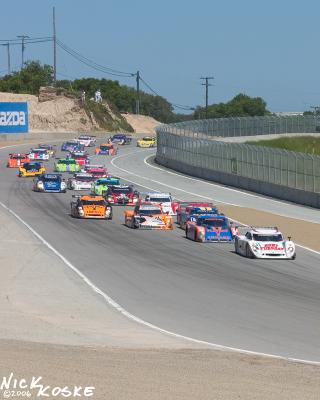
Image 3: Start of the 2006 U.S. Sports Car Invitational, DPs entering T2, 98mm,1/250, f11
You can also shoot the cars as they drive through T2. T2 is probably the best passing location so it's not a bad place to hang out for a while especially at the beginning of the race.

Image 4: Porsche RS Spyder trying to get under a Dyson Lola in T2, 190mm, 1/125, f13
Location 2:
I usually walk around the track during the race. I start at T2 then make my way up to T5 on the outside of the track. The T5 area has a couple good spots to shoot from. If you shoot from the out side of the track, it's better in the afternoon and vice versa for the inside to T5.
You can get a decent head on shot as the cars go through T5 from the outside, just beyond the catch fencing on the outside of T5.
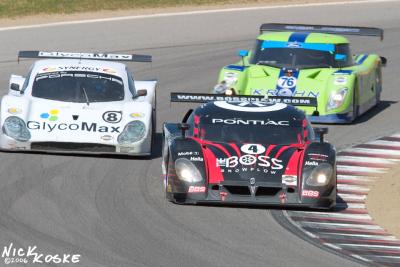
Image 5: Three DPs fighting through T5, 280mm, 1/250, f11
There's another shot if you look up the hill towards the bridge. It's a good one late in the afternoon when the light starts getting warmer.

Image 6: P cars passing a 911 GT3 RSR up the hill towards T6, 250mm, 1/250, f8
Last time I was at Laguna I decided to walk up the inside of T5 to try it out. Unfortunately I was there a little too late in the day and the sun was behind the subject, which sometimes may turn out ok. But, this time it just made the side of the car I shot in the shade. It would be a good place earlier in the day. Cool thing about this spot is you can get pretty close to the track.
Image 7: GA Cup 911 GT3 trough T5, 98mm, 1/125, f11
Location 3:
Next I walk up the hill towards turn 6. Turn six was pretty torn up during the Grand-Am race at Laguna in May of '06. They were making 'improvements' to the track there. Although I haven't been there since they've completed the work, I believe they were cutting away the hill on the on the inside of T6 to give the wimpy MotoGP riders a better view through the turn (can you tell I'm a little biased?). I'm sorry I just don't want the FIA to turn Laguna into a sterile euro track. So there is a couple places on the way to T6 that you may want to visit.
Since I usually walk up the outside of the track there's a spot on the outside of T6 to shoot from. During the FIA-GT race there I shot a Panoz GT1 spinning and wrecking into the wall on the outside of T6, in this spot. You can also take a shot of the cars charging up the hill towards the cork screw. To get there you have to follow some little trails on the out side of the track right next to the bridge that crosses the track.

Image 8: GA Cup cars heading up the hill towards the Corkscrew, 115mm, 1/350, f8
Next I head across the bridge and make my way up towards the apex of T6. There's a shot I like just as the cars come under the bridge. It's a decent pan shot, but you need to be quick as the cars aren't in the shot for very long.
Image 9: Making a pass braking into T6, 120mm, 1/90, f19
I continue on to the apex of T6. There was a point in time where you could get a pan of the cars right at the apex. Last time I was at Laguna you couldn't get to this spot. They were cutting back the hill on the inside of T6 to appease the FIA. So we will see how it is this October when the ALMS visits town.
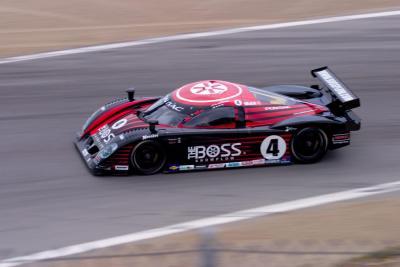
Image 10: Howard Boss DP Exiting T6, 125mm, 1/90, f11
Location 4:
So next I head up the hill towards the Corkscrew. There's not much to be had between the Corkscrew and T6. The Corkscrew is pretty much self explanatory. I'm not sure what to say about probably the most recognizable turn in America. Move around, look at it from as many angles as possible, find trees to frame the shot, the possibilities are endless. My only warning is be thoughtful of the people in the area watching the race, try not to block their view.
Here are a few shots from the Corkscrew area.
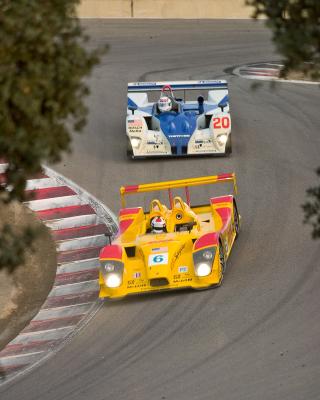
Image 11: Porsche RS Spyder and Dyson Lola diving through the Corkscrew, 200mm, 1/350, f2.8

Image 12: Two P cars and an Aston Martin dropping in, 200mm, 1/350, f2.8
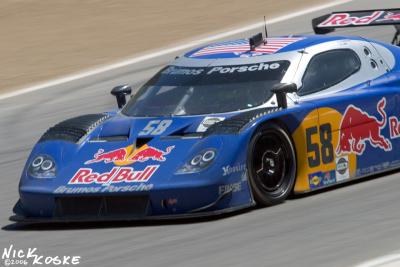
Image 13: Brumos Porsche DP exiting the Corkscrew, 280mm, 1/180, f13
Location 5:
Once I'm finished at the Corkscrew I head down the hill towards the straight between T9 and T10. This area gives a great place for a panning shot of the cars heading into T10. This area is great for for panned shots because the spectator fence is pretty low and you're almost level with the cars.
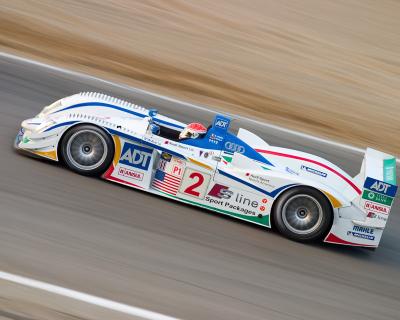
Image 14: Audi R8 exiting T9, Rainy Curve, 170mm, 1/125, f4
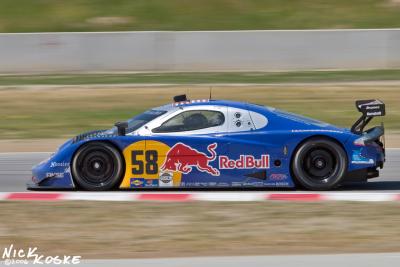
Image 15: Brumos Porsche DP entering T10, 225mm, 1/125, f16
Location 6:
The next place I hit is the T3&4 area. There is some spots where you can see over the fence and other places where you have to shoot through holes in the fence. Those holes may or may not be there for ever, but who knows.
I start near the grandstands near T4 you can get some pan shots here from the stands and also some shots of the cars under the Yokohama bridge
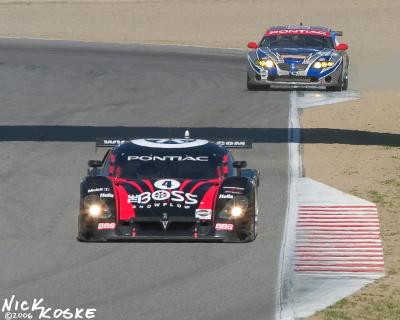
Image 16: Pontiacs between T3 and T4, 280mm, 1/350, f9.5
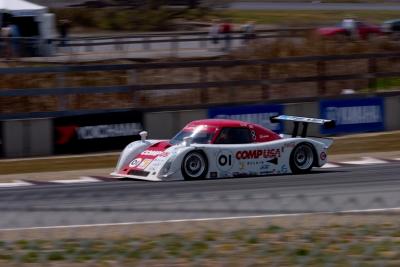
Image 17: CompUSA Lexus Riley in T4, 185mm, 1/180, f13
Then I move down the fence line towards T3 and shoot through holes in the fence as I make my way towards the bridge down the front straight

Image 18: DPs and a GT through T4, 140mm, 1/500, f5.6
Location 7:
I shot at the stands down the front straight for the first time at the 2006 Grand-Am race and I think there are a couple worth while shots. The first shot can be had at the top of the stands of the cars coming through T11.
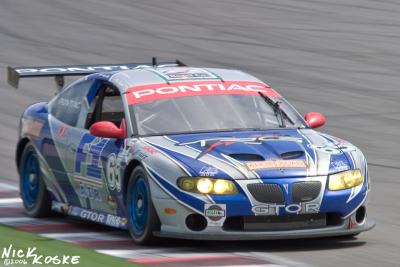
Image 19: TRG GTOR exiting T11, 280mm, 1/90, f13
The second shot is at the base of the stands shooting towards T11. You need to shoot through the chain link fence and then through a photographers holes in the catch fencing. You can get a decent head on shot
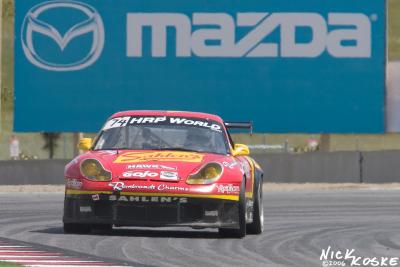
Image 20: Sahlens 911 GT3 Exiting T11, 280mm, 1/500, f6.7
 LagunaPhotoMap.jpg |
| comment | share |
| Graham Newlon | 09-Jul-2007 16:53 | |
| Guest | 26-Oct-2006 05:35 | |
| Guest | 17-Oct-2006 18:19 | |