Saturday, March 04, 2017
Welcome to our travel blog. We photograph mainly landscape, wildlife and nature in the states of North and South Carolina, Virginia, Georgia, Tennessee, and sometimes Alabama. We have just re-established with Pbase and will be updating the blog as we go. We were with Pbase a long time ago when they suddenly disappeared and hopefully it will work out a little better this time.
We will be adding locations to the blog with every trip, and we will also go back and include some of our trips from the past.
The Photographers
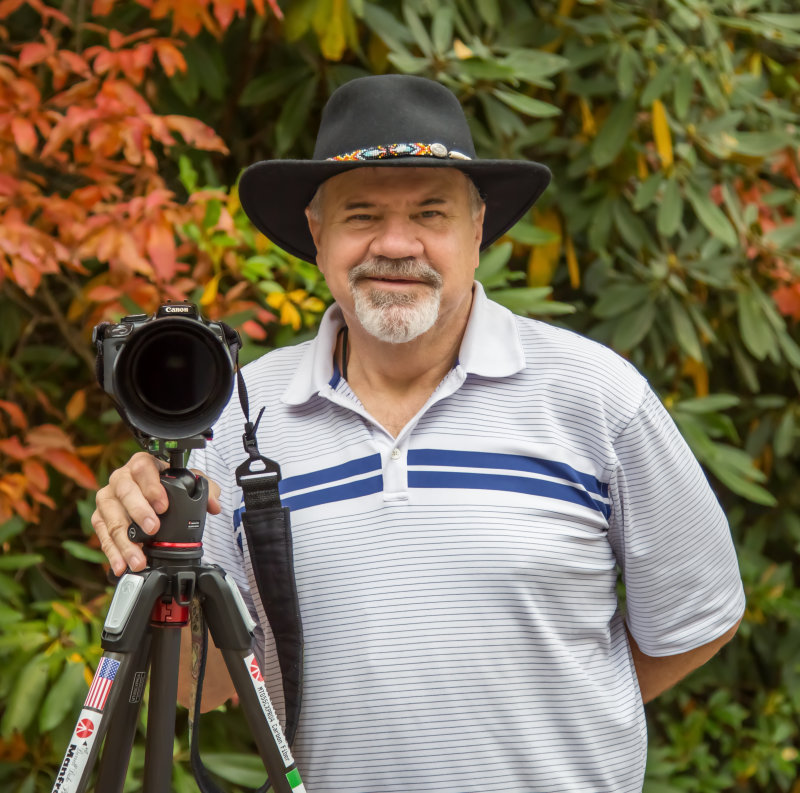
Darrell Duke - Photographer
I consider myself a Wildlife, Nature and Landscape photographer, but like most true photographers I will photograph anything if it moves or not. I also consider myself lucky to be doing this at all, as I was given a second chance at life 9 years ago with a heart transplant. I love to pass on any information I gain on our trips so I will also throw in a little travel advise along the way.
I started my photography at age 6 with a small box camera and have been at this for 57 years. I still love seeing and photographing new places every day. Don't get me wrong however, just being in photography a long time doesn't make you an expert, it just makes you old.( And Broke ) You learn something about this little hobby every day and you must practice all the time, even if it is just in your own backyard.
Cheryl Duke - Photographer
My wife Cheryl took up photography about a year ago and is now taking some amazing images. Her style is somewhat different than mine, but she has a much better eye.
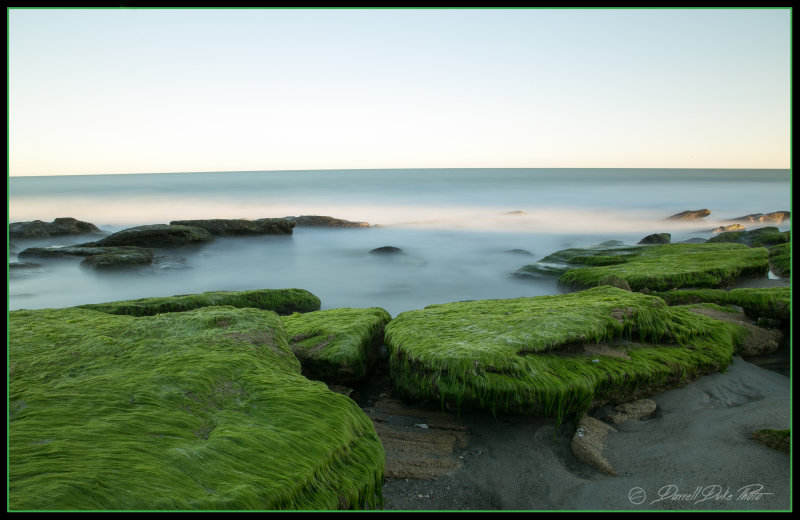
Ft Fisher, North Carolina
We recently had a three day weekend in February 2017, and wanted to go somewhere other than the mountains. Yes, we love our mountains, but every once in a while we like to go somewhere during the off-season you might not expect. This works out well most of the time to avoid the pink shirted tourist, but this late February weekend was quite warm and the pink shirts were out in force. Since we only had three days, we concentrated our efforts in the Carolina Beach, Kure Beach, Ft. Fisher, and Bald Head Island area. We will have to return to the Wilmington area another day. I had seen on Flickr, many great shots from these areas, but we had never spent time in these areas to shoot. Actually drove through these areas once going to the NC Aquarium but did not have time to explore. We were looking to shoot 3-4 particular areas. The Coquina Outcrop, Carolina Beach Pier at Freeman Park, Pelicans at the Kure Beach Pier, and Old Baldy lighthouse on Bald Island. We succeeded on most counts, but the pelicans did not corporate and the sunrise/sunsets were never as flashy as we had as we had hoped. The Coquina Outcrop is in front of the blue condos about 200 yards from the Ft Fisher beach parking lot. We were not sure where to park. Choices were mostly private property, or the museum and a walk across the street, but this doesn't work at sunrise/sunset because the parking lot at the museum is gated until 8am. The best choice was the beach parking lot ( open 24/7 ). It was a paved flat walk of about 150 yards with benches along the way and about 50 more yards on the beach. There are two out croppings, but the first one you come to is the best. Be sure to carry you tripod, ND Filters, polarizer to capture the sunrise here. Try to plan your sunrise pictures at the rocks during low tide if possible. The lower the tide, the more exposed the rocks are. Check local tide and sunrise times before visit and allow about 10 extra minutes to park and walk to the beach. Sunset is over the Cape Fear river behind you, but the out cropping makes excellent photos just before sunset as well. The picture here was taken just before sunset. There are plenty of other photo ops at Ft Fisher including the Ferry Crossing to Southport. Please visit our Ft. Fisher Gallery
Carolina Beach, North Carolina
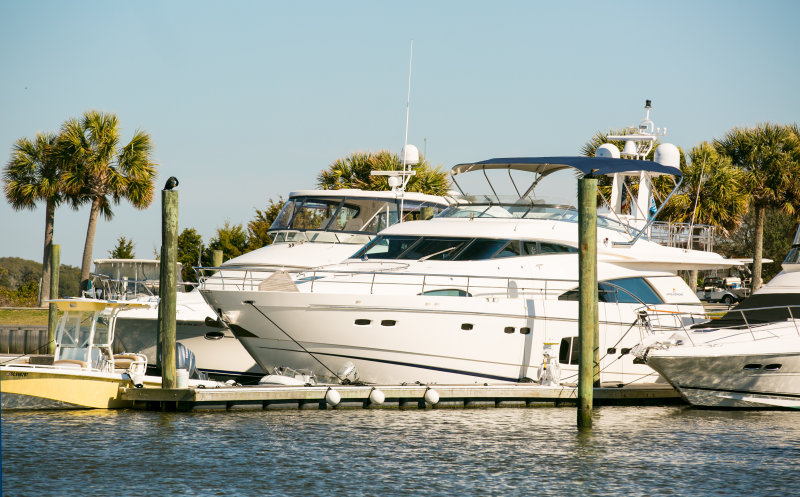
We chose Carolina Beach as our base of operations to explore the North Carolina coastal area between Wilmington and Cape Fear during our short weekend trip. It is centrally located for the area and is the largest of the beach towns in the area. It has two major hotels on the beach (Hampton and Marriott Courtyard) and several other minor players off the beach. We chose the Marriott and it was an excellent choice with all beachfront views. Carolina Beach has a new boardwalk and boardwalk shopping and entertainment district that sports many restaurants, bars, and fast food places. The boardwalk itself is still in progress (getting longer every day), and has benches and swings along the beachfront. It is a very nice addition to an otherwise run of the mill beach town. There are many eating venues to choose from, although many were closed for the season while we were there. Every time we visit a place, we try to eat on a budget, but we like to try at least one or two “Local Joints” while there. The town looks like it would be an interesting place to visit in the summer. It has three major points of interest for the photographer on a short weekend and/or the average tourist. I’m sure there are many more if you have the time to get out and explore the town. The Carolina Beach State Park with its marina and docks on the Cape Fear River make for excellent sunset pictures, The Park also boast an excellent campground is you are really on a budget and also has something called the Venus Flytrap Trail that looked like a good place to shoot in the summer. There was nothing to it in the winter. The major place for sunrise pictures is the Carolina Beach pier and the old pilings between the pier and Freeman Park. The pier itself is closed in the off-season. There is a public parking area on the beach side just before the road enters Freeman Park. It is free before and after hours and during winter. It is between the pier and pilings and only a few feet from the beach. Be sure to arrive at first light and try to plan your sunrise visit during low tide. These were the only two locations I shot during our visit, but others might include, the marina and inlet, the city lake in the middle of town, and areas around the Inter-coastal Waterway.
This was our first visit to the area and I would love to return during season. Places to eat were limited due to the off-season but we did try Havana’s for lunch. I was very disappointed as the shrimp basket I got, was shrimp and onion rings that had clearly just been taken out of a box. Havana’s was crowded every night, but we did not return. We heard that the best seafood place in town is Michael’s by the Inter-Coastal Waterway bridge, but we did not have time to try it. We did try a couple of cheap eats that were surprisingly good. The first was Hardees’s and the second was Jersey Mike’s. By far the best place we ate while there was Wake and Bake donuts. This place is like Duck Donuts on steroids, with dozens of mouth watering varieties and any kind of beverage desired. This one is not to be missed. We even stopped in on the way to get donuts for the trip home.
Please visit our Carolina Beach Gallery
Bald Head Island – Cape Fear North Carolina
OK, my fellow cheap, frugal, and thrifty photographer friends, there are two big major takeaways from our day trip to Bald Head Island. First, be ready to drop some major coin without a lot of photographic return for your buck. Second, take a jacket, hoodie or some other clothing from Nanuck of the North, because this is one cold place. I will elorabate on these, but keep in mind that we ventured there in late February so my view may be slightly slanted.
Let’s start with the trip over. The first leg is the state run car ferry from Ft Fisher to Southport. Relax and enjoy the 35 minute trip and take lots of pictures as this will be your cheapest ride of the day at $ 5.00 each way. Did you remember to bring that jacket I mentioned above? The boat rides can get pretty cold just about any time of year. When we left Ft Fisher the temperature was close to 75, but when we arrived at Bald Head Island it was around 35 and stayed that way the entire day. The wind blows constantly and the island sits out in the Atlantic. It’s hard to take pictures while shivering in short sleeves. Make sure to take a jacket. Once you arrive at Southport and depart the ferry, you will drive about ¼ mile to the marina from which the passenger ferry departs. You will park in one of many Disney World looking parking lots and walk at least a mile back to the ferry terminal. If you have someone that has trouble walking, be sure to drop them off at the terminal before parking. So far you haven’t dropped any more coin, but wait. When you get back in your car in the afternoon, it will cost you $ 8.00 to get it out of hock. Proceed to the terminal (if you can find it), and buy your tickets at $ 22.00 per person round trip. This is just for you, as they do not carry cars. At the ticket booth, be sure to pick up a map of the island before you board, as they are near impossible to find on the island. The 35 minute ferry ride over and back is quite pleasant as it should be for the money. There is one small part of the trip that can get a little choppy just about where the mouth of the Cape Fear River meets the Atlantic Ocean. This part doesn’t last long so hopefully you will not arrive sick.
Please note that when on the island there are only three methods of transportation. You can walk ( not recommended ), you can rent a bicycle ( not bad if you’re in good shape ), or if you are a broken down old man like me, you can rent a golf cart to drive. If you decide to rent the golf cart, exit the ferry terminal, turn left and run (Don’t Walk) past the old English phone booth to a tin shack in the middle of a bunch of golf carts. Why run you ask? There is one guy that rents the golf carts and as many as 150 ferry passengers. Each rental takes about 15-20 minutes to complete, so do the math, and you will quickly realize that you would prefer to be in the front of the line. There is one big circular road around the island, with many little roads in the middle that run between the two sides of the loop, so you really can’t get lost. The map you picked up is more for telling where the shopping, eating, stores etc. are located. Oh, by the way the golf cart your wife jut rented cost $ 79.99 for four hours or $ 80.00 for the entire day. (Not Kidding) Before leaving the area with buildings around the rental area, be sure to visit the restroom because you will not find another for some time. Turn left from the rental area and hit the loop road. Shortly you will come to the split in the loop. The right side of the loop follows the beach through the millionaire’s homes and the left follows the marsh where most photo ops are located. Follow the marsh side and your first stop will be the Old Baldy lighthouse, (oldest in NC) and the chapel next door. These are the top photo ops on the island. Continue on the road in front of the chapel and it will take you back to the marsh loop. There are all types of nature walks for photography people along the marsh road including the one with the boardwalks on the left side of the road. This is the one where the boathouse pictures are taken. A little further down the marsh road, you will find the only grocery store on the island. This is a good place to pickup drinks and snacks for your day of golf carting around the island, without spending an arm and leg. Continue on the loop road making sure to hit all the little trails and other things that your eye catches. Soon you will be on the beach side of the loop. Be sure to walk down some of the many beach access points to view some of the widest, most beautiful and deserted beaches on the east coast. We returned to the marina to find a place to eat lunch. There were on a couple of restaurants there and only one open in the off season. To our amazement the food was excellent and the prices were reasonable. Be sure to utilize your expensive golf cart to the max and explore all the little roads on the island if you have the time. There are a lot of beautiful homes located in some really beautiful areas. When you’re done, just take the cart back to the rental area, and this time you can walk to the ferry terminal instead of running, unless of course the ferry is about to leave.
The Takeaway: Nice place for a day visit if you don’t mind the cost. The photo ops, in my mind, were not as grand as I had hoped, but the off-season visit may have contributed to this. They have rentals so you could leave your car behind and spend an entire vacation week on the island. My wife would love this, but I would be a nut case in a day or two with so little to do. And by the way, as soon as we returned to Ft. Fisher I finally quit shivering as the temperature was again 75 degrees.
Please Visit The Bald Head Island Gallery
17-FEB-2017
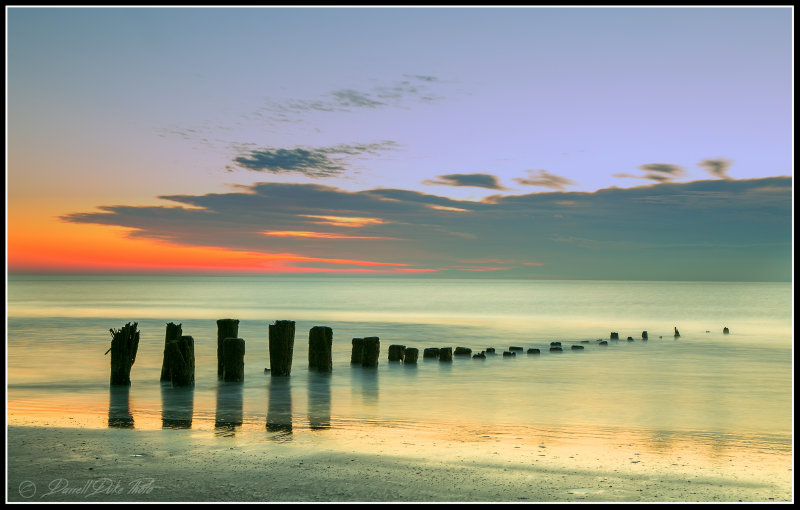
A Word about Neutral Density Photography
At some point in a photographer’s life, he or she will want to try neutral density photography. What is it and why do I want to try it? Neutral Density simply means using a filter to reduce the amount of light entering the lens. This allows for longer exposure times, especially during daylight hours, allowing you to blur moving objects in the frame such as moving clouds or water. Clouds or smoke will appear in the frame as the streaks they leave going across the sky rendering an eerie look. Water will tend to flatten and smooth out, and if the exposure is long enough the water will become misty looking. (See the picture to the right)
The Equipment: If you are a photographer with a nice Nat Geo budget I would recommend getting professional square glass ND Filters such as the Cokin Pro or Lee Big Stopper series. They are much easier to use in the field because they do not have to be screwed to the lens, however they carry a hefty price tag. If you’re the frugal photographer such as me, you will end up getting the round screw-in type filters. Neutral density filters come in different strengths, so which one(s) should I buy? The numbers can be confusing so here is the scoop. I have a weak density filter (Hoya 4 stop ND), a medium heavy density filter (Hoya 9 stop) and what they consider a heavy density (B+W 10 stop), which allows almost zero light in. You may need all three at different times of the day with different light levels to achieve the blur that you are looking for. Remember also, the filters can be used stacked or in combination with a circular polarizer to get the density down even further.
The Neutral Part: Density means the amount of light the filter blocks, but the Neutral part refers to the ability of the filter to do this without affecting the color. Many ND filters, even the expensive ones will leave a colorcast to the pictures. This sometimes can be removed in post processing, but not always. I can’t afford it but I have heard that the Lee Big Stopper, which is the most popular, leaves a blue cast. I know for a fact that the B+W ND filter leaves a brown cast to all its pictures which sometimes cannot be removed. The best neutral filter brand that I have found is Hoya and it just happens to be one of the less expensive ones.
The Process: I started out with the B+W 10 stop ND filter and varied my exposure times. I quickly found this to be a hit and miss deal on correct exposure times to use, with a lot more failures that successes. I heard that there were mathematical formulas that I could use to figure the proper exposure times but not being a math genius or fan, I took my ND filter and threw it in the bag never to be seen again. Then one day I was reading an article by world renowned waterfall photographer Kevin Adams where he mentioned that now “There is an App for that”. The App he referred to was the NDTimer by Three60 Software. It's free but unfortunately, it is only available for iphone at the present time. It is extremely easy to use and requires no MATH. Simply set your camera to the f-stop and/or shutter speed you would use for the scene as you would shoot it normally. Focus the camera and then switch it to the manual focus mode. In the App, input the shutter speed from your camera and the filter or combination of filters you are using. This will tell you how long to keep the lens open for the perfect exposure. Screw in the filter or the combination of filters to your lens, turn your camera to bulb mode, start the app on the phone, (has its own built in timer/alarm) and hold down your shutter remote until the time runs out and the alarm sounds. Bingo/Presto, the perfect exposure. (Well almost, that’s what Photoshop is for)To vary the results, simply change the ISO speed or f-stop and go through this process again.
My Recommendation: I would start with a 4 stop ND, a 9 stop ND, and a good circular polarizer. Don’t forget they can be used in combination if needed, but when stacking filters there is always a chance of some vignetting. The App or one like it for Android phones is a must have unless you have a craving to do math while chasing that sunrise. A flashlight is also good to have if you arrive before first light or stay after dark. Some tell you to carry gaffers tape to cover your viewfinder from stray light, but I have not found this to be a problem. This is a lot of “Things” to fumble with especially if you are working above rocks, or sand on the beach, I would recommend getting something like the Vanguard SB-100 stone bag to attach to you tripod legs to hold your gear while shooting. It is cheap, easy on-off mount, and keeps you from dropping your gear to the deck. Find a local pond, lake, or just start practicing in your front yard today. You will get better at every attempt.
P.S. Needless to say, but I will preach it anyway: Always use a sturdy tripod and remote release during ND Shots. The camera MUST NOT MOVE !
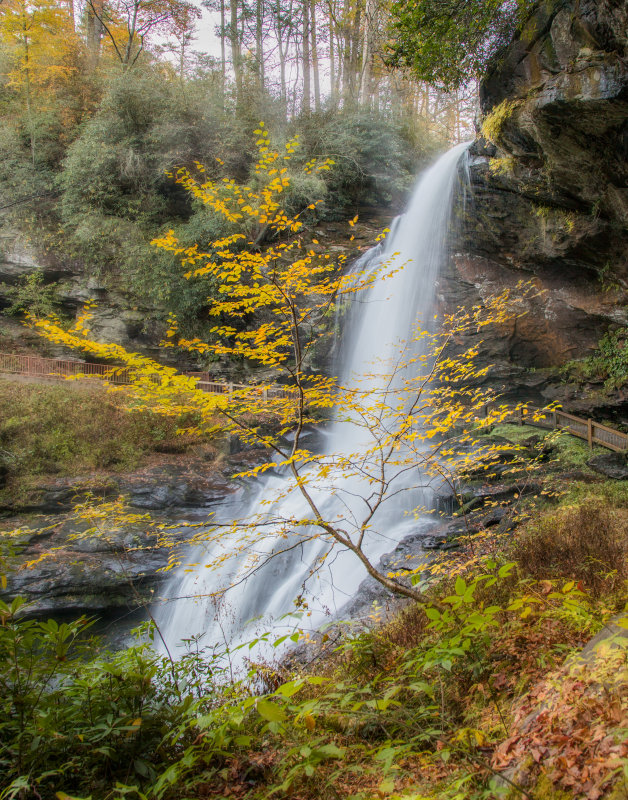
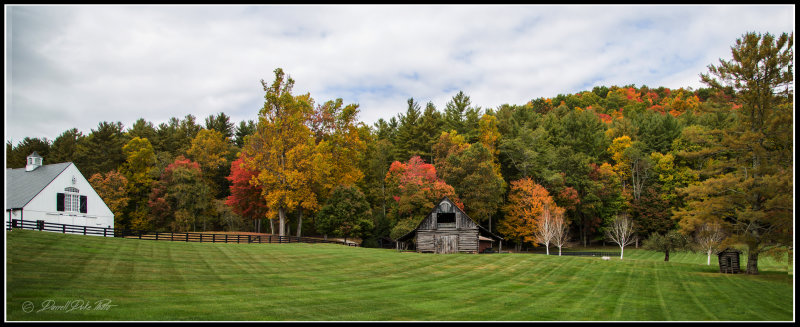
Highlands-Cashiers-Franklin North Carolina
The Highlands, Cashiers, and Franklin North Carolina corridor is one of the most scenic in the world. More to come later