


 |
 |
 |
 |
 |
 |
| Michael Ng | profile | all galleries >> Photo Gear & Reviews >> My Kirk Arca-Swiss System | tree view | thumbnails | slideshow |
|
Introduction: I first heard about the Arca Swiss system from the Nikonians.org website. They were promoting a system used by professionals who were, like me, fed up with having to deal with the inadequacies of the traditional system. I didnít think much of it as I felt that my occasional use of tripods couldnít possibly justify my investing in a pretty pricey system. Eventually, as I grew to appreciate the use of tripods more, the need to get a good support system that will last compelled me to turn to the Arca Swiss format. The Arca Swiss system is currently a widely supported system with several major companies churning out fantastic products to cater to the needs of demanding photographers. Among the major players are Kirk Enterprises (www.kirkphoto.com), Really Right Stuff (www.reallyrightstuff.com) and AcraTech (www.acratech.net). |
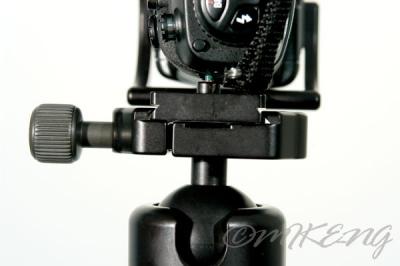
Vise-style clamp which is as secure as it gets. |
Whatís the Arca Difference? The Acra Swiss system basically uses camera/lens attachment plates, most which are custom fit, and a clamp which locks onto the plate like a vise. Unlike the traditional system that locks on one side of the quick release plate, the vise-system employed by Arca Swiss locks onto both sides of the attachment plate, getting a much better hold on it. The beauty of the Arca Swiss system is the custom attaching plates which are tailor made specifically to lenses and camera bodies of most major manufacturers in the market. The custom attaching plates are molded to the contours of the camera body it was made for thus maximizing stability and preventing slippage. Just as all things that are custom made, they come with a rather hefty price tag. Custom plates range from the simple custom attaching plate which costs about US$55 to the full fledged custom L-bracket which costs US$199.95 each. Therefore thereís a huge price to pay. But the quality and craftsmanship youíre getting easily puts your qualms to rest. |
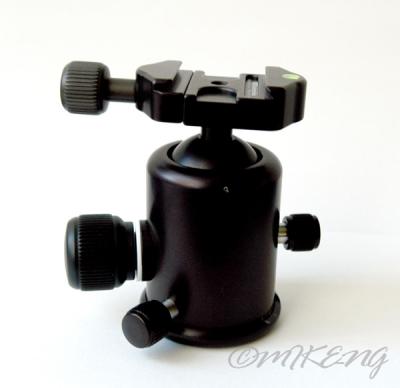
The Kirk BH-3 BallHead  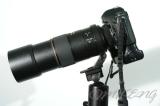 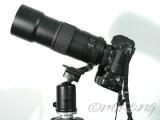 Various positions with my heaviest shooting setup. |
The Ball Head: Part of the reason I moved over to the Arca Swiss system is because I was looking for a good ball-head for my existing tripod. As it turns out, the best ball-heads out there were made for the Arca-Swiss system so the move was inevitable. Why a ball-head? My pan-and-tilt head was just getting too tedious to adjust and the camera kept slipping from the attachment plate. Not only does that spoil your composition, but the friction also damages your cameraís tripod socket and surrounding areas. My original P&T head was also prone to creep (setup doesnít stay perfectly still after locking knobs) which is very frustrating when shooting macro. I decided on the Kirk BH-3 (www.kirkphoto.com) after reading the many wonderful reviews that this ball-head got. Itís the smaller brother of the venerable BH-1. At $255 with a universal attaching plate included, it was the best value for money. My other consideration was the Markins M10 (www.markinsamerica.com). But the price difference was the deciding factor and I went with the Kirk. My package took about one and a half weeks from the date I purchased it online. The Kirk BH-3ís are made to order. But the wait time paid off as I was very impressed with the craftsmanship and precision of the ball-head. The performance of the BH-3 was just as I expected thus I was thoroughly satisfied with my purchase. Using it was just as simple as loosening the main knob, composing, tightening the main knob and then shooting. The beauty of it was the single knob operation which is so much faster compared to pan and tilt heads. Also, when locking the knob, my setup stayed put. No creep like I experienced with my previous pan and tilt head. I have just found the ultimate ball-head for my current setup! The information on the loading of the BH-3 isnt available on the Kirk website. However they do mention that it can carry a pro-SLR with a 300mm f/2.8 lens attached. I believe that this is a conservative estimate as I have read people using 400mm f/4 lenses on this head with great results. If you have heavier lenses in your arsenal, you may want to consider the Kirk BH-1 or the Markins M20 ball heads which are larger versions of the BH-3 and M10 respectively. |
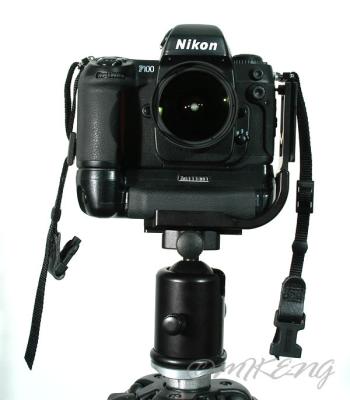
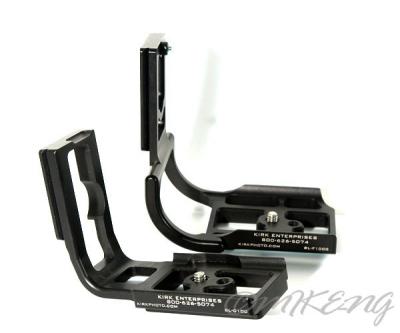 The L-brackets for the Nikon D100 and Nikon F100 by Kirk 
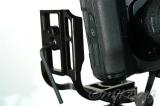
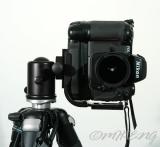 Altertatives for shooting in portrait orientation 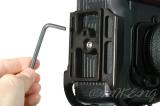
 Releasing the body with the supplied attaching tool. |
The L-brackets: Attaching the camera body to the ball-head requires the use of a camera plate. Options range from the affordable universal plate which fits all kinds of bodies to the very specific and expensive tailor made L-bracket. It would be quite a shame if you had the Arca Swiss system but didnít use L-brackets, because L-brackets were designed primarily to be used with the vise-style tripod heads. The main selling point of the L-brackets is the ability to shoot from landscape to portrait orientation without having to flop the camera to one side. The shape of the L-bracket is of course in the shape of the letter ďLĒ which enables the camera to be mounted on a Arca Swiss compatible head on both sides. This feature is really handy especially for studio photographers who donít want their composition to change so much when changing from vertical to horizontal orientations. The L-brackets also allow photographers to avoid shooting with the tripod head flopped to the side. Though most professional ball-heads are more than capable of keeping the camera body steady in this position, the most stable position of course is when the center of gravity of the camera and the tripod are aligned; which is when the camera is on top of the supporting head. The L-bracket is attached to the camera body via an attaching tool which comes with the L-bracket. The size is standard so one tool can be used for the other L-brackets in your system. On the side of the screw, there are also female threads for the traditional quick release system. So while you have the L-bracket on, you still can attach your setup to a traditional quick release tripod head should the need arise. This screw also allows for additional accessories to be added on if necessary. |
 Rock steady with a 6 second long exposure.
|
Conclusion: Though the progression from the traditional quick release system to the Arca Swiss standard may be extremely pricey, I can say that it is well worth it. Setting up for a shot couldnít be any easier, and the support Iím getting is rock solid. Because the L-brackets are custom made to each camera body, one has to bear in mind that every time a new body is added to oneís rig, a new L-bracket has to follow. But I do look at such equipment as a one-time investment. Buy it once and youíll never have to upgrade again later. If the Arca Swiss system is within your budget, stop struggling with the conventional system and switch over. Youíll be astounded with the ease and results youíll be getting. ©Michael Ng 2005 |
| comment | share |
| George | 13-Sep-2008 04:12 | |
| Guest | 24-Mar-2006 10:53 | |
| matthew wright | 21-Mar-2006 04:44 | |
| Scott | 28-Oct-2005 17:02 | |