photo sharing and upload picture albums photo forums search pictures popular photos photography help login
Gordon W | profile | all galleries >> Tips & Techniques Galleries >> Keeping Your Perspective tree view | thumbnails | slideshow

Keeping Your Perspective

Below is a photo of the Canadian Parliament building before and after removing vertical convergence, a process that adds subtle professionalism to an image. Professional photographers remove vertical convergence by using tilts and shifts in their cameras or lenses, but we mere mortals can also achieve this via a simple process in our image editor.

Any good image editor should provide a means of doing this. Photoshop provides several ways, but the easiest I know of is to use the 'Perspective' command found at: Edit > Transform > Perspective.

However, the layer you are adjusting must be unlocked and since this adjustment is usually done to the Background layer, which is normally locked by default, you must first unlock it by double-clicking on the background layer in the layers palette, or by going to the menu: Layer > New > Layer from Background (apparently Adobe doesn’t consider ‘Background’ to be a layer, even though it is, but that’s a topic for another time :-).

Anyway, once the Background is unlocked, call up the Perspective command and pull one of the little top corner squares to either the left or right, depending on whether your camera was pointing up or down when you took the shot. Pulling one of the corners while in this command moves them both, but in opposite directions. Pretty cool actually. This was done in the wet darkroom by tilting the enlarger film carrier and easel base. So much easier in Photoshop.

Then pull one of the little bottom corner squares the opposite direction you pulled the top corner until the little side squares are again centered over the edge of the image frame, as shown in the second photo below. This step is important to maintain the original aspect ratios of the objects in the photo.

At this point, assuming you pulled the corner squares in the correct direction, chances are your verticals will be closer to being truly vertical but not exactly so. Simply continue to make the above adjustments, fine tuning them, until the verticals are indeed vertical. Dragging guides into the image is usually a big help in seeing when that point is reached.

Click Enter. The image will then need to be cropped to remove the unused area created by this process and that’s all there is to it.
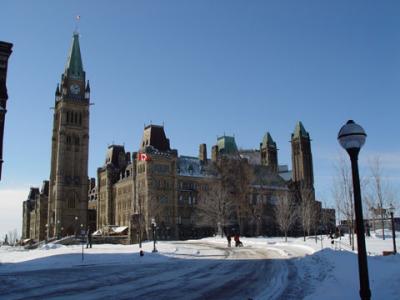
Parliament - Before Correction
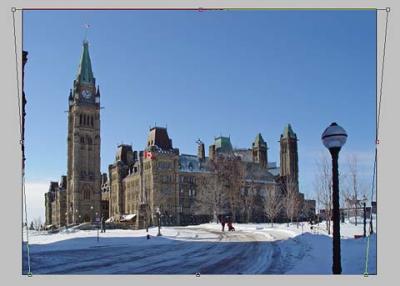
Parliament - Convergence Adjustment
Parliament - After Correction
Towering Parliament
Towering Parliament