photo sharing and upload picture albums photo forums search pictures popular photos photography help login
Gordon W | profile | all galleries >> Tips & Techniques Galleries >> Contrast Masking tree view | thumbnails | slideshow

Contrast Masking

I find the distribution of tones in images from digital sensors to be different from how I actually saw the scenes...sensors producing shadow areas that are darker and highlights that are brighter than how I perceived them (the human eye and mind having exceptional dynamic range). My preference to compensate for the limited dynamic range of digital sensors is a technique called Contrast Masking, a technique that's been around for decades (film also suffered from limited dynamic range).

Contrast Masking selectively alters areas of an image that has extremes in contrast. It tones down and reveals detail in overly bright highlights (as long as they haven’t been completely blown out to white with no detail remaining) as well as brightens and reveals detail in shadow areas that looked nearly black (as long as they aren’t actually solid black with no detail remaining). In the old film days, creating a contrast mask was quite a chore - in today's digital age, it is quite simple.

An internet search will reveal many tutorials available (some simple, some not) that describe how to create a digital Contrast Mask, as well as Photoshop CS or later has its ‘Shadows/Highlights’ command that does essentially the same thing, and if you have Photoshop CS3 or later, its Adobe Camera Raw plugin has two commands called ’Recovery‘ and ’Fill Light‘ that also increase the dynamic range of the output from RAW files. As well, there are commercial applications and plugins available that produce a similar effect (Topaz Adjust being my favorite), but contrast masking is free.

The end result of applying a contrast mask to an image is very similar to the result achieved by applying HDR (High Dynamic Range) treatments to multiple images of a scene and the more data one has to work with, the better the results, but often a single image contains enough data to work with and often a single image is all one has and for single images I have yet to find anything that works better than a simple contrast mask for increasing dynamic range and by far the method that works best for my workflow is also the simplest and most flexible I‘ve found because it‘s done using just a duplicate of the image layer. This also has the advantage of leaving the original image layer untouched, which is always a good thing.

Described here is the process I use to create a contrast mask and is essentially the same process that can be found on numerous web sites.

To create a simple contrast mask...
(requires an image editor with layer capability and layer blending modes
and I think most of them today meet this requirement)


1. Open an image file (preferably one with a lot of contrast, like a bright sky over a shadowed foreground)
2. Duplicate the image layer
3. Invert the duplicate (make it a negative image)
4. Desaturate it (make it grayscale)
5. Change its blending mode to Overlay

And those are the basic steps. Pretty simple.

It is equally simple if one is using Photoshop to create an Action to perform these steps automatically, which is what I‘ve done, so I now create a Contrast Mask with a simple click or two of the mouse. Doesn‘t get much easier than that.

At this point however, the effect is usually too intense and needs to be reduced a bit. To do this, you can...

1. Decrease the contrast mask layer‘s opacity (sometimes radically, sometimes not)
2. One can blur the contrast mask layer (also sometimes radically, sometimes not, every image being unique)
3. Or one one can do a combination of those two (normally the case).

You can blur the contrast mask layer directly or even better if you are using Photoshop, you can create a non-destructive blur by converting the contrast mask layer to a Smart Object and then select the Gaussian Blur filter. This has the benefit of creating a blur that can be modified anytime later.

Be aware that blurring can produce haloing (ghosting) along lines of change in extreme contrast. To avoid this, I sometimes use a very large number for Guassian Blur which makes the haloing less noticeable, but also lessens the effect of the contrast mask.

One caveat of any HDR technique though is that it‘s easy to overdo things and end up with an unnatural looking image, which is fine if that is one‘s goal, but not if one is trying to produce an image that looked like how one perceived it originally. I personally dislike the ’haloed‘ look.

Another caveat is that nothing is free. The price for increasing shadow detail is an increase in image noise in those areas (easily reduced by applying noise reduction to just those areas), plus due to the nature of digital images those areas will inherently have much less dynamic range than brighter areas, so the technique works best when applied to a properly exposed image and one shot at the lowest ISO setting possible. Increasing dynamic range in shadow areas is where combining multiple images has the advantage, although with correspondingly greater difficulty to achieve (as I said, nothing is free).

Below are several examples showing the effects of Contrast Masking, Photoshop‘s Shadows/Highlights command, and (as I recall) Fred Miranda‘s original Shadow Recovery plugin.

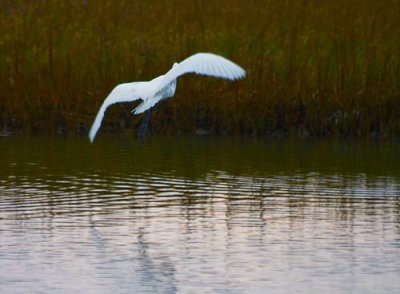
Egret In Flight 32955 (No Contrast Mask)
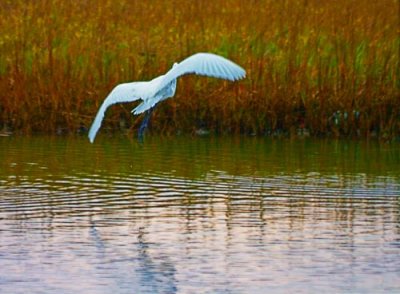
Egret In Flight 32955 (Contrast Masked)
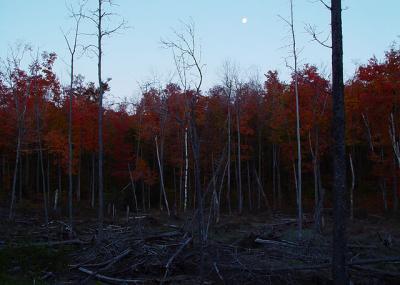
Gatineau Park Predawn - Before
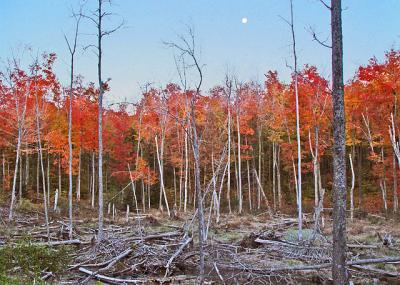
Gatineau Park Predawn - After
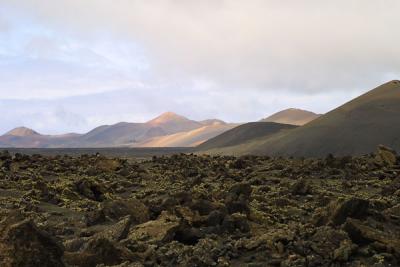
Original Image
Original Image
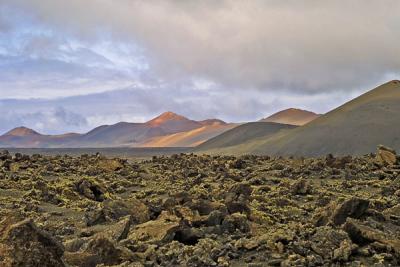
Shadow recovery + levels + usm
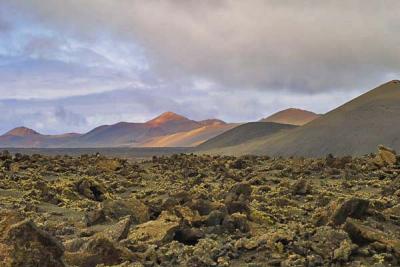
Photoshop CS Shadows/Highlights to match
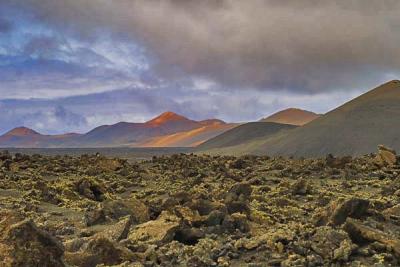
Photoshop CS Shadows/Highlights Stronger