06-JAN-2012
Manifold Off
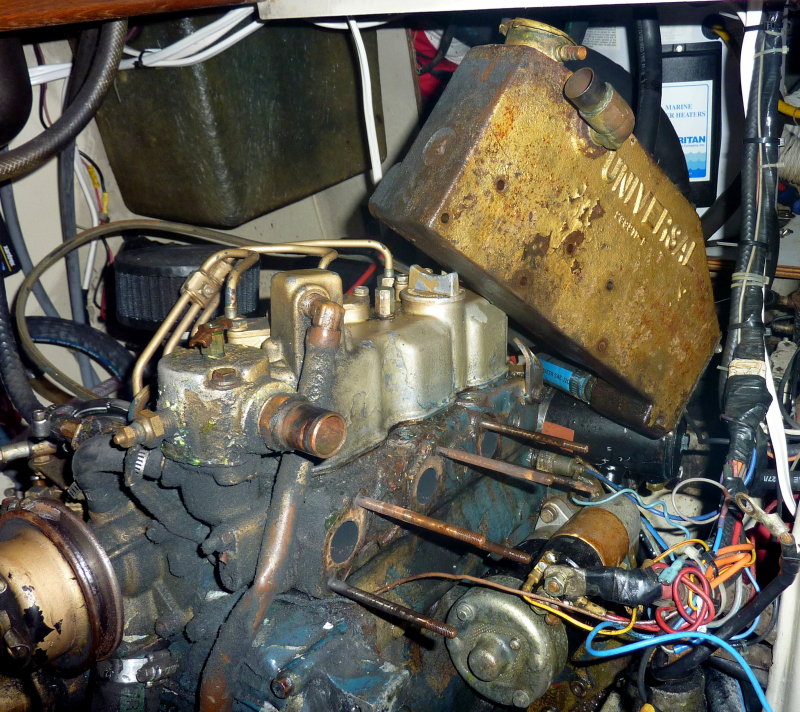
In this picture the manifold has been removed. You will now need to disconnect the last hose and take it off completely.
Apply to the base of each stud, where it enters the block,some PB Blaster, Kroil or another quality penetrating oil. Before someone asks, WD-40 is NOT a good quality penetrating oil....
06-JAN-2012
Remove The Old Manifold Studs
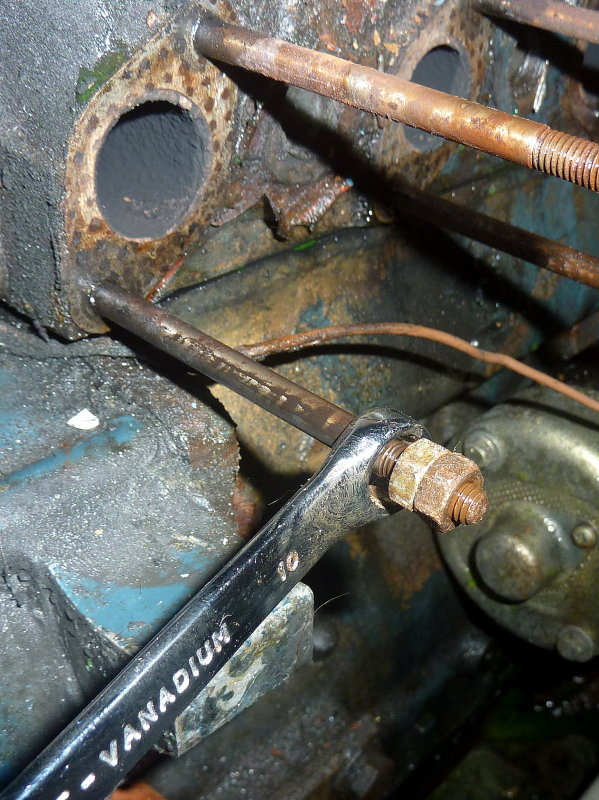
In order to remove the old studs I coated them with PB Blaster and waited. I then double-nutted them and they came out quite easily. If they give you fits with double nutting place a flat washer between the two nuts before you back-tighten them onto each other.
TIP: Double-nuts is a good trick for removing studs. Spin one nut onto the stud and then another. Now tighten them hard against each other, not to the stud. You may now use the inner nut to beck the stud out. If you have room, placing a flat washer between the two nuts minimizes any slipping....
Once all the studs are removed you will then need to remove the old manifold gaskets and clean the three exhaust port flanges. I used some acetone and a 3M Roloc disc by hand, not a drill. Alternatively some burgundy Stotch-Brite will work too. These gaskets come off pretty clean..
11-JAN-2012
Install New Studs
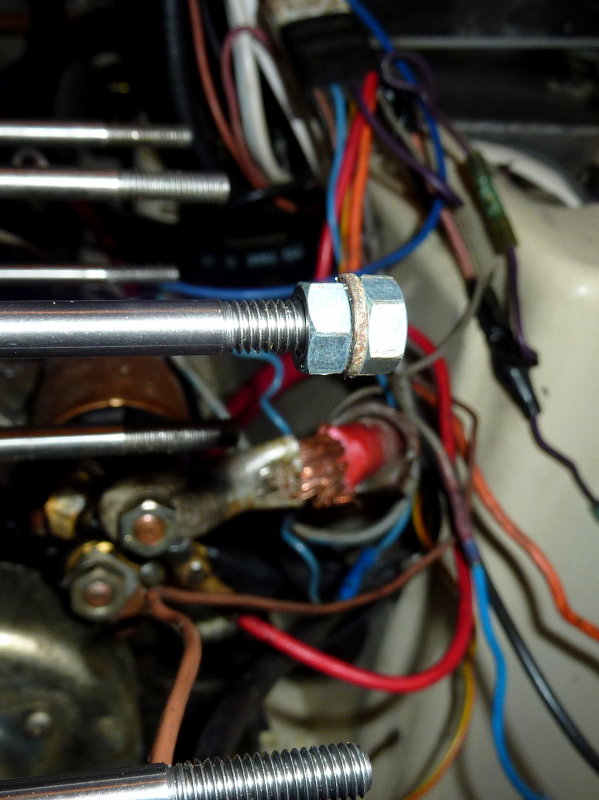
This is the reverse of removing them. In this photo I have placed a flat washer between the two nuts. Tighten them by using the outside nut...
It should be noted that the four new longer studs go in the front two exhaust ports closest to the crank pulley. The aft exhaust port can still use the old studs or you can purchase new replacements and do it right, while you're in there.
11-JAN-2012
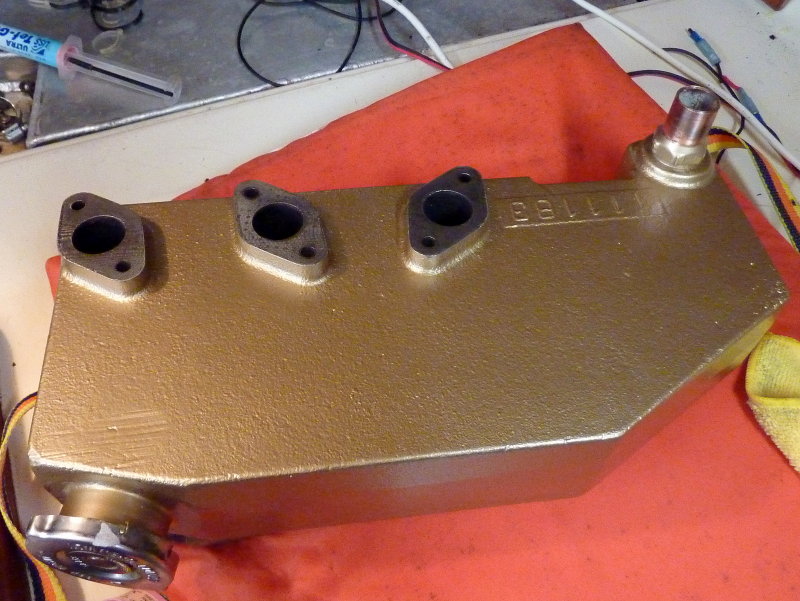
Manifold Cleaned, Painted & Ready
While you have the manifold off it may be a good time to have it boiled out, sand blasted and then you can paint it and get it ready to re-install. I also purchased a new radiator cap and removed and re-installed all tappings with fresh pipe dope..
11-JAN-2012
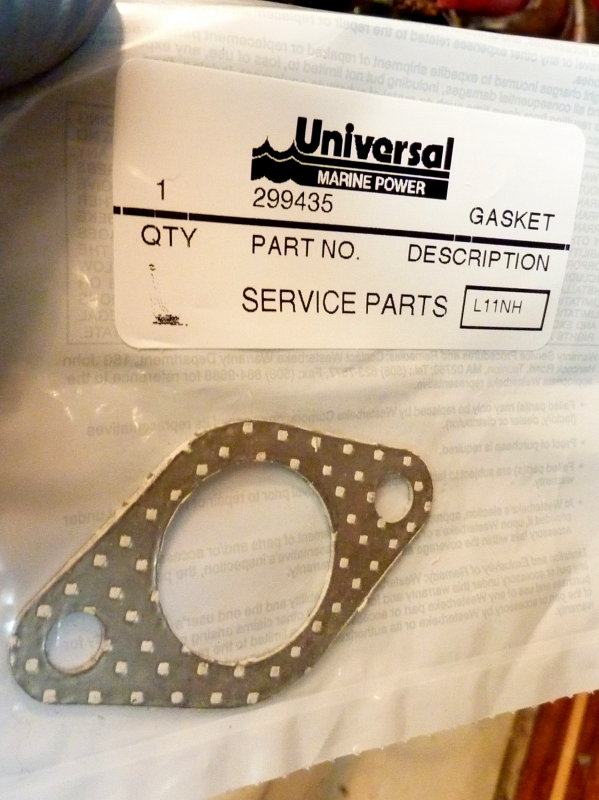
Manifold Gaskets
You will need three of these gaskets, part# 299435, and they run about $9.57 each.
11-JAN-2012
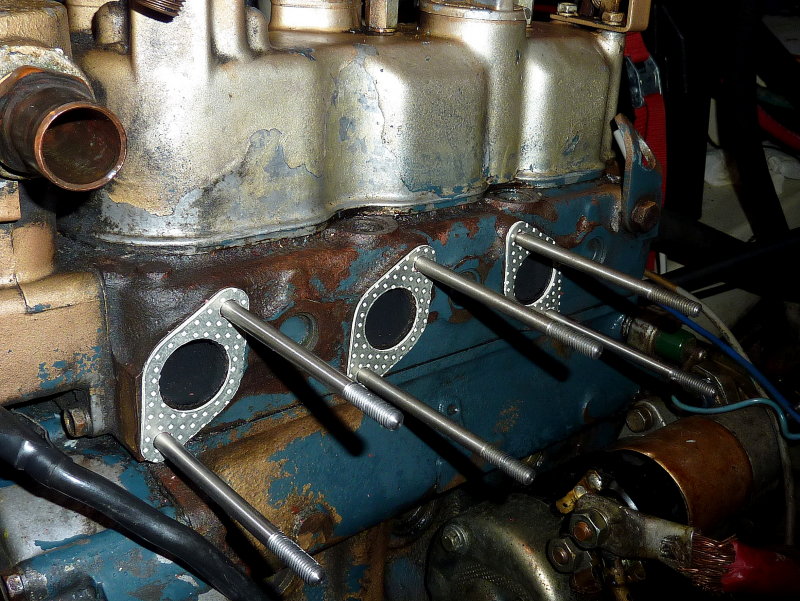
Studs & Gaskets Installed
Once the studs are installed and have been torqued slide the gaskets over the studs. You are now ready to re-install the exhaust manifold.
11-JAN-2012
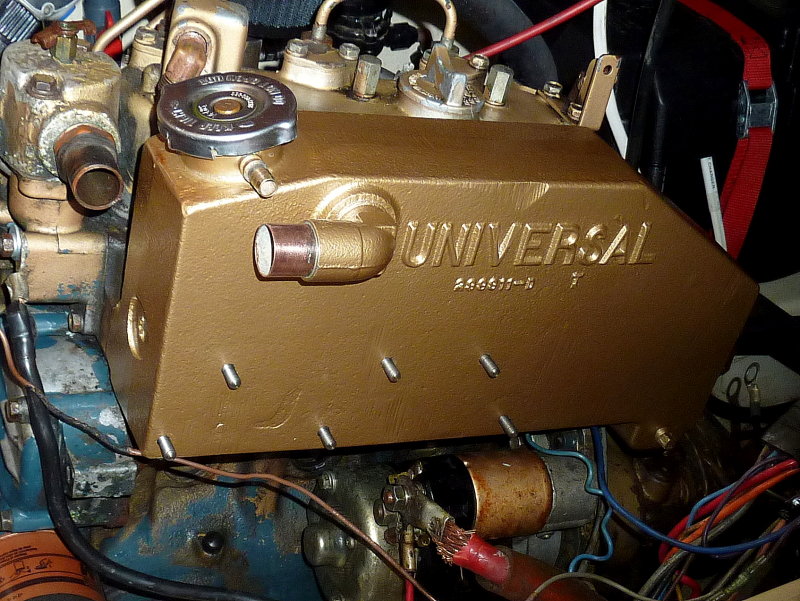
Exhaust Manifold Back In Place
With the manifold back in position you can see the added length of the new studs.
11-JAN-2012
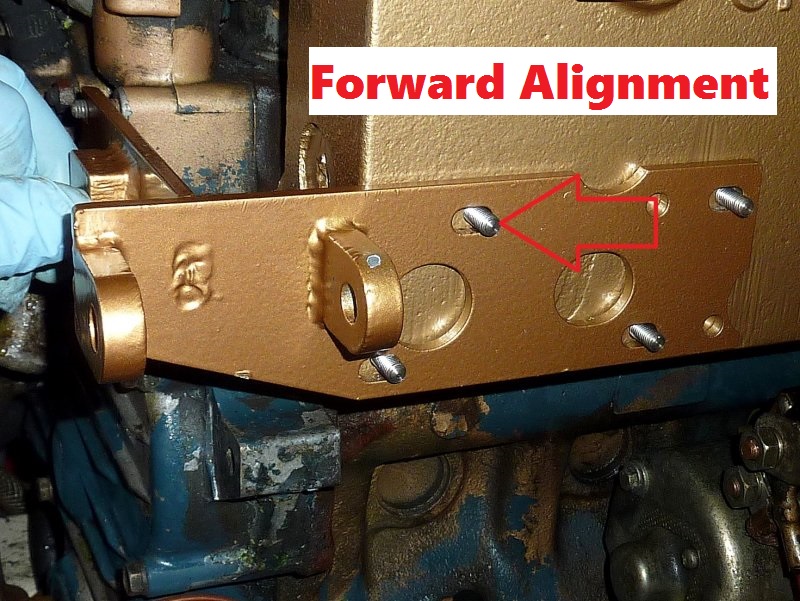
Forward Alignment
I have seen a lot of M-25's and M-25XP series engines with very poor alternator belt alignment. This leads to chronic belt dust, premature belt wear and slipping belts. Any slippage can also increase alternator heat.
These brackets have oval mounting holes in them for a reason! In this photo the bracket is slid all the way forward.
Be sure to align your alternator with the other two pulleys!
11-JAN-2012
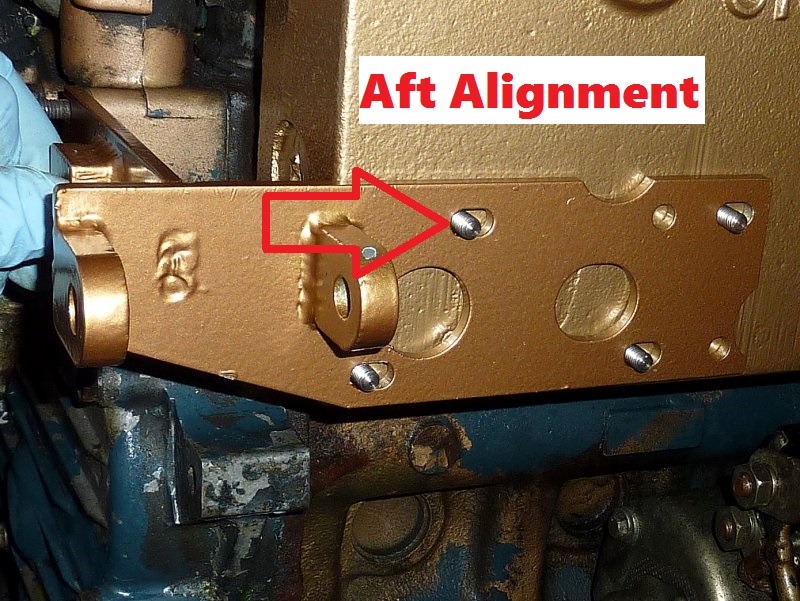
Aft Alignment
This image shows the bracket in aft alignment. No two engine/alternator combos are perfectly identical so please take the time to ensure your belt is well aligned.
Boats with deeply cycled banks of batteries drive a lot more current through these small belts, for a lot longer duration, than cars do. Proper alignment is critical.
11-JAN-2012
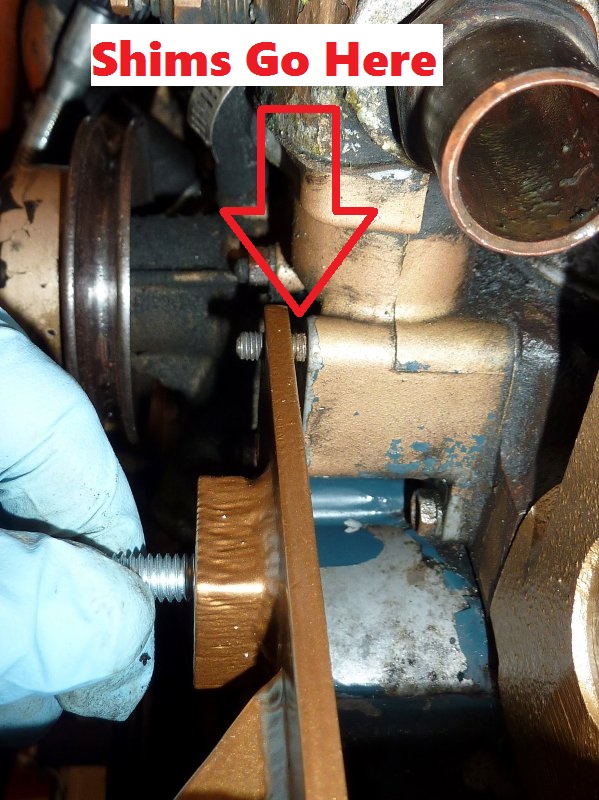
Forward Alignment 2
When you forward align the bracket you will need the proper thickness washers or shims to fit here. If the washers are too thick you can sand them to the correct thickness with some sand paper. This takes time so be patient.
12-AUG-2012
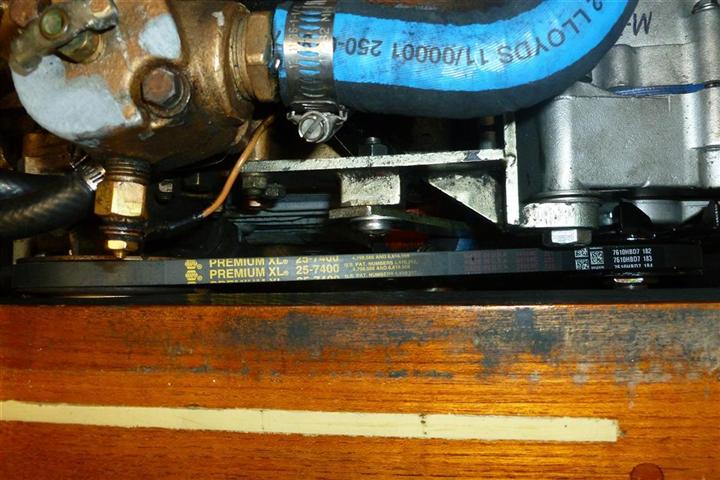
A Good Example of A Bad Alignment
Here is a very good example of a very bad alignment. As we can see the alternator needs to come forward in the forward align position. This belt will do nothing but wear prematurely if left like this.
Like many installers do, this installer simply bolted the bracket on and slammed it all the way to aft alignment, never considering there were slots in the bracket for a reason..
Sight your eye and the belt to the edge of the teak board...!! You can also see the curvature where it comes off the water pump pulley.
Image courtesy: S. Jackson
11-MAY-2012
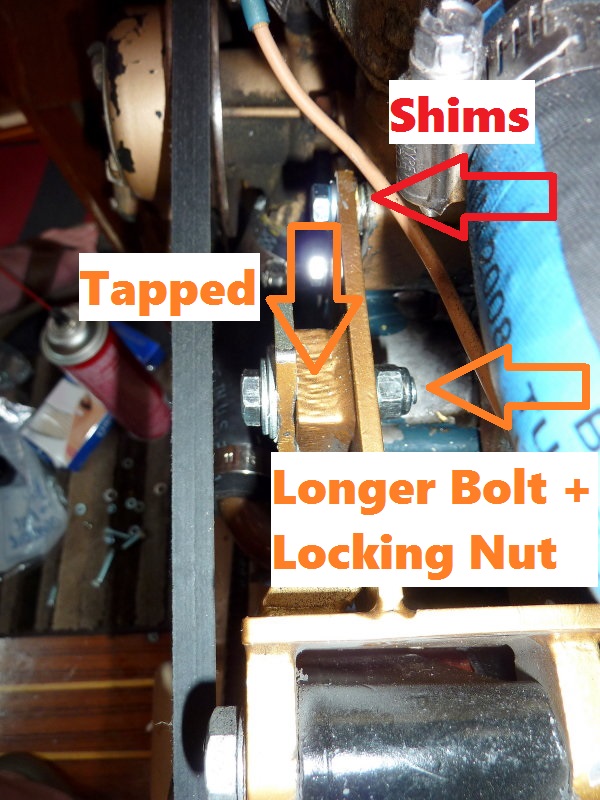
Alternator Aligned
In this image we can see the alternator in-place and aligned. It needed shimming as referenced by the red arrow. On this engine it took two metric washers with one of them partially sanded thinner.
TIP: One thing I see over and over is adjustment arm bolts and alternator ear bolts coming loose and slipping thus reducing tension on the alternator belt and causing it to slip and create belt dust.. On these Universal engines the bracket itself is drilled and tapped to accept a bolt, as is the alternator ear. (ORANGE ARROWS)
I go one step further than the factory and purchase a longer bolt that sticks all the way through the bracket so I can add a locking nut to the back side. In doing this extra step I have never once had an adjustment arm come loose!
I would recommend you use at least blue Loc-Tite on the studs that go into the water pump housing to hold the alternator bracket.