MAY-2006
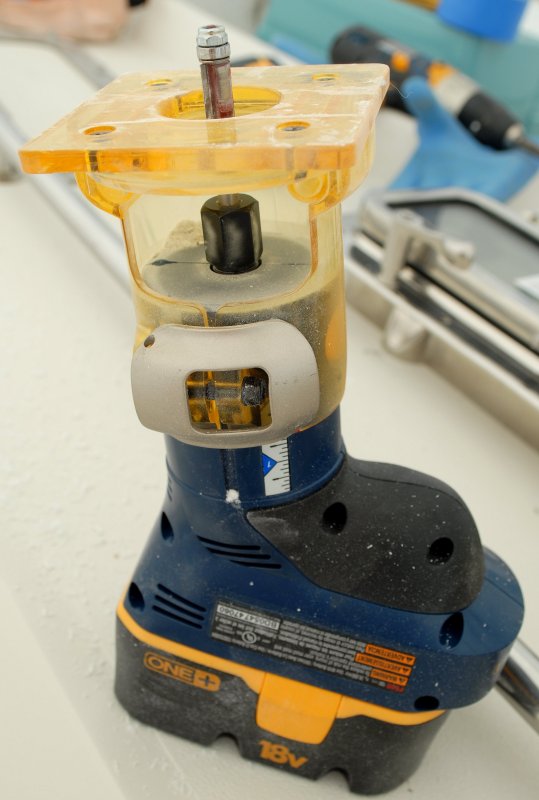
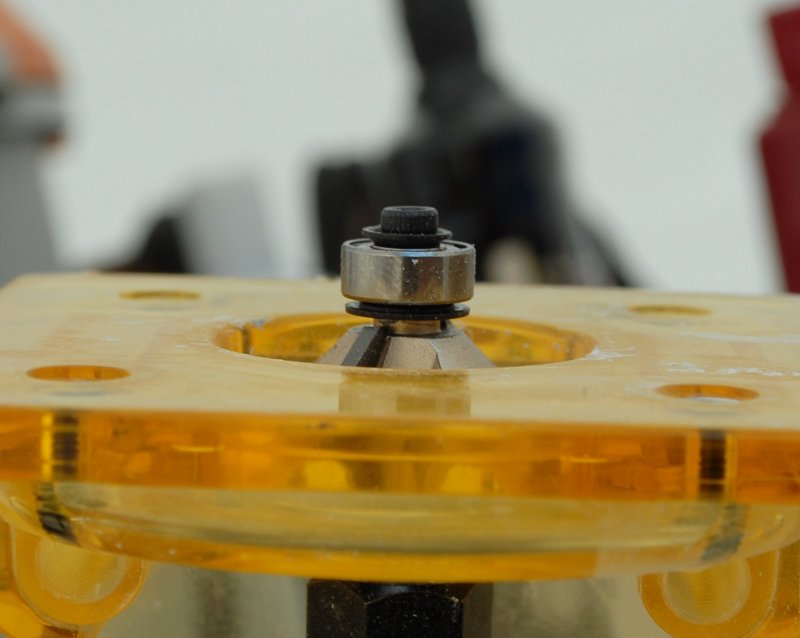
The Laminate Trimmer
This little battery operated laminate trimmer is the best $49.00 I've spent in a long time. I own lots of heavy duty professional grade tools from Hitachi, Porter Cable, Milwaukee, Makita & DeWalt but often find my self reaching for my cheap Ryobi ONE+ stuff.
I have yet to kill one of these "budget" tools and I use my Ryobi stuff quite often (professionally). I now have about 10 batteries, $49.99 for two, and two chargers, so I never run out of battery power.
Whether you chose to use a Ryobi, DeWalt, Hitachi or Bosch the small laminate trimmer, vs. a router, is the way to go regardless of brand..
MAY-2006
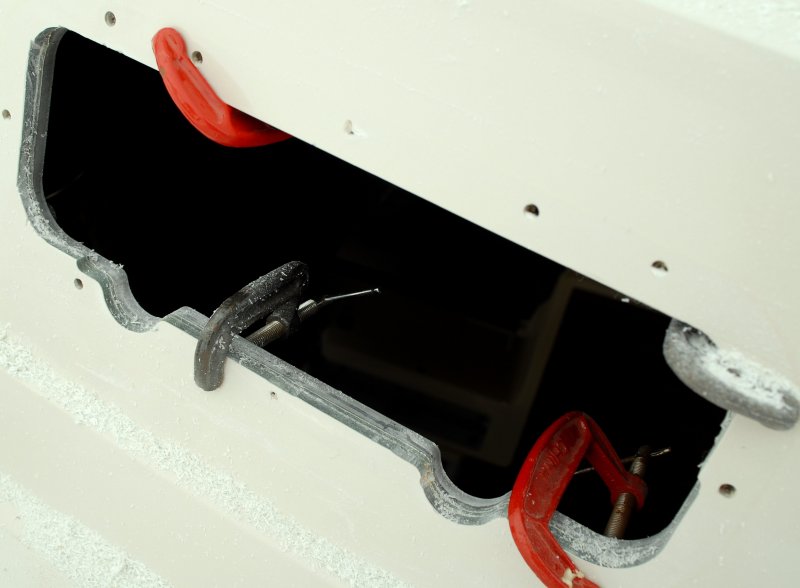
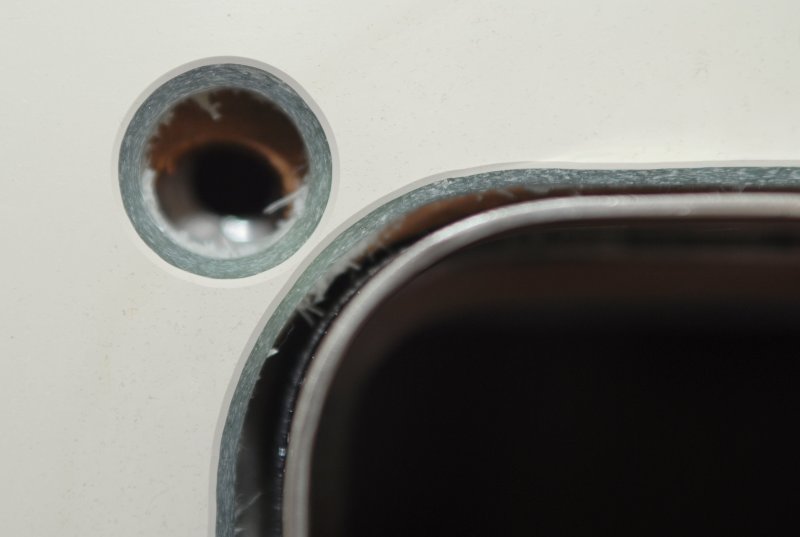
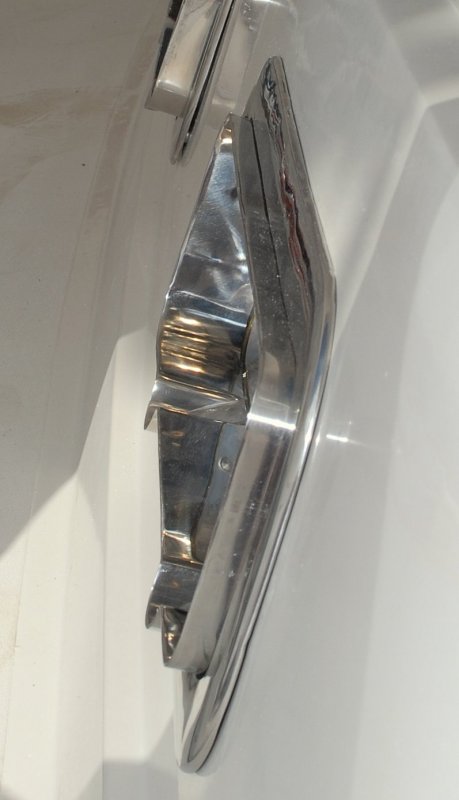
Ready To Bore The Holes
This photo shows the completed and routed port opening after moving the clamps to complete the full circle. It matches the Template perfectly.
Once the opening is cut leave the template in place and use the built in drill guides to drill the 8 3/8" trim ring holes. You will notice in the picture that I have drilled, from the inside while the template was still in place, many of the eight 3/8 inch trim ring holes already.
MAY-2006
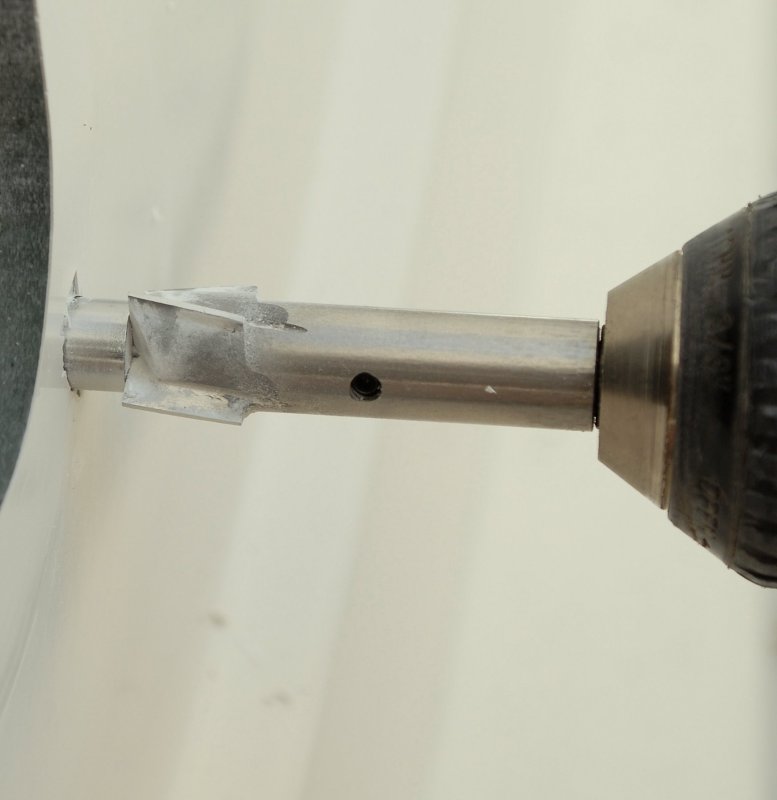
The NFM $29.00 Counter Bore Is Worth It
Once you have drilled the 3/8" holes you need to counter bore into your cabin side exterior 1/2" deep to accommodate the bolt studs on the trim ring. My cabin sides were 1/2 inch deep so I had to go all the way through which is fine.
The NFM counter bore has a 3/8" guide pin, to match the previous 3/8" holes you drilled, and it bores it out to 5/8". It is well worth the $29.00 and is a very high quality & clean cutting tool.
MAY-2006
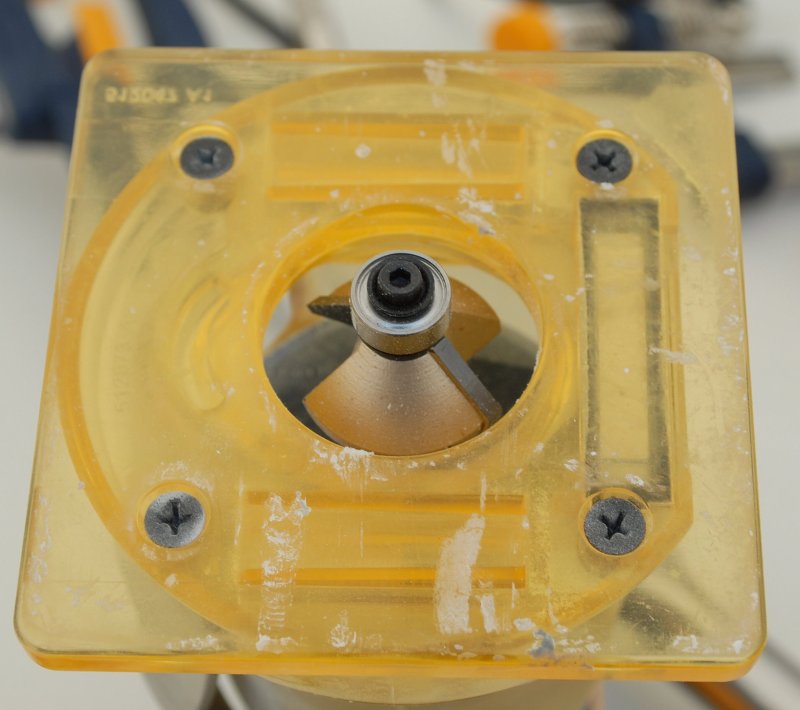
45 Degree Bearing Guided Chamfer/Bevel Bit
Having learned the art of bedding fittings from some of the masters at Hinckley Yachts I believe in the bevel/chamfer and tighten once method for most things. I don't generally subscribe to the "tighten over a few days to create a gasket" method.
Beveling the edges of the holes does a few things:
1)It forces bedding compounds into the hole, like a funnel, as you tighten the fitting.
2) It creates an o-ring of sealant that is about 6-8 times the thickness of what would be there without a bevel.
3) It allows you to tighten the fitting all the way down without coming back days later to do so which can break the seal that has already cured around the bolts threads.
4) It creates a surface area that forces sealant against and around the bolts threads or shank.
5) It prevents gelcoat crazing and checking around the bolt holes.
To use this process for the ports I used my laminate trimmer and a 45 degree bearing guided bevel/chamfer router bit. The router bits guide bearing fits in the 5/8" hole so I used the laminate trimmer for those holes too.
On these ports, using the butyl, it is very, very difficult to tighten them down all the way at once. I tightened the ports over two days, which is short enough so my polysulfide sealant did not fully harden, but long enough to fully compress the butyl.
WARNING: I differ from the NFM instructions on this particular procedure. NFM says to tighten over a few days letting the sealant harden to form a "gasket" so you make your own choice on how to seal the ports but here is my explanation of why I do it the way I do:
I've been bedding fittings, tighten once or before the bedding is dry, this way for a very long time and never once had a re-leak. The idea that tightening a fitting all the way down squeezes out all the sealant is just not true. Take for example the aluminum valve cover on the Volvo 5 cylinder engine used in the V-70 series and others. This valve cover uses no gasket and only a thin layer of Permatex (Silicone) is required to seal it. You apply the Permatex, install the valve cover, and torques the bolts. Valve cover gaskets are under positive crank case pressure and deck fittings or ports are not! I have used the above method (bevel then tighten at once) on underwater fittings as well and still never had a leak.
Again, it's your choice as to how to seal your ports and I'm merely telling you how I differ from the manufacturer on this one point.
EDIT: If I had to do this job over again I would NOT use the NFM black butyl tape and would instead use Bed-It Butyl Tape in gray. This will completely avoid the need to use both a sealant and butyl. The gray Bed-It Tape is far less messy than the black tape from NFM.
MAY-2006
Depth Of Chamfer/Bevel
This photo shows the depth of the bevel cut. It does not take much to create a good seal..
MAY-2006
The Chamfer / Bevel
Here is a close up of the beveling or chamfering. It runs all the way around the port and around each bolt hole. Every bedded fitting on my boat is, or will be, as I get to them bedded in using this method.
Most times I just use a drill and a chamfer or countersink bit but for big holes like this a laminate trimmer is the way to go. While that bevel may look big it's really only about 1/16 of an inch..
MAY-2006
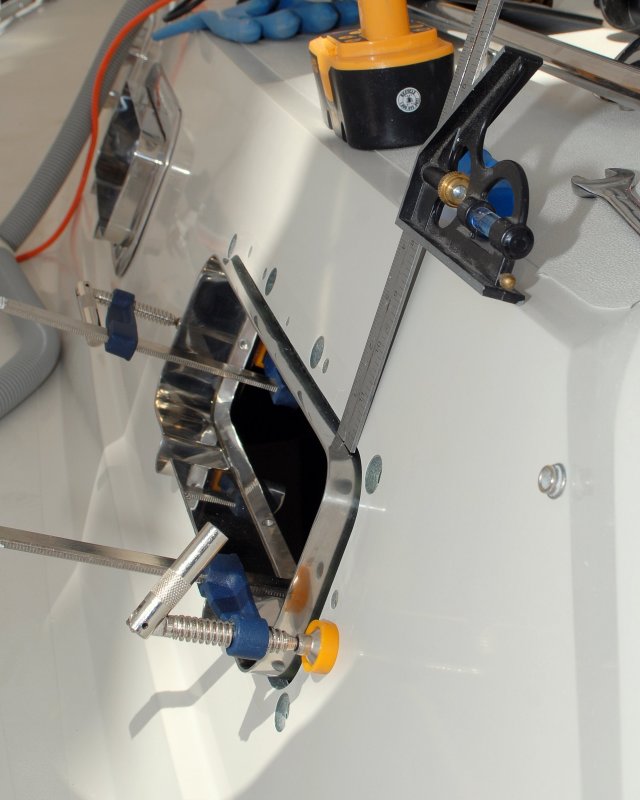
Dry Fitting & Leveling The Ports
When I routed the holes using the NFM template I made sure it was level with the cabin top. Some boats have a large smooth radius cabin top so you'd need to find a way to measure for level but my boat has a nice square, clean edge to work off of.
Before applying the butyl tape I made sure to line up the ports and make sure they were level by using my combination square. Once they were level I tightened down hard on the clamps making sure to use a block of wood on the inside to prevent scratching the port.
This photo shows me checking the right side of the port with the combination square.
MAY-2006
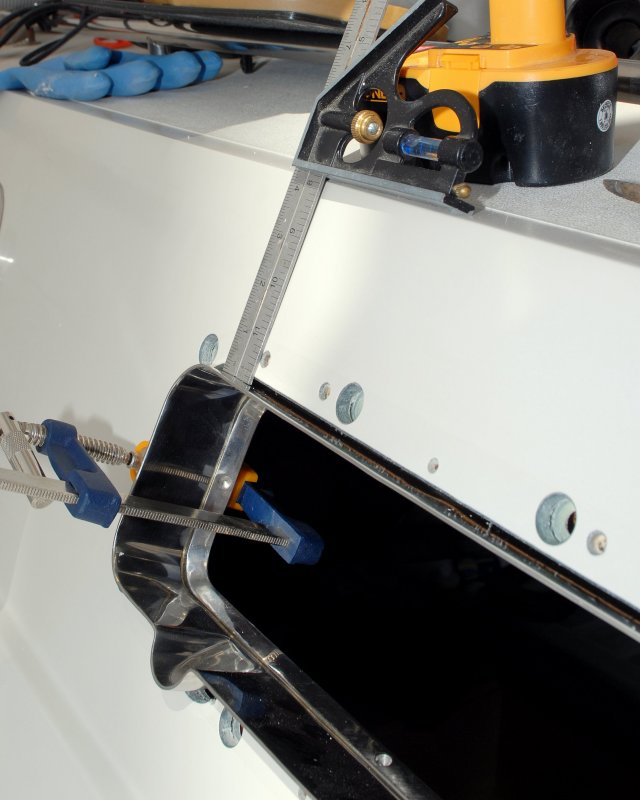
Dry Fitting & Leveling The Ports 2
Checking the left side of the port for level. You can see, when the camera pulls away, how slight the bevel is. It's there but hard to see in this photo.
Again, CLICK ANY PHOTO TO MAKE IT LARGER
MAY-2006
With Teak Spacer & Without
The port in the foreground of this photo has the teak spacer installed and the port in the distance does not. You can clearly see why the spacers are needed on boats with thin solid glass cabin sides.
The NFM teak spacers are 5/8" thick and by adding them it left about 1/4" of the spigot protruding vs. almost one inch without.
MAY-2006
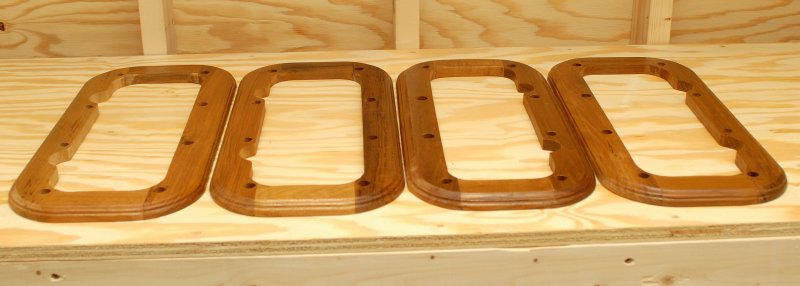
Teak Trim Rings
These are the NFM teak spacers. They are $40.00 each but are still well worth it. Do yourself a favor and pre-finish them before installation.
MAY-2006
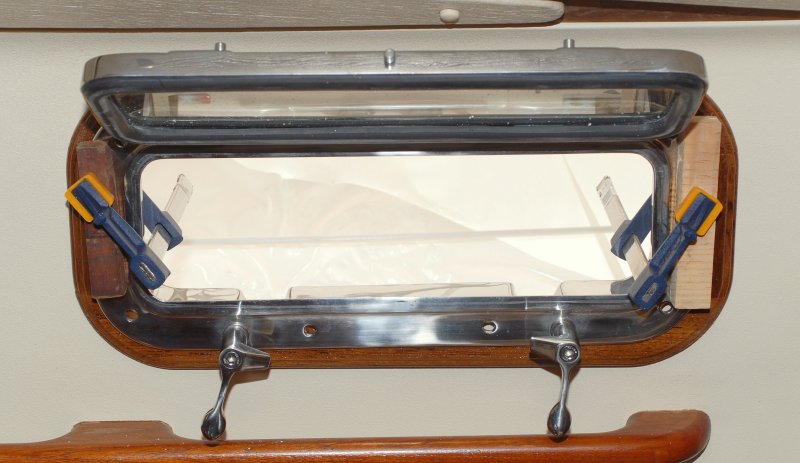
Interior View
This view shows the teak trim ring and the wood blocks for clamping and aligning the port.
MAY-2006
Ready For Butyl
In this photo I'm getting ready to level the port and clamp it down to apply the butyl.
*******CLICK BELOW FOR PAGE 4*******