25-APR-2012
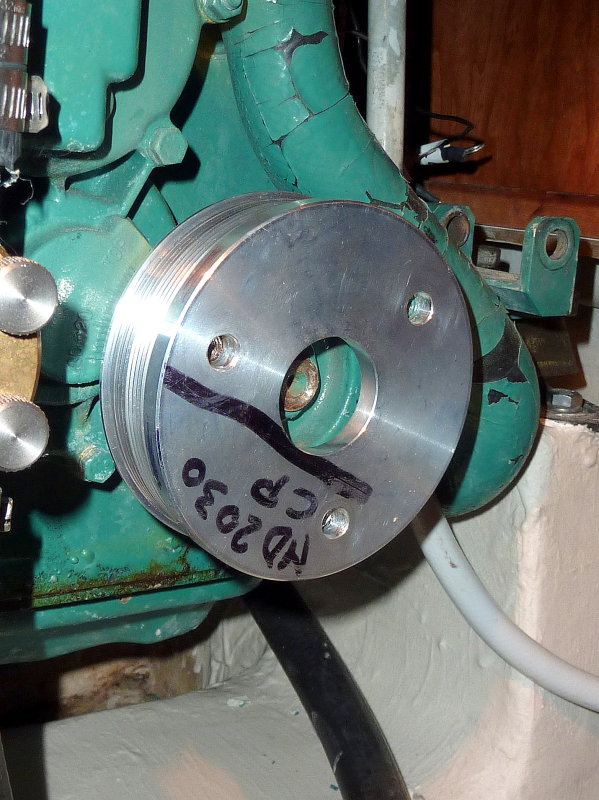
Install The New Crank Pulley
Slide the new serpentine pulley over the factory crank pulley and align the holes.
Apply some blue LocTite to the threads and tighten. You can look up torque values for any size fastener on the internet in metric or SAE. Keep in mind that torque values are lower for "lubed threads" and LocTite, when wet, counts as a lube.
26-APR-2012
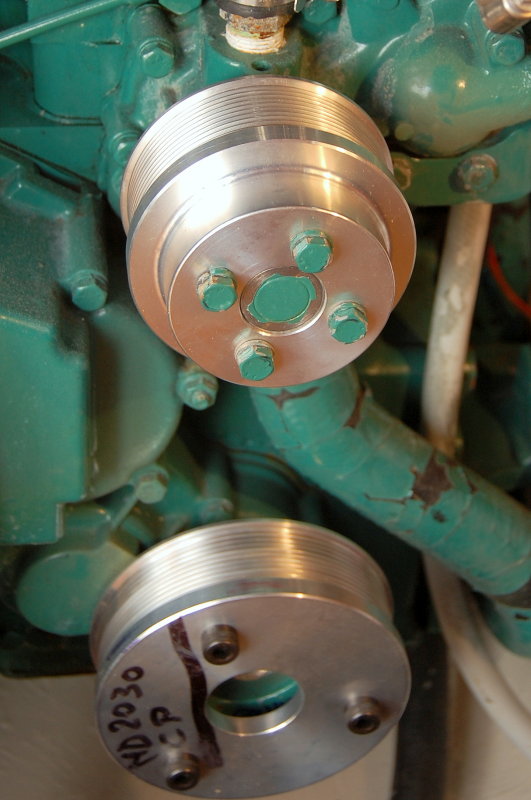
The "Problem" Solved
This was the big challenge with this kit. The serpentine pulley needed to clear the timing marks and then all the pulleys, water pump and alternator, needed to line up with the crank pulley.
E-Maax exceeded my expectations in this department and the fit was amazing.
25-APR-2012
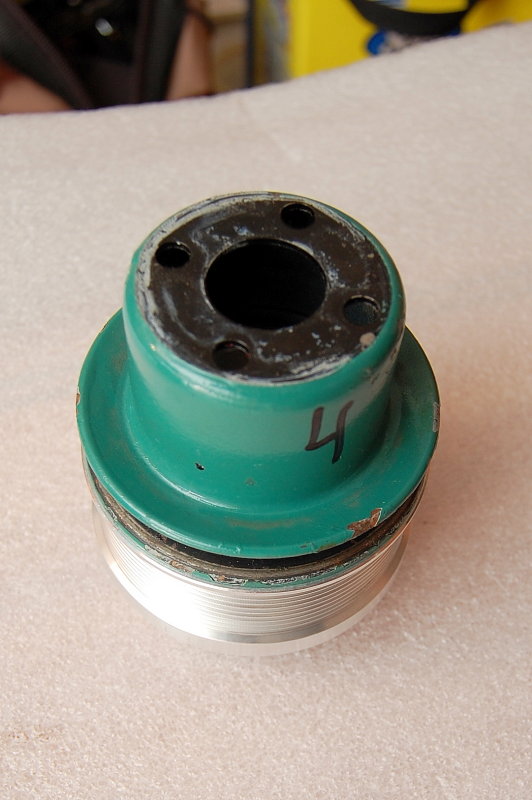
Water Pump Pulley
Rather than fit a waterpump pulley over the old one, like they do with the crank pulley, they simply machine a new one. Fitting a water pump pulley over the old one could change the engines flow characteristics and they are careful to keep the pump within the manufacturers guidelines.
In the kit you order the offsets for all the pulleys will line up perfectly.
25-APR-2012
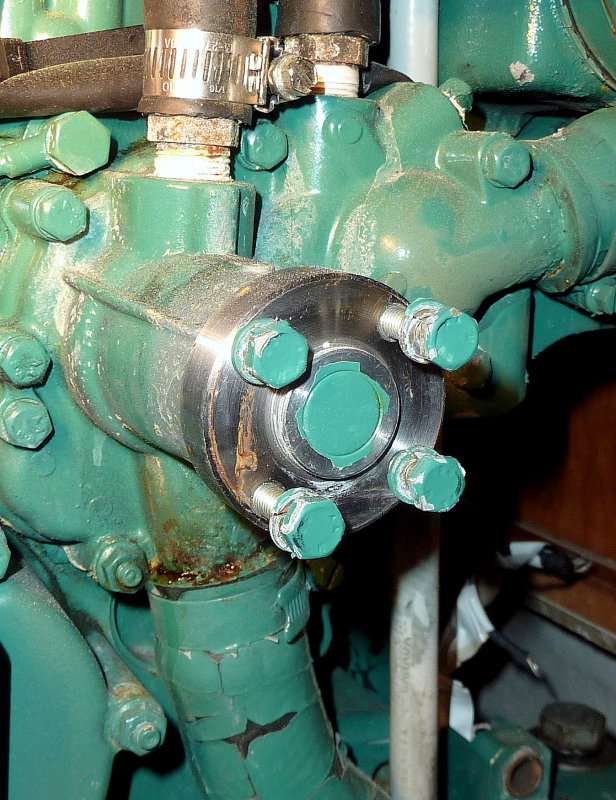
Water Pump Pulley OD Is The Same
As you can see the OD of the pulley remains the same.
25-APR-2012
Water Pump
If you are developing a kit and need to send the pulley's off to E-Maax simply put the bolts back into the pump so you don't misplace them. We all know how bilges prefer a diet of expensive nuts and bolts. Best just to know where they are...
25-APR-2012
Install The Water Pump Pulley
Just like with the crank pulley install the water pump pulley by sliding it over the water pump shaft. Then insert the bolts and torque to spec. I used a strap wrench to hold the pulley while torquing the bolts. A two handed job and no third hand for the camera...
25-APR-2012
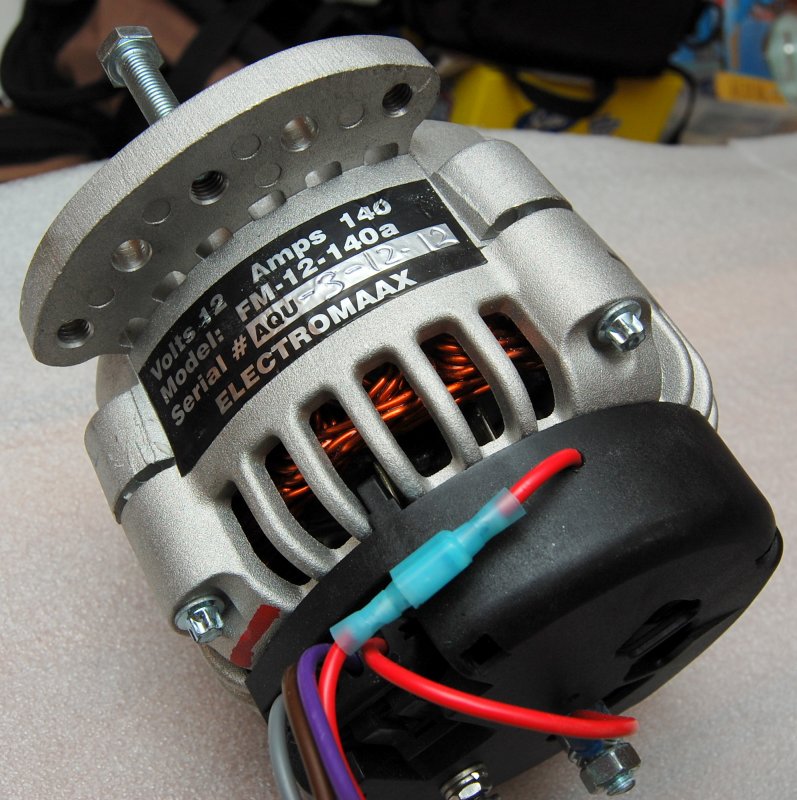
The Alternator
This is the 140A Electromaax alternator. It is well built and hand wound. The front case is cast by Electromaax in Canada and has a universal adjusting ear for fitting it to many different engines. The bearings are over sized, it has dual internal fans, a built in regulator and the capability to be wired for external regulation as well, it also has heavy gauge hand wound windings that are 14GA. Beefy to say the least. The cases of these alternators are not painted and E-Maax claims it is to help them dissipate heat better.
I threw this one on the test bench at my local alternator shop before installing it and cold it exceeded 150A before the test machines belt could not handle it.
25-APR-2012
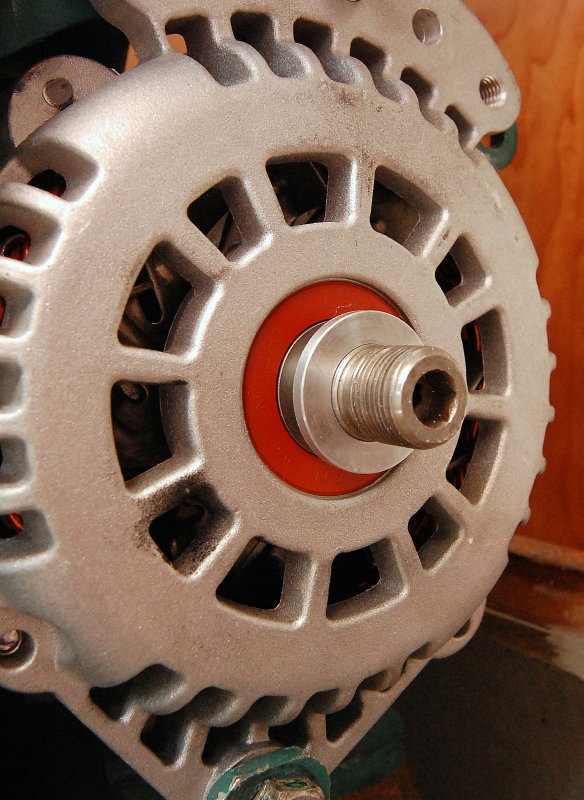
Install The Alternator
This kit required a shim behind the alternator pulley. The front of the pulley was machined to make up for this so there is enough shaft to get the nut on. To remove the alternator pulley and impact driver works best. If you don't have one the shaft is machined to take a hex key / Allen wrench.
If you look close you can see the shim already half way down the shaft.
25-APR-2012
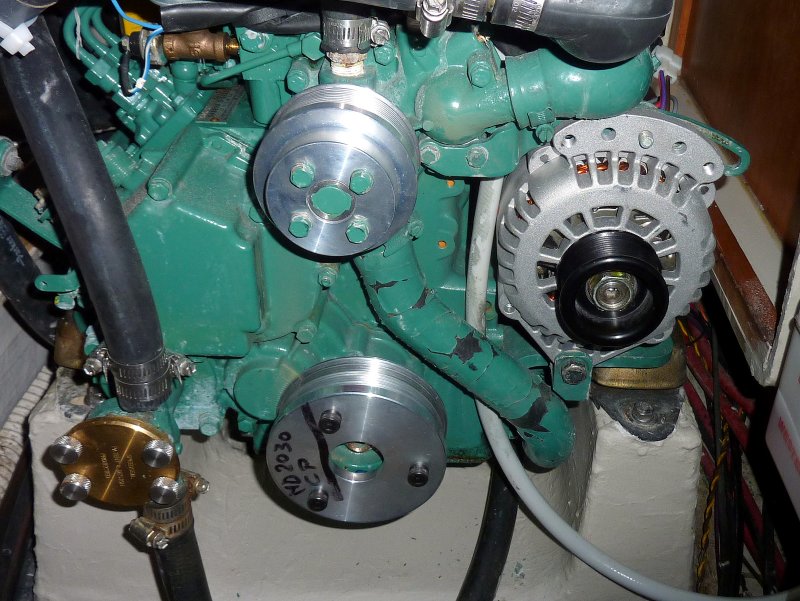
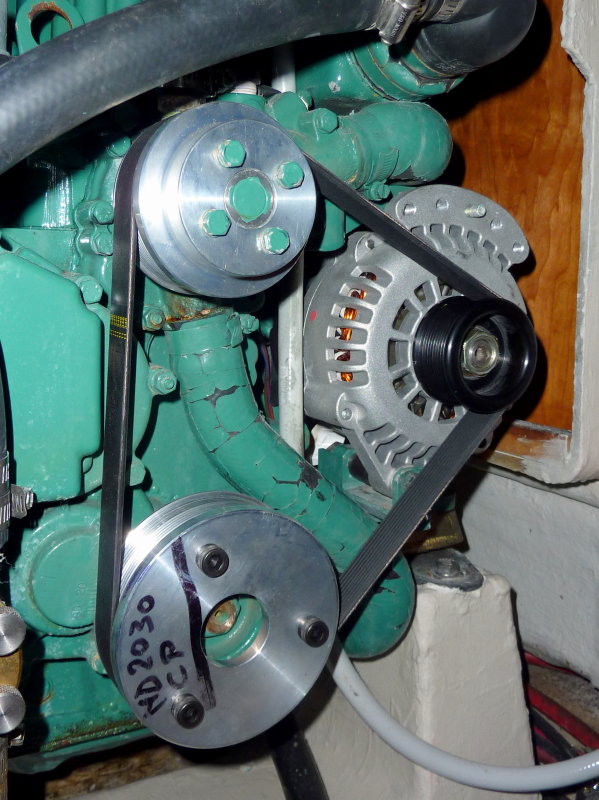
Crank, Pump & Alternator Installed
With the pulleys and alternator installed it is time to install the belt.
25-APR-2012
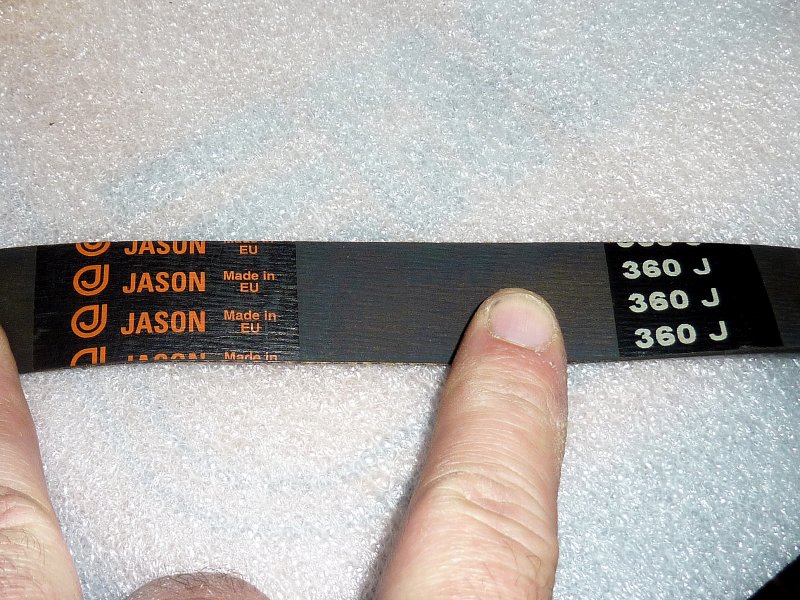
The Belt
The belt used in the Electromaax kits is a J or "Jason" belt in a 10 groove design. The numbering designation for these belts is inches X 10. So a 33" belt would be a J330 or 33" X 10. The J360 shown in the picture is a 36" belt.
These belts are NOT normal belts you will find at an automotive store and need to be special ordered. They are easy to find and Electromaax or another source such as Motion Industries can get them for you.
It should be noted that Electromaax sends you TWO belts in the kit. However if developing the kit the size they send you may not be correct. Best to collapse the alternator to it's shortest belt size than wrap a tape measure around it to know what you'll need. Once the pulleys were installed I did this and discovered I had 32.5" path around the pulleys. I ordered a 33" belt as opposed to the 36" belt they had sent me and all was good.
If going off cruising I might invest in a third or fourth belt as these Jason belts are NOT going to be easy to find in remote locations. No one in the entire state of Maine had one in the size I needed. It was four days to get one from Electromaax and they had sent it out the very next morning..
I know why they use this belt, and that is because it can handle a lot of HP. It would however be nice to have the option, on alts under say 140A, to have an standard automotive belt option you could grab at any auto-parts store..
25-APR-2012
Automotive Serpentine Vs. Electromaax
Excuse the flash blast. I wanted to show the difference between a standard automotive serpentine pulley and the 10 groove "J" belt. You can see why a standard serpentine belt won't work.
30-APR-2012
Installed
If you are installing a serpentine kit and alternator, and Electromaax has a pre-made kit for you engine, you are looking at about 1 hour from start to finish on the install. This of course does not include the wiring just installing the pulley kit and alternator.
These kits are very, very easy to install and can drive lots of current to your bank without so much as a whimper.
Because the belts have so much more grip they don't have to be as tight as a single V belt.. This can help put less wear & tear on your water pump bearing and alternator bearings.
Other belt options for alternator upgrades would include dual v-belts but I generally dislike them. One belt invariably seems to take the load more than the other. No two belts are exactly the same length or stretch or wear the same in the pulley grooves. In a perfect world they would wear evenly and stretch evenly, unfortunately we just don't live in a perfect world.
With v-belts going out of fashion in the automotive market it is getting very difficult to find "matched pairs" of v-belts. Industrial suppliers sometimes have them or can order them but I am still not a huge fan. Serpentine pulleys just makes sense for high amperage alternators.
The decision to go serpentine was an easy one...