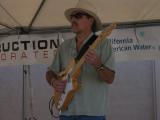
This image is very dark -- ideal to show techniques for finding the best white and black points, and finish the image.
Here is my workflow. Don't let it scare you. If you work your way through it, many of you will learn several new things.
__________________________________________________________________________________________________________________________
1) convert to 16 bits
IMAGE/MODE/16 Bit Color
2) Set White Point, Black Point and gamma
a) Click yin/yang symbol on layers palette
b) Select threshold
c) Move slider to the right until only one pixel is white, with everything else black.
d) Select eyedropper
e) Zoom in on white pixel using CTRL SPACE click
f) Shift click on white pixel to set color marker.
g) Similarly, move slider to left until there is only one black pixel.
h) Mark it as well.
i) Hit CAPSLOCK
j) Hide the mask layer
k) Select the background layer
l) Bring up the levels adjustment tool (CTRL l)
m) Click the Black eye dropper
n) Move it over the mark for the black pixel until it disappears to show that you are exactly on it, and click.
o) Select the white eyedropper, and click on the white marker the same way you did for black.
You have now set the lightest pixel in your image to white, and the darkest to black. Now move the Gamma (center) slider to the left for best flesh tones.
3) Remove Noise
Lightening exposed some noise, especially in the face. Select
Filter/Noise/Reduce Noise, and set it to Strength 9, Preserve Detail 53, Reduce Color Noise 100 and Sharpen detail 0.
4) Sharpen
The image is already fairly sharp, but can be improved. Go to Filter/Sharpen/Smart Sharpen. Set it to Amount 272, Radius .8 and Gausian Blur. Do not check More Accurate. Don't worry that this looks terrible. Click OK, then, without doing anything else, go to Edit/Fade Smart Sharpen.
Set the mode to Luminance, then reduce the slider until the image looks best.
5) Crop
Most of the background here was a distraction.
6) Clone out distractions
MY crop left support members in the upper right and lower right that weren't doing anything for the image.
7) Convert back to 8 bit color, and save.