photo sharing and upload picture albums photo forums search pictures popular photos photography help login
John S. Nasche | all galleries >> Photography Hints, Tips and Lessons >> Photography Tips and Tricks (May Contain Artistic Nudity) >> How To Make A Light Table In 10 Minutes At No Cost > Light Table Step 5
previous | next
22-JAN-2005 J.S.Nasche

Light Table Step 5

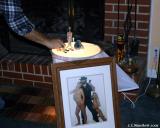
Place whatever you want illuminated from below on top of the glass and arrange them to suit your taste. Items that work best are translucent like these glass doo-dads I swiped from a decorative bowl and a chunk of crystal rock.

Canon EOS 300D Digital Rebel
1/60s f/5.0 at 38.0mm iso400 with Flash full exif

other sizes: small medium original auto
comment | share
John S. Nasche27-Jan-2005 04:59
In the case of the “table” that I built, the light bulb is only 65 watts and the container is deep. I imagine if I left the light on for some time, it would develop considerable heat, but in most cases when I’ve used it I only had it on for ten minutes or less. If I were doing a large series of shots one after another and needed time to arrange the items, I would probably unplug the lamp from the outlet after each shot to keep things cool as I put the new items on the glass, plugging it back in just for the exposure. The heat has never been an issue for me, but then again I didn’t leave it set up for longer than 10 or fifteen minutes. Remember, this is a quick “down and dirty” table built for “right now” use. If I were doing large amounts of light table photography, I would build a far better light table out of plywood, spray-painted white inside complete with variable light source and intensity and using hard white plastic sheets instead of a sheet of glass and a white trash bag.
virginiacoastline27-Jan-2005 03:14
won't this generate too much heat from inside?? How do you keep that from happening??? Do I need to drill holes in the side?