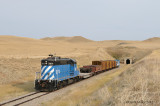
Another stop was made at Tunnel 1, this time at the west portal.
All photos copyright Garry & Roz Miller - all rights reserved. Please contact gnrmiller2@shaw.ca for photo use.