Pretty spiffy.
Here's the thing - it might not be perfectly clean, but it's pretty darn good.
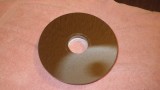
(That's my popcorn ceiling you see reflected in the mirror).
Anything left on it after this can just stay, you don't want to get any more aggressive with cleaning.
It is certainly much cleaner than before.
While it's drying, clean the empty OTA. One of those lint rollers with the sticky tape you peel off is perfect.
Run it around the inside of the tube. Done. Just like that.
As they say in auto repair manuals....."Reassembly is the reverse of disassembly"
Carefully place the mirror back onto the carrier tube, lining up the rotational orientation mark. It probably won't just slip all the way down into place. I know you have a nice thick towel on the surface you're working on.
If you don't, don't tell me, just put one there. With the mirror on the tube and facing up, hold the tube and gently tap the back of the tube on the towel-protected table to persuade the mirror to slide down.
You'll have to do this with the focusing shaft hanging over the edge of the table. Gentle taps, it will work its way down, don't worry, it's tougher than you think and won't break. You REALLY want it to go all the way.
Thread on the retainer and snug it up to the mirror. Using the PVC pipe tool (or pinwrench) carefully tighten the retainer a little. It will push the mirror into position. Not too tight, amigo, just a little beyond snug.
The area where the carrier tube slides on the baffle tube should get a little lubrication, I use SuperLube. A little on the fingertips and rub it all around.
With the OTA pointed upwards (not necessarily vertical), grab the carrier tube, tilt the mirror so it fits through the cutouts on the front of the tube and slide it onto the baffle tube, rotating it so the focusing shaft goes through its hole.
Watch those fingers, you don't want to put prints on the mirror. You WILL have to clean it again if you do, fingerprints are one of the worst things you can do to optics short of breaking them. Thread the focusing knob and bearings onto the focusing shaft.
Put the circlip back on*, I find needlenose pliers helpful. Put the hog ring back on the baffle tube. Be very careful with those fingers.
You'll want to have the OTA tilted down so you don't drop the hog ring onto the mirror - (that's why the focusing knob goes on first......so you can tilt the OTA downward without that nice clean mirror sliding out of the tube).
Put the focusing retainer and three screws back on.
Shine a flashlight into the OTA. Whoa! I thought it was supposed to be clean? It IS. But it's NOT NEW and it's NOT freshly aluminized. Some of that is dust, some is imperfections in the aluminized surface, and if the mirror is old,
some is deterioration, but think back to what it looked like before cleaning and you'll realize how much better it is now.
If anything did NOT want to come off with this cleaning method, it's better to live with it than risk damaging the aluminized surface by trying to remove it.
The First Contact Polymer cleaning solution mentioned earlier would likely do the trick but even that can have difficulties with some contaminants, like the pine pollen we get here in the Florida Panhandle.
Now that you have your scope all spiffily cleaned, you'll need to collimate it. Keep it protected and covered so you won't have to clean the mirror again for many years, if ever.
*When you removed the circlip it went 'pling!' and launched itself into the Twilight Zone. No problem. Before you reassemble everything, scurry on down to the hardware store with the carrier in hand.
Find two nuts that thread onto the focusing shaft. When reassembling, put both on the shaft instead of the circlip and jam them together.
You could use a single self-locking nut insead, or some thin wire tightly wrapped around the shaft and with the ends twisted.