


|
|
|
|
|
|
| |
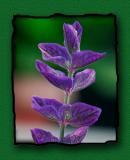
| Isabel | |
Photographer Vincent Versace has some beautiful images framed in an effective technique: http://www.versacephotography.com/gallery_f.html I tried to copy the technique and came reasonably close. I would like to refine the image so the inside of the black border is more diffused. I adjusted the directions I first posted on dpreview, so that they would be a bit easier to follow. One caveat...if things aren't going right make sure you are on the correct layer and that you have the right colors in your palette! Please note that this image does not have darkened edges. After checking Versace's website, I decided to try to the darkened edges by making a selection and using levels to darkened the perimeter. Click on "next" and see what you think. Is the image more effective? What would you do differently?
1. Open the image and the Layers Palette.
2. Double clicked on the picture icon layers palette to make background Layer 0.
3. Held down the control key and clicked on New Layer Icon. New layer created below my image.
4. Made white my foreground color.
5. Went to Image/Canvas Size and increased the canvas size by 120%
6. Clicked on the fill tool and filled the new layer with white.
7. Made my image the active layer and click on Layer Mask at bottom of Layers Pallette
8. Choose a rough brush and painted with black around the edge of the image. White shows through.
9. Click on the New Layer icon. Hold down the Alt Key and Click on Merge Visible.
10. Used the Magic Wand to click on the white area to select all the area around my image (which now has an uneven edge)
11. Inverted the selection by going to Select/Inverse
12. After choosing black as background, went to Edit/Stroke and chose Black as my color, inside, and 10 pixels
13. Deselected and putting down 10 as the feather setting made a rectangular selection inside the black border and made a selection including the black border and the space outside the rectangle (too complicated to explain without going through the process again). Fill the area with black - brushed certain areas for unevenness. Deslected.
14. Worked on the background layer (white layer) by choosing a nice tan color and filling it in.
15. Made a rectangular selection around the edge of the background layer, setting the feather to about 40. Inverted the selection and then used layers to darker the edges. Deselected (NOTICE: I chose NOT to use the rectangular selection as Versace seems to have used.)
16. Went back to make the black edged image with the transparent edge the active layer. Used the Magic Wand to select the transparent area and then inverted. Copied the image to the clickboard and pasted it. Became a new layer.
17. I turned off the layer from which I copied the image so what showed through was the background. (I guess I had to eliminate the layer with the mask too...my brain is a bit foggy at this point).
18. Went to Layer/Styles and chose drop shadow and played with the sliders to get the effect I wanted.
19. Had to move both the image and shadow. Used the move tool on the image and then clicked on the drop shadow icon on the layers palette and used the move tool to move the shadow.
Picture copyrighted by author - May not be used without permission