photo sharing and upload picture albums photo forums search pictures popular photos photography help login
Canon DSLR Challenge | all galleries >> Challenge 22: Flight (Hosted by Roberta Fair) >> Challenge 22: Exhibition (Hosted by Roberta Fair) > Taking Off*
By Byron Stuckless
previous | next
15-AUG-2004 Byron Stuckless

Taking Off*
By Byron Stuckless

Edmonton, Alberta - Canada

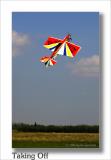
Another photo taken at the RC Flying Club near my house. The kid flying this thing was amazing.

Canon EOS 300D Digital Rebel ,Canon EF-S 18-55mm f/3.5-5.6
1/250s f/11.0 at 55.0mm iso100 hide exif
Full EXIF Info
Date/Time15-Aug-2004 14:26:29
MakeCanon
ModelCanon EOS DIGITAL REBEL
Flash UsedNo
Focal Length55 mm
Exposure Time1/250 sec
Aperturef/11
ISO Equivalent100
Exposure Bias
White Balance (-1)
Metering Modematrix (5)
JPEG Quality (6)
Exposure Programshutter priority (2)
Focus Distance

other sizes: small medium original auto
share
Canon DSLR Challenge19-Aug-2004 19:24
OK Byron, I gave it another quick spin in Photoshop, avoiding curves and layer masks (other than adjustment layer masks). That was before I noticed you'd already figured something out on your own. Oh well since I've already written what I'd done, here it is:

1) Duplicate background layer and set the layer blending mode to multiply. Set the opacity of the new layer to 50%.

2) Add a levels adjustment layer by clicking (and choosing from the pop-up menu) on the adjustment layer icon at the bottom of the layers palette. On the RGB-channel set the input levels to 64, 2.00, 255. On the Red channel (use drop-down menu at the top of the levels dialog box) set the input levels to 0, 0.9, 255. On the Blue channel set the input levels to 0, 1.10, 255. Click OK to the levels dialog box.

3) With the levels layer highligted in the layers palette paint with black, using a suitably sized soft brush, on the ground-and-trees-part of the image, in effect masking off the levels adjustment on that part of the image.

4) Click on the adjustment layer icon at the bottom of the layers palette and choose Brightness/Contrast. Leave Brightness at 0 and set Contrast to +18.

5) Cmd-Click (Mac) or Ctrl-Click (PC, I think) on the mask icon of the first (levels) adjustment layer. This should load the selection of the mask. Now make the multiply layer active by clicking on its icon in the layer palette and then hit the delete button on your keyboard. This should bring back the original tones of the ground and trees, except they will have slightly more contrast due to the Brightness/Contrast layer, which has no mask.

Presto - a clear blue sky with nice white clouds, very similar to the first edit I'd done! Note that the above edit was done to the originally posted image.
--
Olaf
Canon DSLR Challenge19-Aug-2004 09:23
Well, Olaf. As Elements doesn't have curves, I improvised. I went back to the original photo and adjusted the contrast as much as I could get away with and played with the levels some to bring some punch to it. I hope this is better. The version I first published is still on my website athttp://www.pbase.com/paul_stuckless/rc_flying_club

Thanks again for the help.

Byron
Canon DSLR Challenge18-Aug-2004 19:56
Byron, sorry about that, I never installed the Elements-software that came with the camera, so I am unaware of what it can and cannot do! Did you recieve my email with the adjusted image? --Olaf
Canon DSLR Challenge18-Aug-2004 17:17
Hmmm... I guess I'm going to have to break down and buy the full version of Photoshop, as Elements doesn't have curves. Having a blue sky is always better. I'll have to use my brother's computer for this one... but first I'll see if there is a way to do something similar in Elements. Thanks for the tip. -Byron
Canon DSLR Challenge18-Aug-2004 09:07
OK, I gave it a quick spin in Photoshop. Try this:

1) Duplicate background layer and set the layer blending mode to multiply. Set the opacity of the new layer to 50%.

2) Add a curves adjustment layer by clicking (and choosing from the pop-up menu) on the adjustment layer icon at the bottom of the layers palette. On the RGB-curve add a point at Input/Output = 123/171 and move the point at 0/0 to 64/0 instead. On the Red curve (use drop-down menu at the top of the curves dialog box) add one point at Input/Output = 135/128. On the Blue channel add one point at Input/Output = 118/128. Click OK to the curves dialog box.

3) With the curves layer highligted in the layers palette paint with black, using a suitably sized soft brush, on the ground-and-trees-part of the image, in effect masking off the curves adjustment on that part of the image.

4) Cmd-Click (Mac) or Ctrl-Click (PC, I think) on the mask icon of the adjustment layer. This should load the selection of the mask. Now make the multiply layer active by clicking on its icon in the layer palette and then add a mask by clicking on the mask icon at the bottom of the layer palette.

Presto - a clear blue sky with nice white clouds! Hope you'll be able to follow my instructions. Please let me know how it goes and what you think!
--
Olaf
Canon DSLR Challenge18-Aug-2004 04:11
Any tips on bringing out the sky after the fact? I'm sure if I had used a polarizing filter when I took the shot it would have done wonders. I tried in PSE to do something, but wasn't too happy with the results. I'd love some hints. The sky was actually quite blue. - Byron
Canon DSLR Challenge17-Aug-2004 20:11
Nice colorful airplane against a not so clear blue sky! That's probably what the sky looked like, but I think twisting the truth by adding some more color and contrast to the sky would make the image graphically stronger. --Olaf