I've finally started to laminate the top. In the books that I have one author says to do the edges first. The second author says to do the bottom first, then the edges and finally the top. On this project I'm doing the edges first, then the top and bottom.
I now understand one of the secondary reasons for using 2 pieces of 3/4" plywood for the top. Trimming the laminate edges on only a 3/4" edge gets tricky, especially if it is your first laminate project as this is for me. There are a few boo-boos here and there, but that's OK by me.
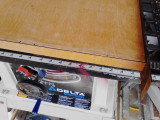
The marks that you see on the left of the top of the plywood are layout marks for the piano hinge and the sanding slot. There are 2 additional layout marks for the sanding slot that are to the left and out of the photograph.
I have a Bosch laminate carbide trim set, #RBS020XW, 1/4" shanks, that came with my Pony laminate router when I bought it used. The trim bit was perfect for this project as was the edge beveling bit.