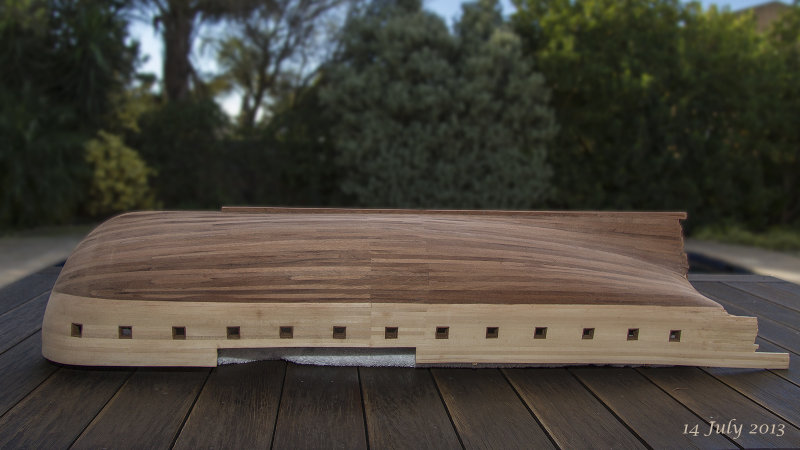
14-JUL-2013
Almost done with the hull planking
Hull planking almost done. The stern still need some attention (Lots of it).
Rough sanded the hull only.
After fixing the stern, the rest of the keel needs to be fitted, followed by a couple of hrs sanding and then finished off with some protective varnish. Then the work on the stern castle can start...
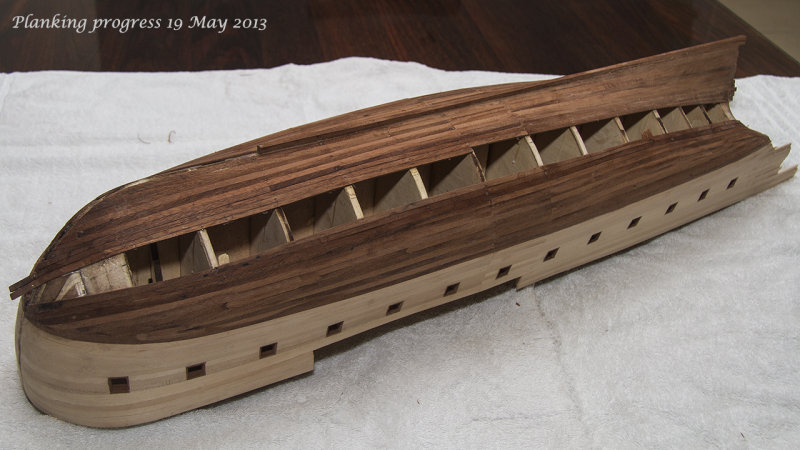
19-MAY-2013
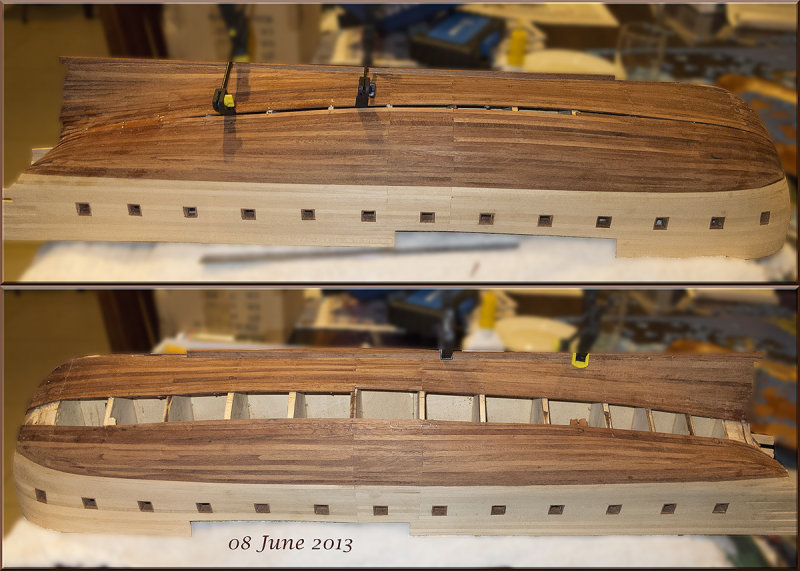
Planking Continues
Continued planking. No sanding done yet on new planks.
Getting a little concerned how the two halves will meet with respect to the "run of the planks".
Maybe I should have followed the manuals proposed sequence...
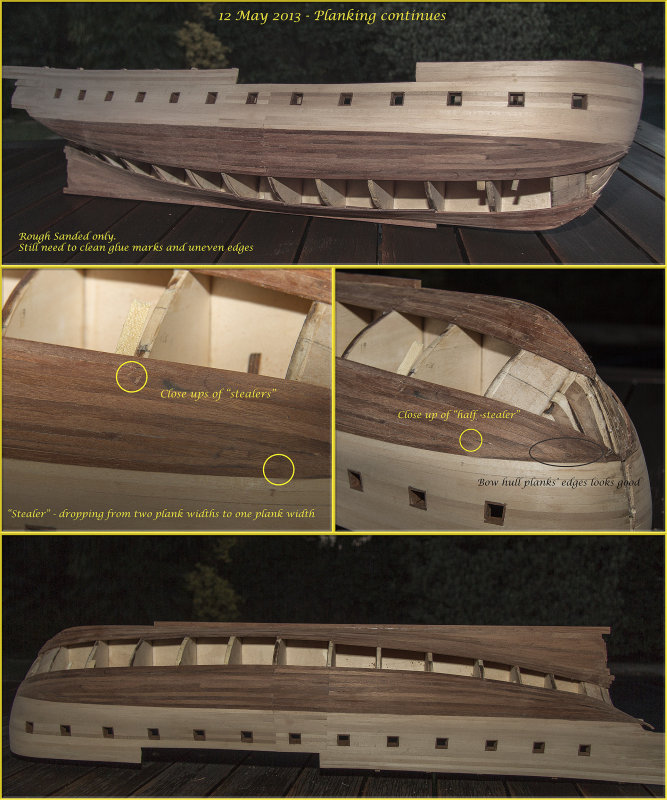
12-MAY-2013
Planking Continues
Managed to do another 3 or 4 widths.
Also decided to do a first pass sanding - even if only to convince myself it would 'clean up OK' - Glad to say it does clean up quite nicely with sanding.
I do find it difficult to keep glue stains off the outside of the wood - especially now with the clamping of planks between the bulkheads very awkward at this stage using the clamps I used to date.
The stealers and half stealers highlighted here turned out OK. Pity not all of them look like this. Also the edges of the bow planking as it terminates against the freeboard planks looks very nice.
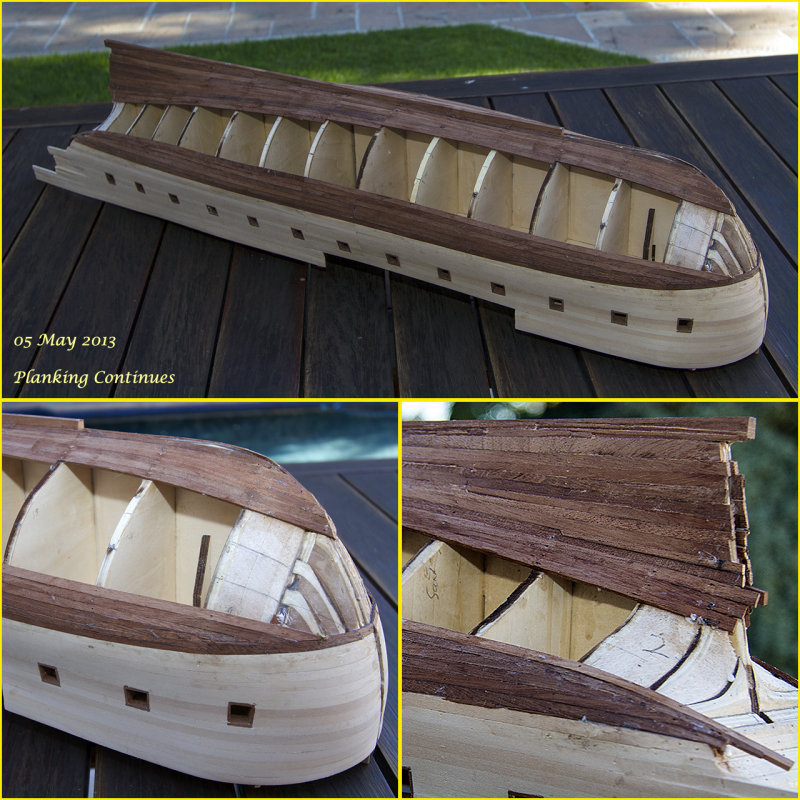
05-MAY-2013
Planking continues
Started planking again. Made some good progress over the last 2 weekends. Not sure whether my fitting of the planks with half stealers to compensate for the curvature of the hull and to prevent planks curving upwards is correct but will see how it ends up.
Reasonably satisfied to date. There is a lot of cleaning up to do (especially in the stern area) and some sanding in the future but the fit of planks looks reasonable.
I should have cleaned up the glue stains at least before taking the pictures I guess...
24-SEP-2012
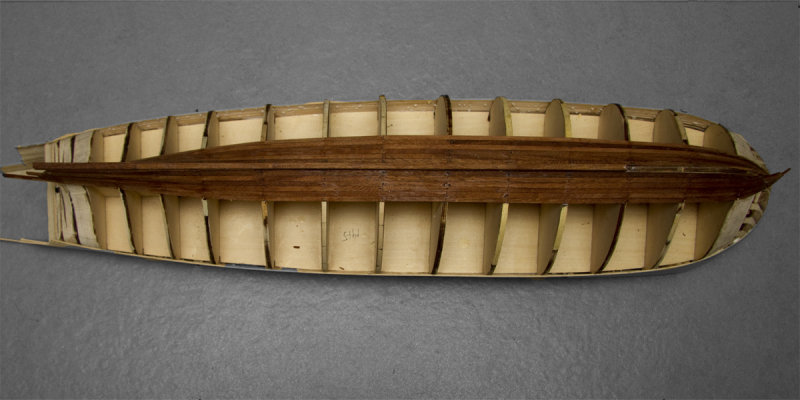
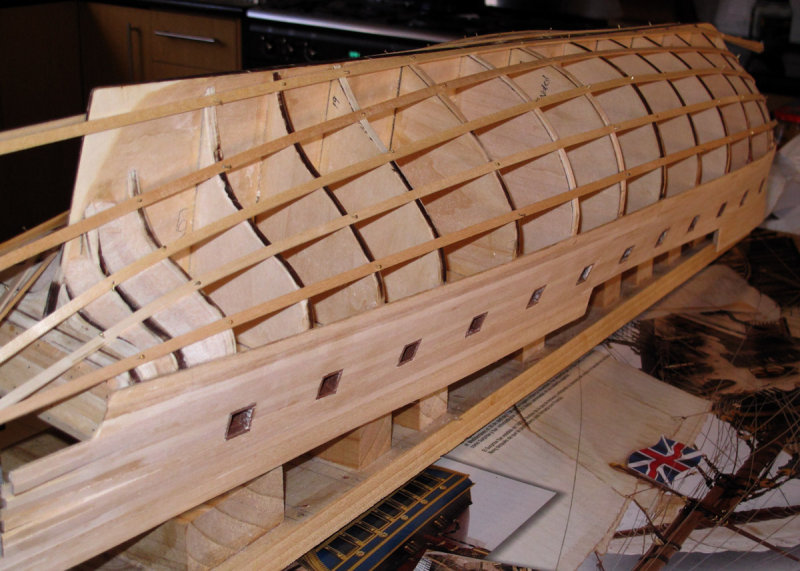
First planking bands done (1631)
The result of about 16hrs work on the hull planking. No cleaning or sanding done yet. Next planking band tackled will be the one below the freeboard working towards the keel
25-SEP-2012
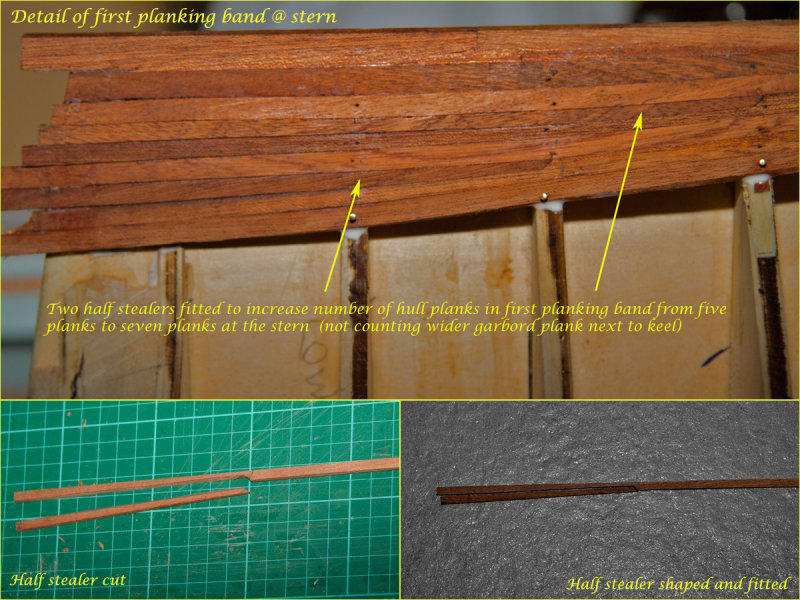
Stern & Half Stealers detail
This came out reasonable well in the end. Made use of half stealers to increase the number of hull planks from 5 to 7 towards the stern in the planking band next to the garboard planks. After realising I can use my floor mounted sander in my garage to shape the half stealer it went much faster with the 2nd, 3rd and 4th ones... (There are two half stealers ports side and two stealers starboard side in the first planking bamd)
23-SEP-2012
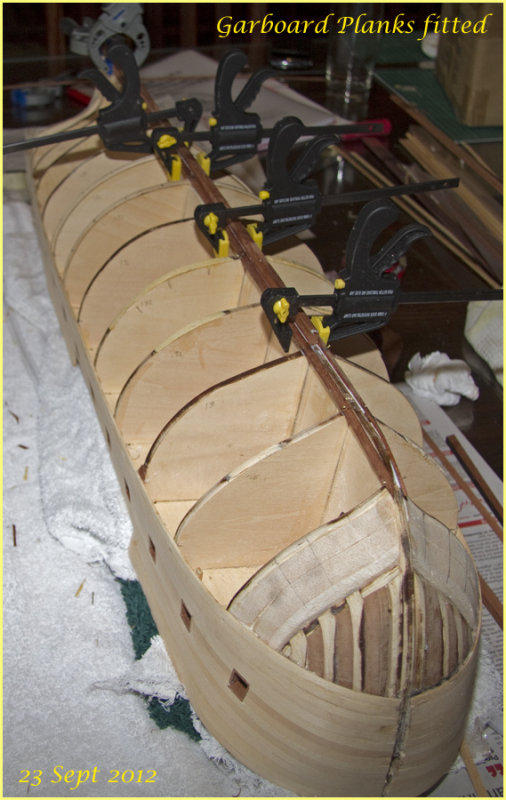
Garboard Planks Fitted (1619)
Garboard planks fitted, both port and starboard after a lot of agonising, trimming and re-trimming (and breaking strips of wood.) The model nearly went back into the cupboard but fortunately it came together after 'one more attempt'.
If I do get to a next model, I will approach this a bit differently. One mistake I made was fitting part of the false keel (to use as an edge) before cutting a rabbit (kerf) in the bottom to fit the garboard planks in. The garboard is now a butt-edge joint which will need some filling with shims to shape it as it rotates through to 'vertical'. Will deal with this when cleaning up/sanding the hull.
22-SEP-2012
Marking Garboard Template (1615)
Finally back to the model after a 5 month break.
I removed the battens used to mark out the 5 planking bands after marking the edges on the bulkheads and struggled for a good couple of hrs to get the garboard plank shape sorted out. The garboard plank is the one next to the keel and can be an odd shape (ito width profile) as it twists through a full 90 degrees along its length. It is fitted adjacent to the false keel and if the profile is correct it will provide a natural curving edge for the plank next to it allowing a smooth fit.
In the end I stretched a piece of masking tape between the bulkheads, replaced the batten used to determine the planking bands closest to the keel making sure it never is more than 8mm away from the false keel. I then traced the edge on the masking tape and transefreed the masking tape to an 8mm Sapele strip. I bought the 8mm wide sapele wood strips specially for the garboard plank as the kit only supplied 5mm wide strips used for the rest of the hull planking.
24-MAR-2012
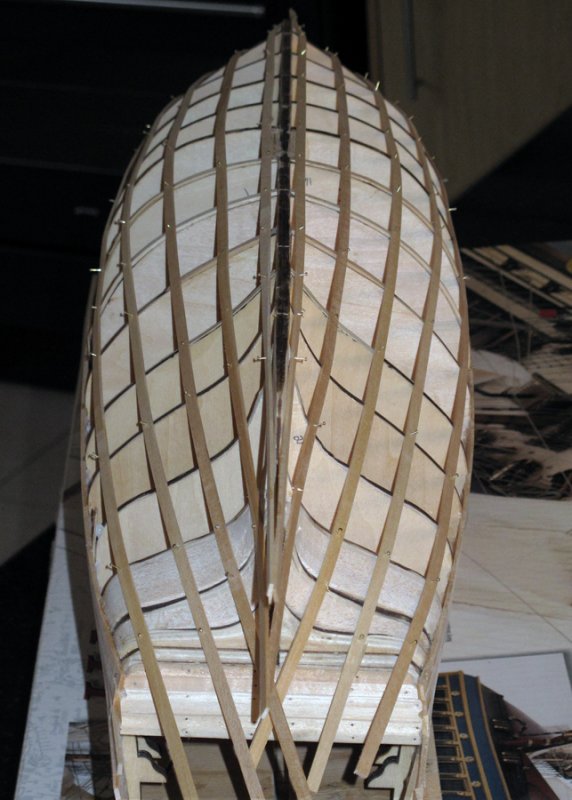
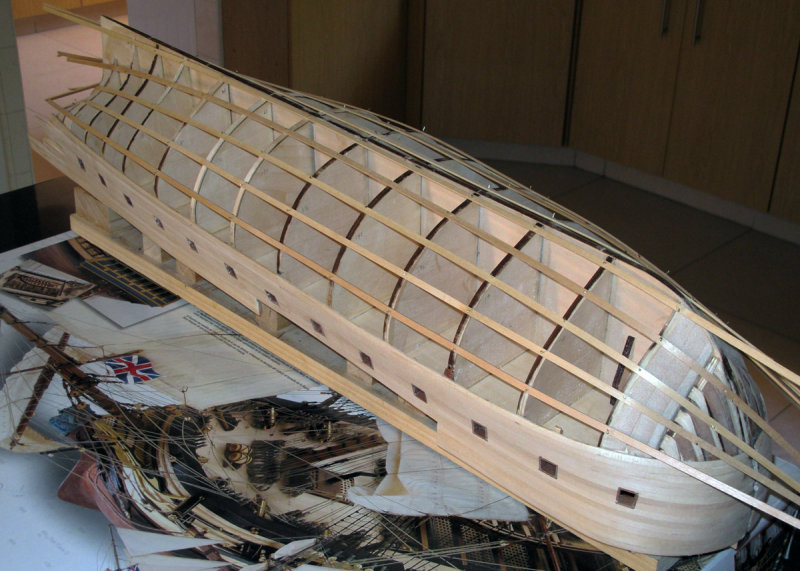
Planking bands - reasonable symmetry
Symmetry looks OK. I did notice some highs & low spots across some of the bulkheads and adjusted these with 0.6mm veneer shims for the lows after these pictures were taken.
Next step is marking the planking bands on the bulkheads - removing the temporary battens and then tapering & fitting each individual plank going forward - starting with the garboard plank next to the keel.
24-MAR-2012
Temporary planking bands fitted - view from Bow
It is going to be interesting to shape the Sapele hull planks across the bow shape.
24-MAR-2012
Temporary planking bands fitted - view from Stern
Laying out planking bands to plan tapers and to minimise any lateral bending against grain of planking strips.
After this set of pictures some more 'shims' were inserted at some of the bulkheads to counter some 'low spots'