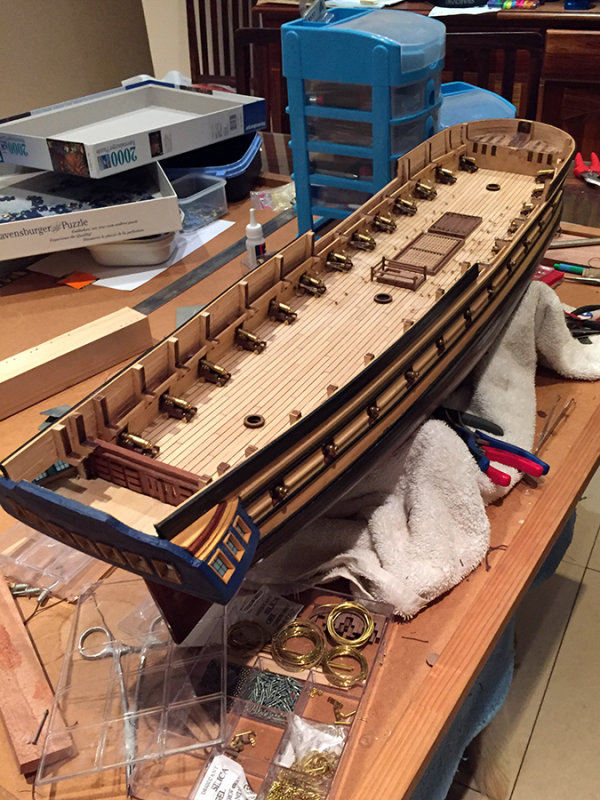
:: Fitting the guns to the gundeck (29 Nov 2015) ::
A pictorial log of the construction and fitting of the guns on the lower gun deck. My pbase build log is out of date. Will bring up to date so decided to put this in its own folder for now. The last picture in this sub album is the current state. Its been more than a year since I worked on it. This week decided to get going again and built the guns and completed all fittings of the gun deck (lower deck)
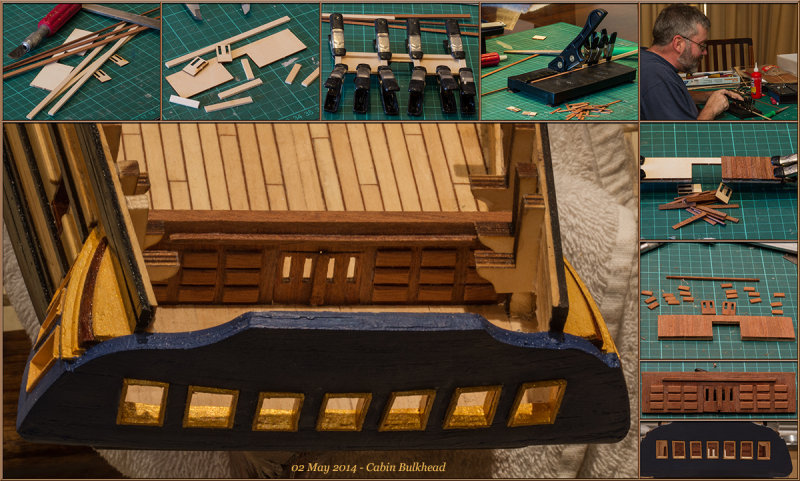
02-MAY-2014
Cabin Bulkhead
Worked on Cabin Bulkhead today. Something not quite right. Even though bulkhead made as per instruction (esp trimming to size) it is not 'high enough' when compared to the example in instructions' image. Fitted additional beam across on top and kept doors closed.
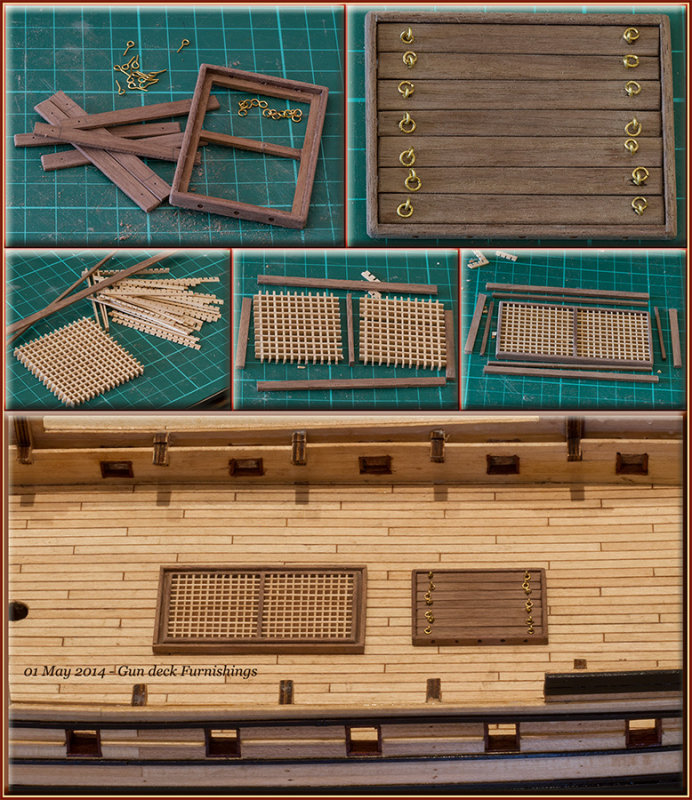
01-MAY-2014
Gun deck furnishings - 01
Worked on gun deck 'furnishings' today. Took almost 7 hr I think for these two pieces - didn't feel like it though. They must still be final sanded and varnished and then fitted. Just lying loose on deck on bottom picture
28-APR-2014
False deck dry fitted (2776)
I am planning to deviate from the plans and plank the main deck using more realistic scaled lengths of plank (as I did the lower gun deck). This requires fitting a false deck on top of which I can do the planking.
I still need to figure out how the deck planks would have been fitted around the various openings and also whether the 'king plank' was the central plank or fitted on either side of one of the openings on this generation ship. My understanding is that the 'king plank' was a thicker, wider plank used in deck construction to provide structural strength. I am also going to attempt to 'joggle' the deck planks into the edge plank as opposed to just running off the edge beneath the inner hull planks.
On the lower gun deck I used 0.6mm veneer strips between planks to simulate the caulking. I read somewhere this morning that someone used dark wood filler successfully - I want to experiment with that as it would definitely be quicker that way - need to figure out whether it would not dry out over time.
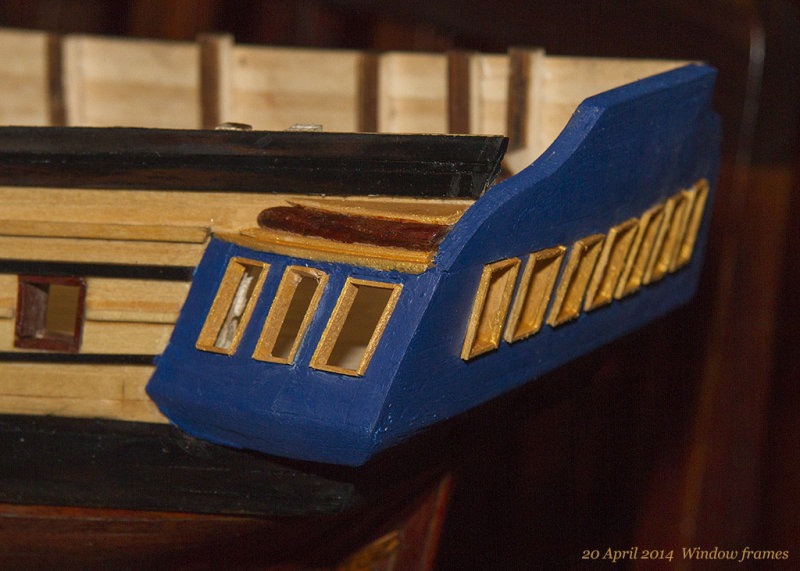
20-APR-2014
Window frames
A close up of the gold painted window frames completed today. The very thick 'fudged' (padded) sterncastle can be clearly seen in this picture. The sterncastle is only supposed to be 1.5mm thick (the thicnkness of the ply), but I had to pad it out to almost 5mm to get all to fit and look reasonable because I cut the upper hull planks too short towards the stern. It does now require that all the frames and capping (still to come) needs to be made wider as well.
What is the old saying - measure twice, cut once. will remind myself (if there is a) next time.
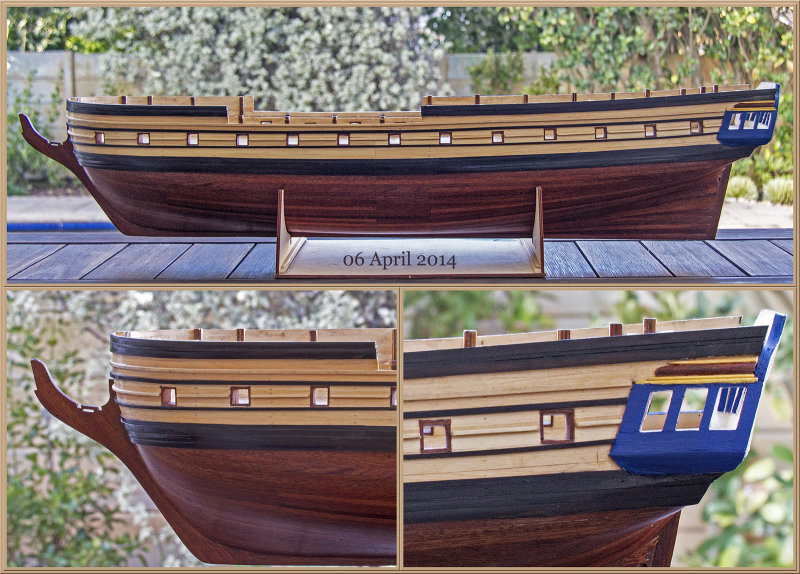
06-APR-2014
Hull work done
Most of the hull work done. Its been a while to get here, but that's OK. The stern castle still needs gold window frames and decoration which will break the blue that is currently so dominant. Some of the strakes in the bow could have fitted better but reasonably happy. There will be a lot of rope and anchors here when finished to 'distract' and 'hide' the imperfections of the rubbing strakes in the bow. (Well that is what I tell myself)
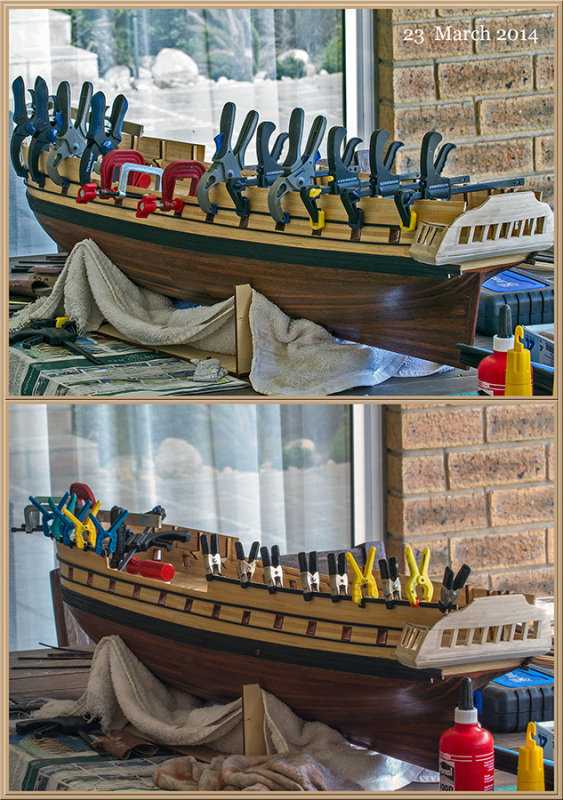
23-MAR-2014
Clamps are your friends
Fitting the upper rubbing strakes in these 2 images.
These last sets were reasonably easy to fit because they can be clamped. The rubbing strakes along the waterline was a real challenge and took some trial and error (and lots of patience). Ended up sanding the hull to bare wood again to fit those to make the gluing easier. That was heartbreaking. On these picture it has been varnished again after fitting the rubbing strakes.
The rubbing strakes also turned out a little darker than intended. The wood is mahogany which I stained using an 'ebony wood stain' in clear sanding sealer. Ended up adding to much pigment and it came out (pitch) black. Gives a nice contrast though and I have seen models that the rubbing strakes are black which looked OK to me. Preference would have been to see the wood detail come out a little more, but not to be on this model.
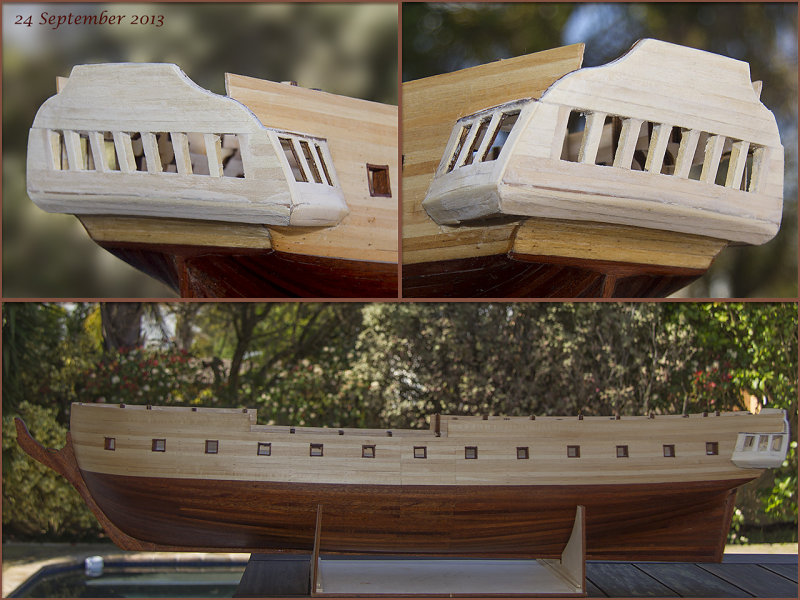
24-SEP-2013
Stern Castle
Somewhere something went wrong here and had to be 'creative'. This is not what the model maker intended. Those familiar with the model will notice that the sides (particularly the back) is a lot thicker than the single plywood shape intended by the instructions. I had to pad it with balsa wood and then had to frame the inside of the windows with 0.6mm veneer to clean up. Also then used 1mm planking strips then on top of the balsa to plank the sterncastle (which was also not intended by the plans). All this because I cut the upper hull planks to short and at the wrong slope.
The sterncastle will be painted which is why I used wood filler here which really looks ugly on these pictures. It was (is?) worrying times - concerned that I messed up a reasonable model at this stage. Still some concern - but hope to be able to save the look - the window frames will be out of scale - but there will be many other items to focus on on the completed model
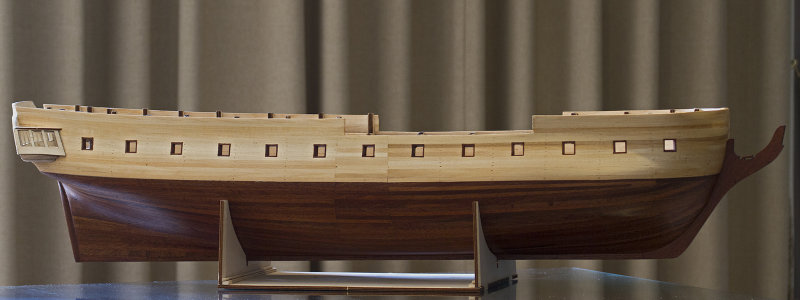
01-SEP-2013
Protective varnish & Polish (0262 cd)
Side on view - Varnished and polished for hull protection. Started on Sterncastle. Went wrong somewhere in the beginning at the stern. Lots of fiddling and adjusting to get to this point on the sterncastle.
11-AUG-2013
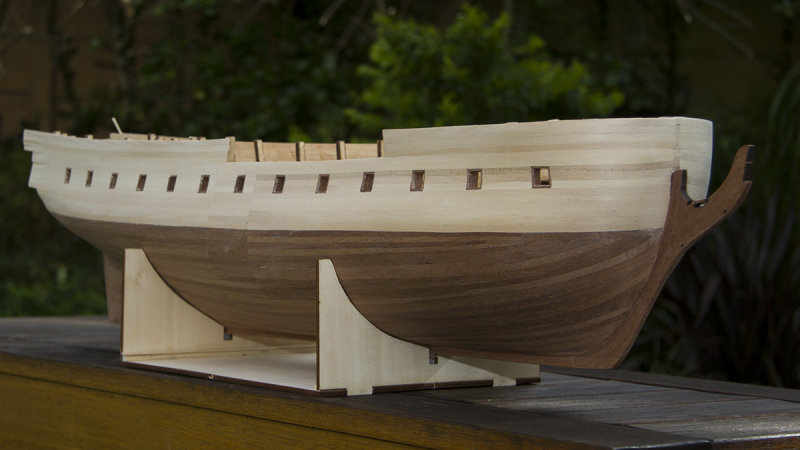
Starboard Side view
Milestone reached with hull planking done and sanded.
32 months elapsed since start, but only ~210hr spent building according to build log. one more light sanding next time out of cupboard followed by clear varnish and then on to sterncastle; cannons and deck furnishings...
11-AUG-2013
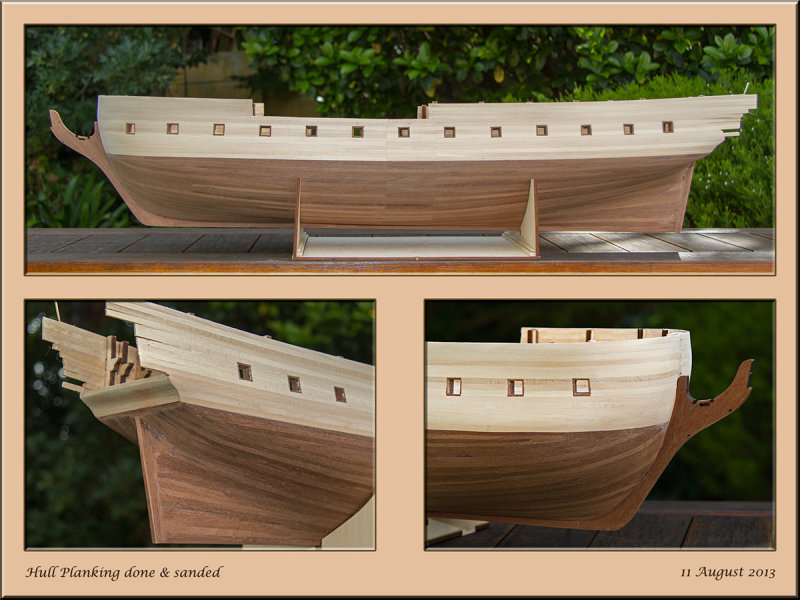
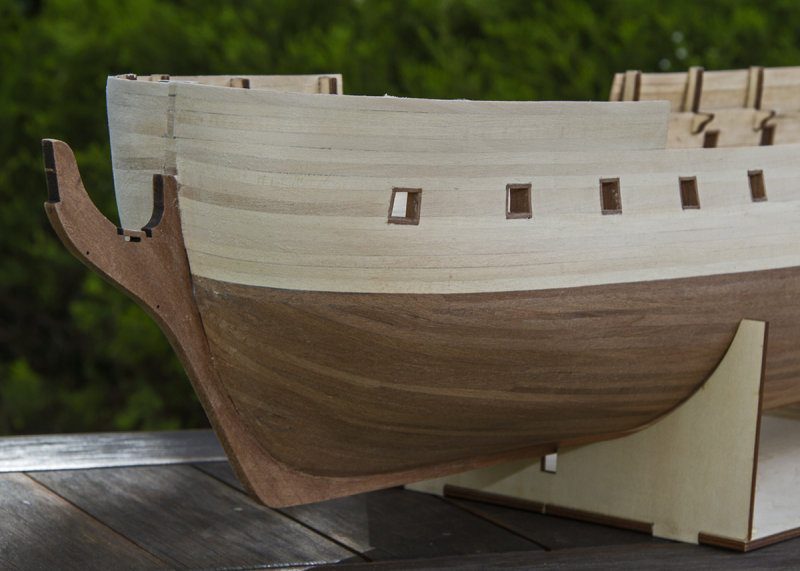
Planking done & sanded
Hull planking done, stern fixed up, keel and bowsprit support fitted.
Picture shows the patchwork needed in the stern (next to rudder post). Upper part (light wood) will be trimmed back when sterncastle is built so not an issue there.