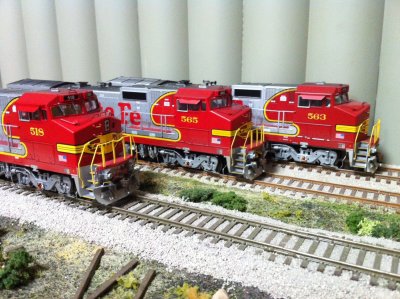
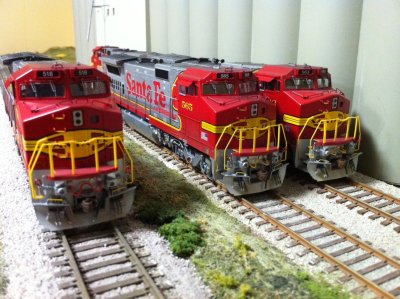
All of these modifications can be done without removing the shell from the chassis. Over the years Atlas used varying shades of factory Santa Fe Red – of my four units I have three different shades. I used the following paints:
Scalecoat II Santa Fe Red, Model Master Insignia Yellow, FolkArt Sterling Silver, Apple Barrel Black [flat], Model Master Leather, Apple Barrel Cardinal Red, Testors Glosscoat, Testors Semi-Gloss, Model Master Flat Lacquer (all three clears were airbrushed). Be sure to mask any glass/headlights/ditchlights before doing any airbrushing.
1) remove factory snowplow and horn – throw away
2) remove factory couplers – throw away
3) remove handrails (you can leave the ones from the nose to the steps alone)
4) if you are going to make the unit DCC now is a good time to remove the radiator hatch and change the plug over.
5) remove grab iron on rear end, engineer’s side, fill holes with putty.
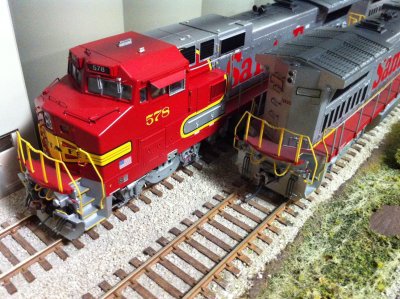
6) remove rear sand filler hatch, turn 90 degrees clockwise and reinstall (hinge will face engineer’s side)
7) Before you remove two lines of plastic on conductor’s side above the air conditioner module drill #79 holes on the side facing the rear adjacent to the ends of each line, not on the end. The two lines are roughly straight above the rear of the module. One you remove the lines install one DA 2224 11” straight grab in the top position and one Cal-Scale ____ grab in the bottom position. Paint the grabs and the area where plastic was removed silver.
8) Items to paint silver – new DW -255 snowplow (install two grab irons on top before painting), DW -190 airhorn, DW -196 spare knukle, DA 1507 Modern MU receptacles, antennas on top of cab roof, underframe and, bottom tips of air/MU hoses and top plate of MU hoses. On the fuel tank on some Atlas production two items are painted signal red on each side – only the actual fuel filler should be red – that will be the item on the right side of the tank as you look at it. Paint the other item on the tank silver if it isn’t already.
9) Items to paint yellow – horizontal section of grab irons on [now silver] snow plow, horizontal section all grabs on rear end (including the one on the roof and the ones above the MU hoses on the rear pilot), and horizontal section of grabs on front of nose, horizontal sections of the grabs on the rear of the air conditioner module and the horizontal section of the two grabs you installed above the radiator module.
10) install the snow plow and air horn – follow mounting instructions for the snow plow, for the air horn you will have to drill a larger hole
11) install the cab sunshades that came with the model – you may have to touch up some of the seams with red
12) install one MU receptacle on each pilot – each one goes towards the right side just inboard of the one already there
13) Before installing Kadee 158 couplers, paint them Leather and dry brush with a darker brown. Be sure to cut the trip pin off the one that will mount above the snowplow and paint the remaining trip pin flat black. Install with the coupler boxes.
14) Install the spare knuckle on the front right truck (under the engineer) and right rear truck (under the radiator side with the brake wheel). The knuckle mounts centered between the two holes at the bottom of the sideframe. After installation paint the knuckle Leather.
15) on the conductor’s side paint the speed recorder cable on the front truck cardinal red.
16) Optional (depends on the era and unit you are modeling) – glosscoat the side of all four step wells that are on the same side as the hood. Also glosscoat below the end of the cigarband. Install decals for safety instructions in the stepwells and American flags beneath the cigarband.
17) On my units the “Santa Fe” on the side of the long hood was much glossier than any other paint on the units. I airbrushed that area with a 50