


|
|
|
|
|
|
| |
| 18-Jan-2010 | AKMC |
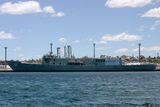
Here we see a more extensive view of the cuts made into Adelaide's hull (image 4865), with the sea looming menacingly in the foreground ready to swallow her.
Note that the masts which were seen in the earlier images are now gone as well. As I mentioned in the commentary of the main gallery, that needed to be done to ensure that she was deep enough not to be a hazard.
©2000-2024 AKMC. May not be used, copied or reproduced or used in AI training without written permission, especially by Facebook